

DIY: Crochet Bobble Hand Towel

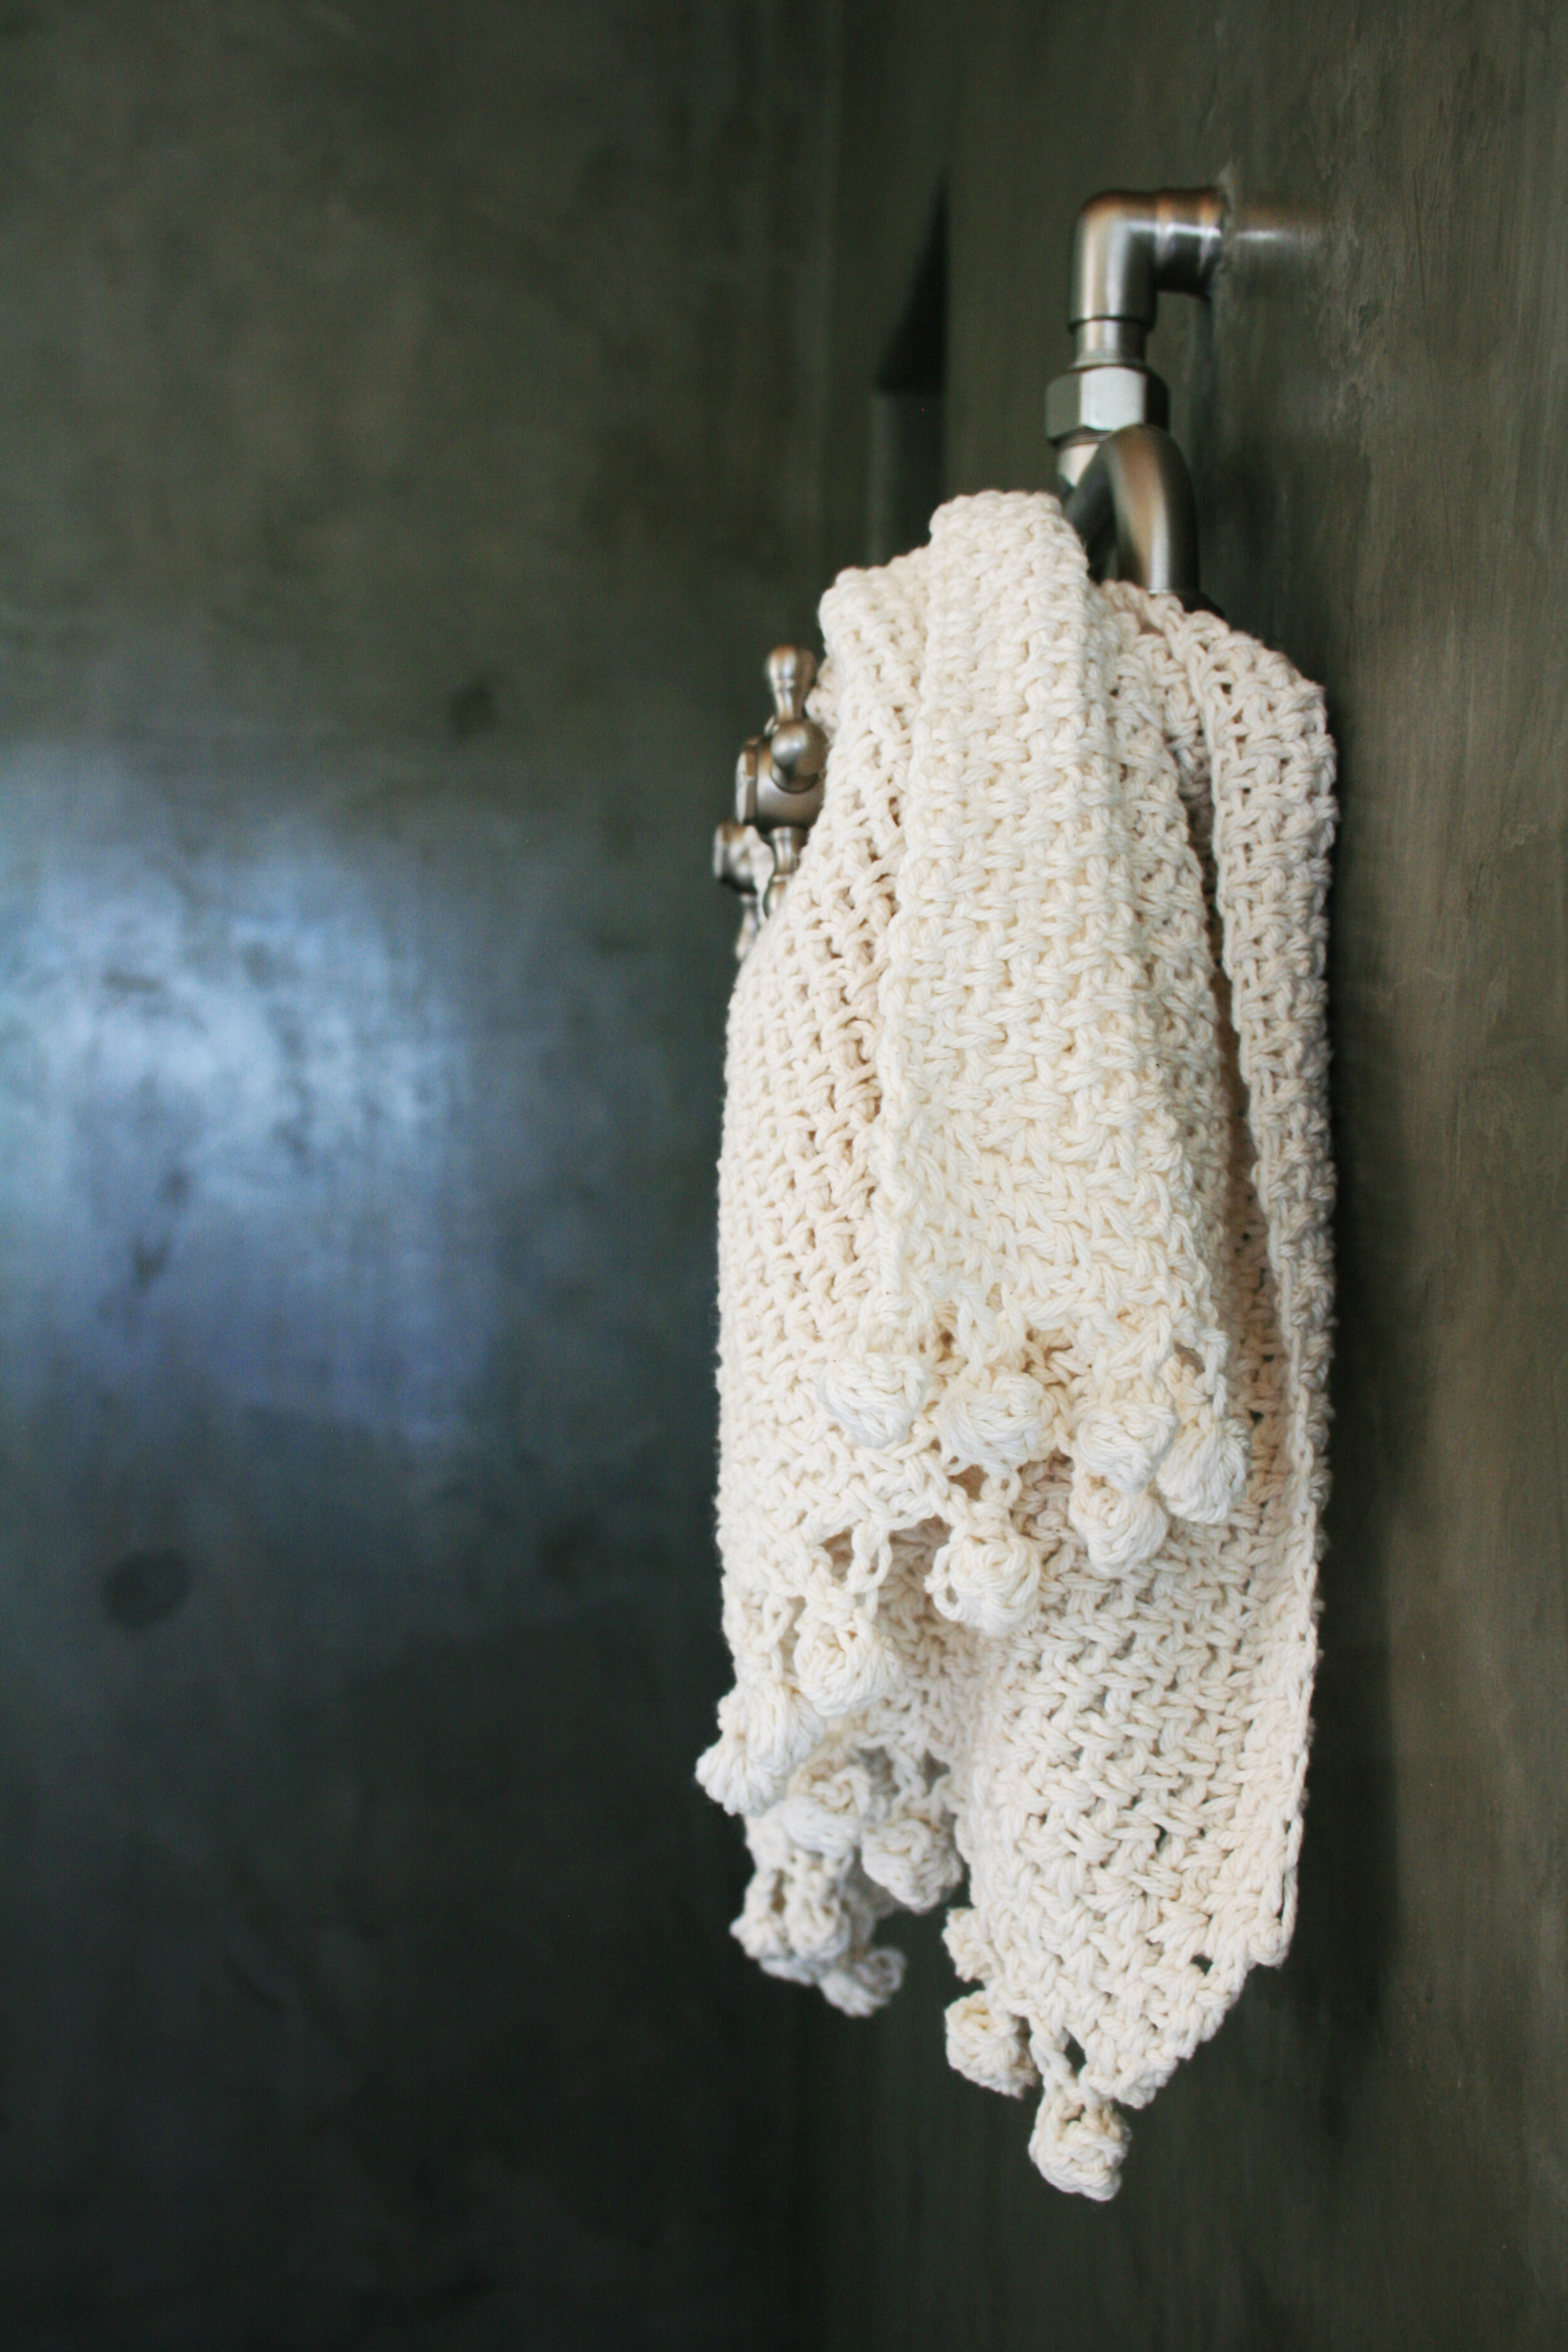
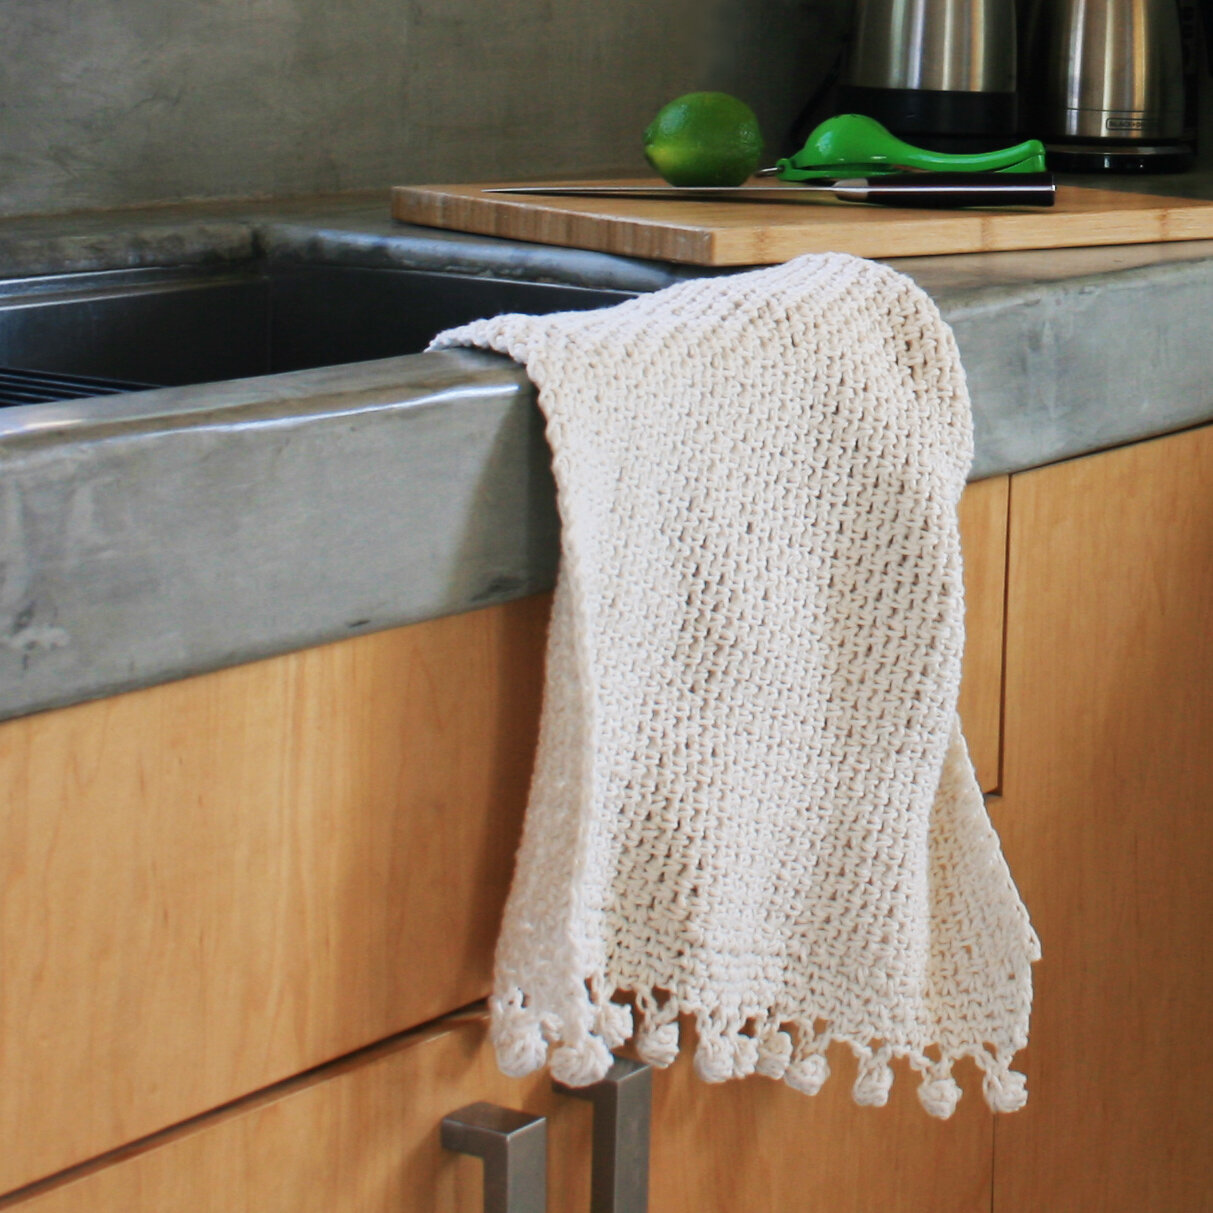
i absolutely love cotton yarn, and lily sugar’n’cream remains my undefeated favorite. it’s the perfect yarn for making home accessories: it comes in the best colors, washes and wears exceptionally well, is widely and easily available, and best of all, it’s like $3 a ball.
after designing the perfect potholder pattern, i realized how easy it is to transform this humble cotton yarn into luxurious and expensive-looking accessories. next came the perfect tea towel pattern, and then my favorite to-date, the crochet bobble bathmat and the embellished geometric version. i’m so obsessed with the bathmat i knew i had to make a matching hand towel.
whether you use it in the bathroom or the kitchen, this towel is the perfect mix of functional and stylish.

MATERIALS
YARDAGE/YARN: approx. 350 YARDS, 4-PLY WORSTED WEIGHT 100% COTTON
SUGGESTED: 2 supersize balls of LILY SUGAR’N CREAM (I USED COLOR ECRU)
HOOKS: MAIN HOOK/BOBBLE HOOK: H/8-5.00MM
TRIM HOOK: F/5-3.75MM
FINISHED DIMENSIONS: 24x16”
PAttern

the hand towel uses the same hook sizes and is worked in the same stitch pattern as the original bath mat.
you can reference the bath mat pattern instructions and tutorial photos in the original blog post here.
hand towel modifications:
WITH MAIN HOOK, FOUNDATION CHAIN 44 STS
WORK FLAT SINGLE CROCHET MOSS/LINEN/GRANITE STITCH UNTIL PIECE MEASURES approx. 16”.
USING THE TRIM HOOK, JOIN YARN TO THE SIDE EDGE AND WORK MOSS/LINEN/GRANITE STITCH FOR 4 ROWS.
SWITCH TO MAIN HOOK SIZE AND WORK 6 STITCH BOBBLES ACROSS THE ROW:
CHAIN 4, 6 ST BOBBLE INTO 3RD CHAIN, FINISH BOBBLE ON 4TH CHAIN. CHAIN 1 AND ATTACH 1 SPOT AWAY, THEN 1 MOSS ST BEFORE NEXT BOBBLE. 13 BOBBLES TOTAL.
REPEAT TRIM ROWS AND BOBBLES ON OTHER SIDE.

DIY: Free Giant Pencil Knitting Pattern
A whimsical and oversized toy designed for my nephew and godson’s first days of school.


My nephew and my godson just started their first weeks of kindergarten and preschool respectively, and I am so incredibly proud of them! To celebrate, I was inspired to make a giant pencil plush. This was a satisfying, super-fast project with a variety of techniques to keep you engaged. the best part is that I was able to make two using entirely scrap yarn. some simple embroidery finishing makes them personalized and extra cute!

Materials:
Yarn:
Color a (main color): Approx. 15 yards of worsted weight yarn in a bright color
(suggestions: yellow, red, bright blue)
color B: Approx. 3 yards worsted weight (light brown, ecru, tan, beige)
Color c: Approx. 3 yards worsted weight (Black, dark brown, dark gray)
Color D: Approx. 5 yards worsted weight (Gray, silver, gold, metallic)
Color e: Approx. 5 yards worsted weight (Pink, coral, red)
Needles:
Size US 6 (4 mm)
Tools:
Tapestry needle for finishing
poly-fill or other stuffing material
Gauge:
Gauge is not important for this project!
Finished Dimensions:
Measures approximately 16.5” tall (42cm)
Key:
k - knit
p - purl
k2T - Knit two together
ssk - slip slip knit
sts - stitches
techniques:
Knitting in the round, stranded colorwork, simple decreases, picking up stitches. basic embroidery (optional).
[Pattern includes charted colorwork instructions]
construction:
Start by knitting a tube in the round. two rounds of simple stranded colorwork start to form the sharpened end, and simple decreases form a point. stitches are picked up at the other end to knit the metal crimp and eraser.

This is a downloadable PDF knitting pattern for the “Giant Pencil Toy.”
A whimsical oversized toy designed for my nephew and godson’s first days of school.
Pattern Notes:
Yarn:
Color A (main color): approx. 15 yards of worsted weight yarn in a bright color
(Suggestions: yellow, red, bright blue)
Color B: approx. 3 yards worsted weight (light brown, ecru, tan, beige)
Color C: approx. 3 yards worsted weight (black, dark brown, dark gray)
Color D: approx. 5 yards worsted weight (gray, silver, gold, metallic)
Color E: approx. 5 yards worsted weight (pink, coral, red)
Needles:
Size US 6 (4 mm)
Tools:
Tapestry needle for finishing
Poly-fill or other stuffing material
Gauge:
Gauge is not important for this project!
Finished Dimensions:
Measures approximately 16.5” tall (42cm)
Key:
K - Knit
P - Purl
K2T - Knit two together
SSK - Slip slip knit
STS - Stitches
Techniques:
Knitting in the round, stranded colorwork, simple decreases, picking up stitches. basic embroidery (optional).
(Pattern includes charted colorwork instructions)
Construction:
Start by knitting a tube in the round. Two rounds of simple stranded colorwork start to form the sharpened end, and simple decreases form a point. Stitches are picked up at the other end to knit the metal crimp and eraser.


DIY: Free Knit I-Cord Workout Headband Pattern
i love to knit i-cord! it is fun and fast, and can be used in so many different applications from borders and edges to embellishment. many years ago i designed a simple headband by attaching an elastic hair tie to the ends of a section of i-cord, and the best workout headband was born!
i’m a big fan of those skinny elastic workout headbands, and i particularly love this i-cord version. it’s soft and stretchy, and the knit texture of cotton yarn stays put in your hair without pulling.

the best part is this project is lightning fast: you can make one from start to finish in around 40 minutes or less! i have one in just about every color. they also make great gifts!
this pattern is set up as a step-by-step photo tutorial to walk you through the entire process. i also put together a little video showing how to make a 3-stitch i-cord in case you’ve never made it before!
this tutorial is also available as a FREE pdf download!

This is a free downloadable PDF knitting pattern for the I-Cord Workout Headband.
**PLEASE NOTE: this is a free PDF pattern. Skip the billing field at checkout to receive the free download and confirmation.
Inspired by those cute elastic workout headbands, this knit version employs stretchy and comfortable i-cord and snag-free, metal-free elastic hair ties to create a super cute and functional hair accessory.
Absolutely essential for working out or whenever you need to hold back your hair, this i-cord headband stays in place and won’t cause headaches or hurt your ears. Use any worsted weight/category 4 100% cotton to make them easily machine washable with your workout gear!
This is a SUPER QUICK and SUPER EASY pattern yielding a headband you will wear, wash, and re-wear all the time. Grab some yarn and whip up this project in around 40 minutes or less!
This pattern includes a step-by-step photo tutorial to walk you through the entire process.
For a video tutorial on how to work a 3-stitch i-cord, check out my video tutorial here:
https://www.youtube.com/watch?v=kKamKP6ZVYw&t=21s
Purchase my recommended metal-free hair ties on Amazon here:
Yarn:
5-6 yards of any worsted weight / category 4 100% cotton
Needles:
2 x size US 6 (4mm) double-pointed needles
A 16” or shorter circular needle will also work perfectly fine!
Tools:
snag-free elastic hair ties
measuring Tape
scissors
tapestry needle for finishing
Gauge:
4 rows of i-cord = 1”
Finished Dimensions:
Approximately 17.5” unstretched
One size fits most - directions are included in the pattern on how to customize the size
For more information, see:https://www.elisemade.com/blog/i-cord-workout-headband
here’s what you’ll need to make your own:


Materials
yarn: approximately 6 yards of a worsted weight/category 4 cotton yarn
recommended: Lily sugar’n’cream
needles: size US 6 (4.0 mm)
I recommend using two (2) double-pointed needles, but a short circular needle will work perfectly fine!
tools: metal-free elastic hair ties (click here to purchase), tapestry needle, scissors, measuring tape
gauge: 4 rows of i-cord = 1”
finished dimensions: approximately 17.5” unstretched
customization notes: the length of your finished i-cord should be approximately 5-6” smaller than your head circumference
part 1: make the i-cord
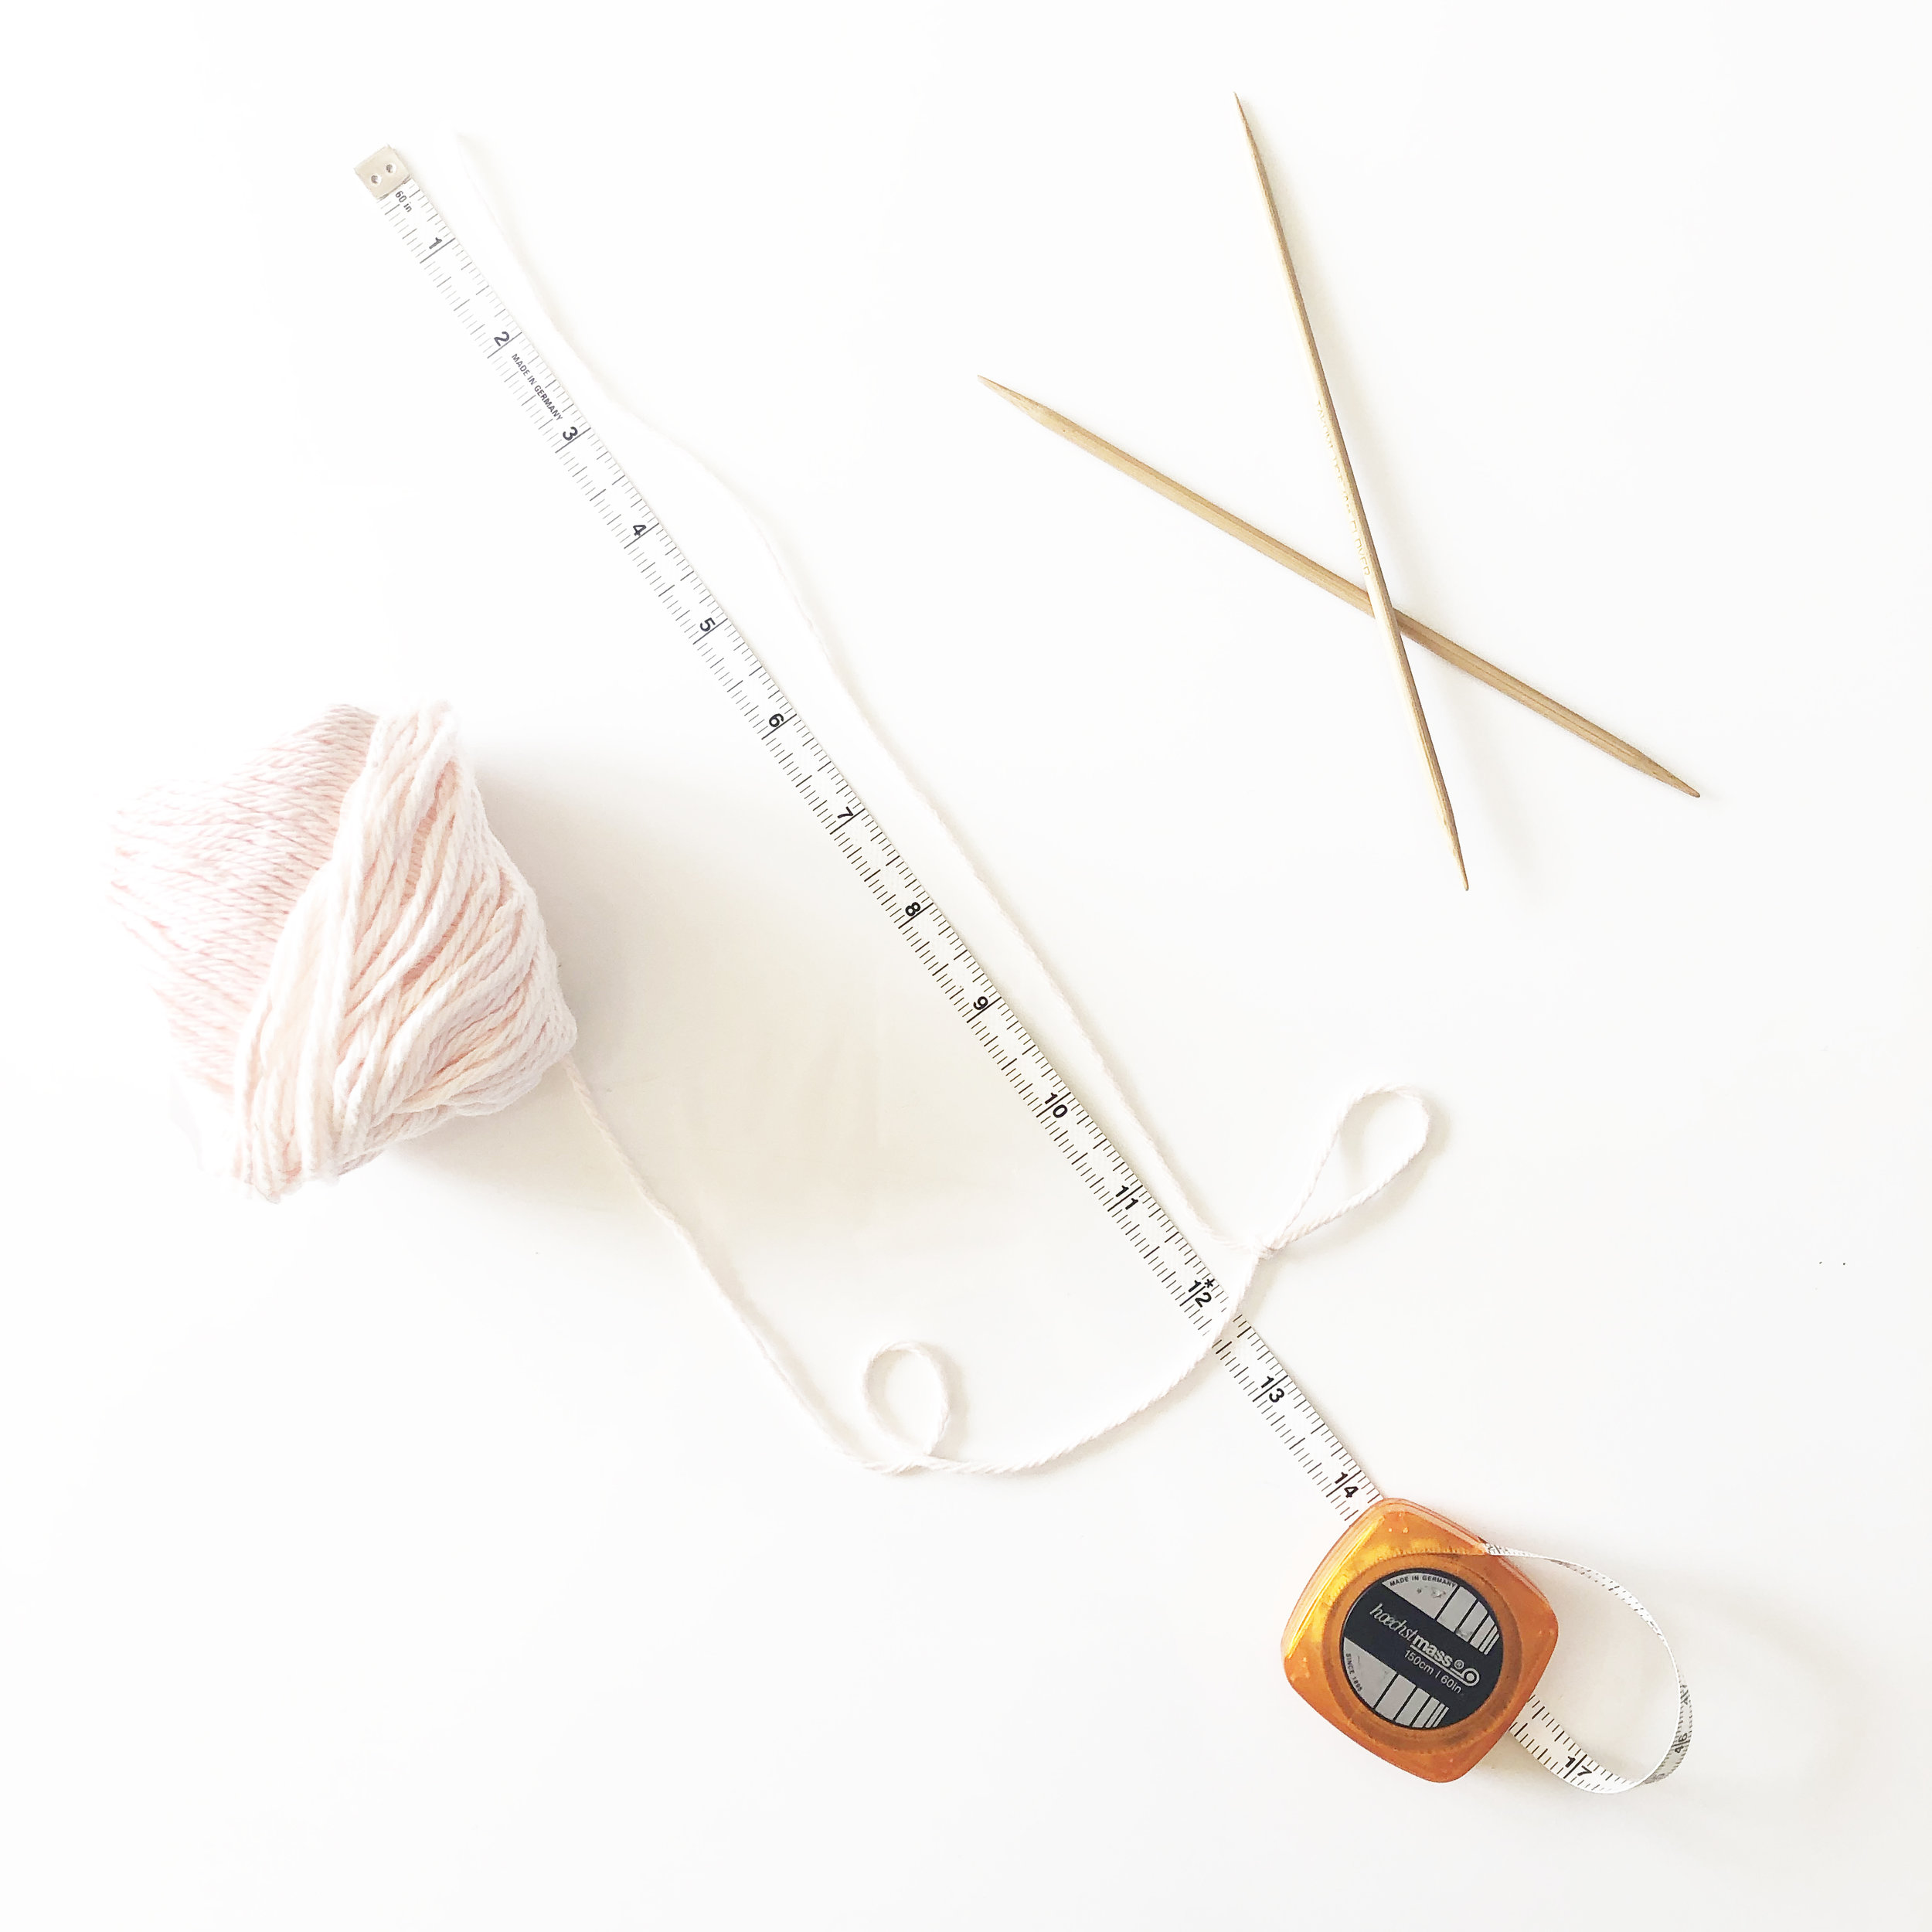
step 1: measure out a 12” length of yarn. cast on three stitches.
you should have a remaining tail measuring approximately 10”.

step 2: knit all stitches across the row.
note: the working yarn is attached to the first of the 3 stitches (the first stitch on the left-hand side).

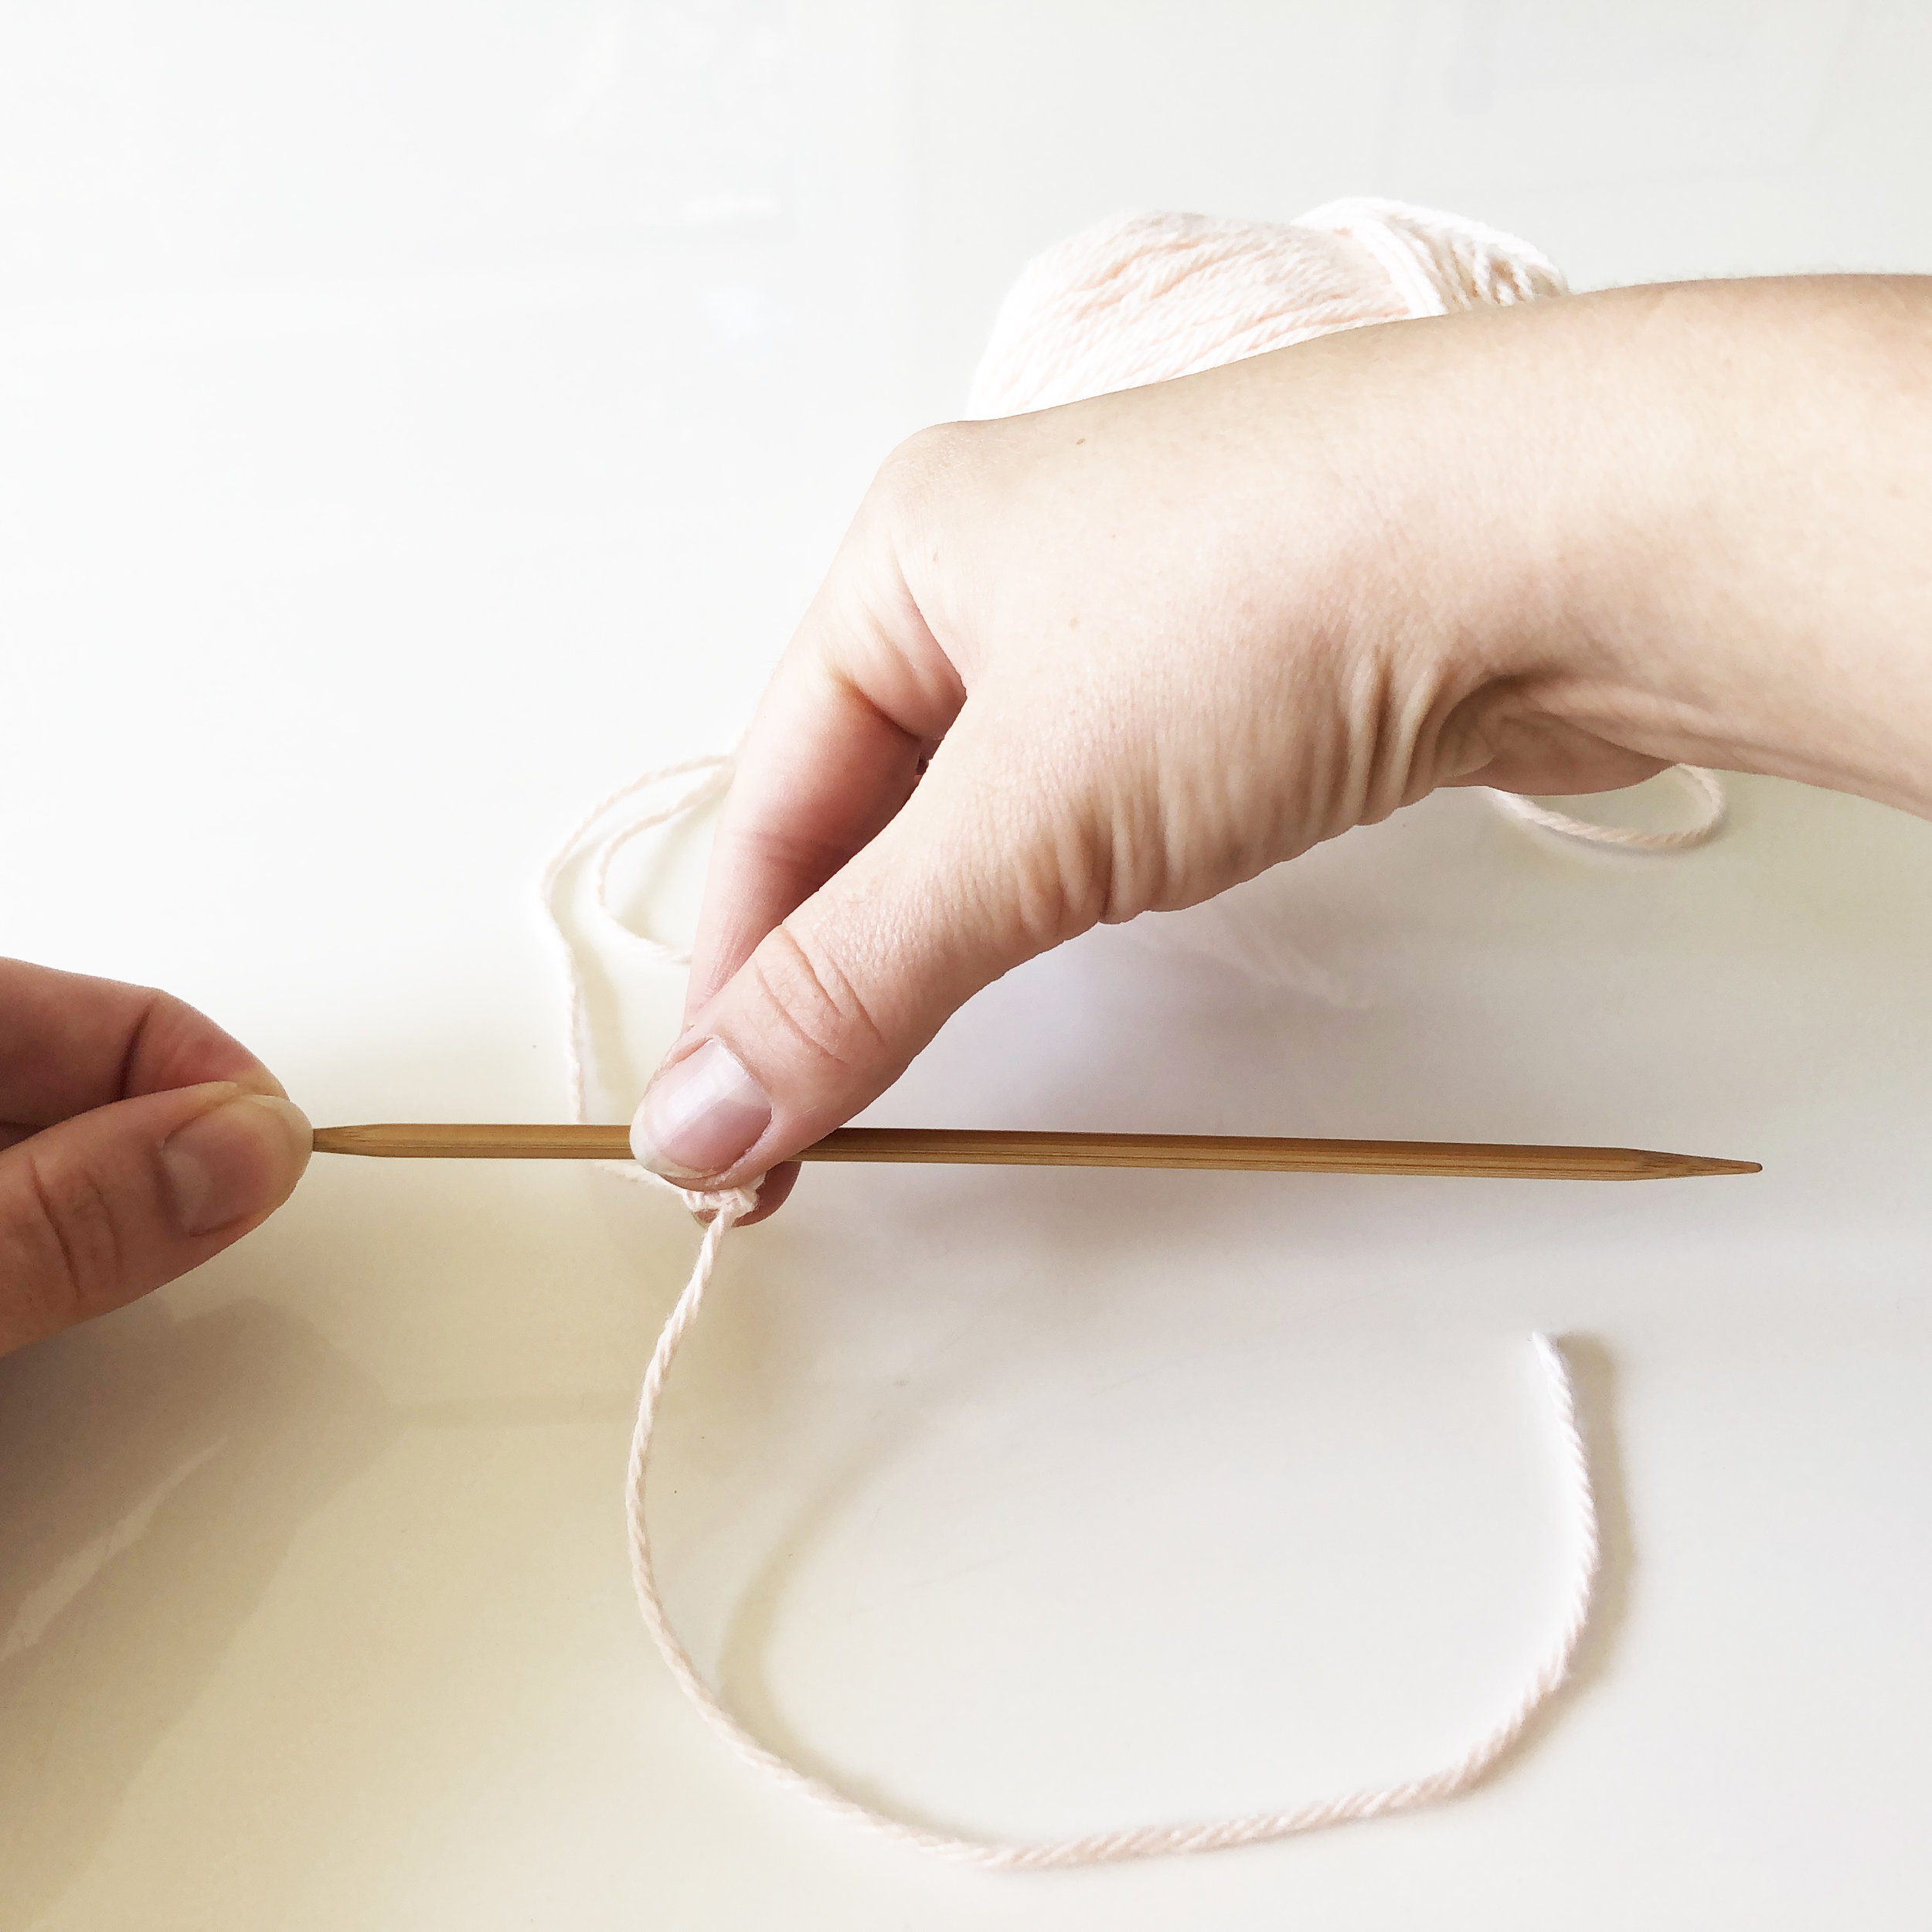

step 3: without turning your work, slide stitches to the other side of the needle, from the left-hand side to the right-hand side.
note: the working yarn is now attached to the back of the last of the 3 stitches (the stitch the furthest to the left).

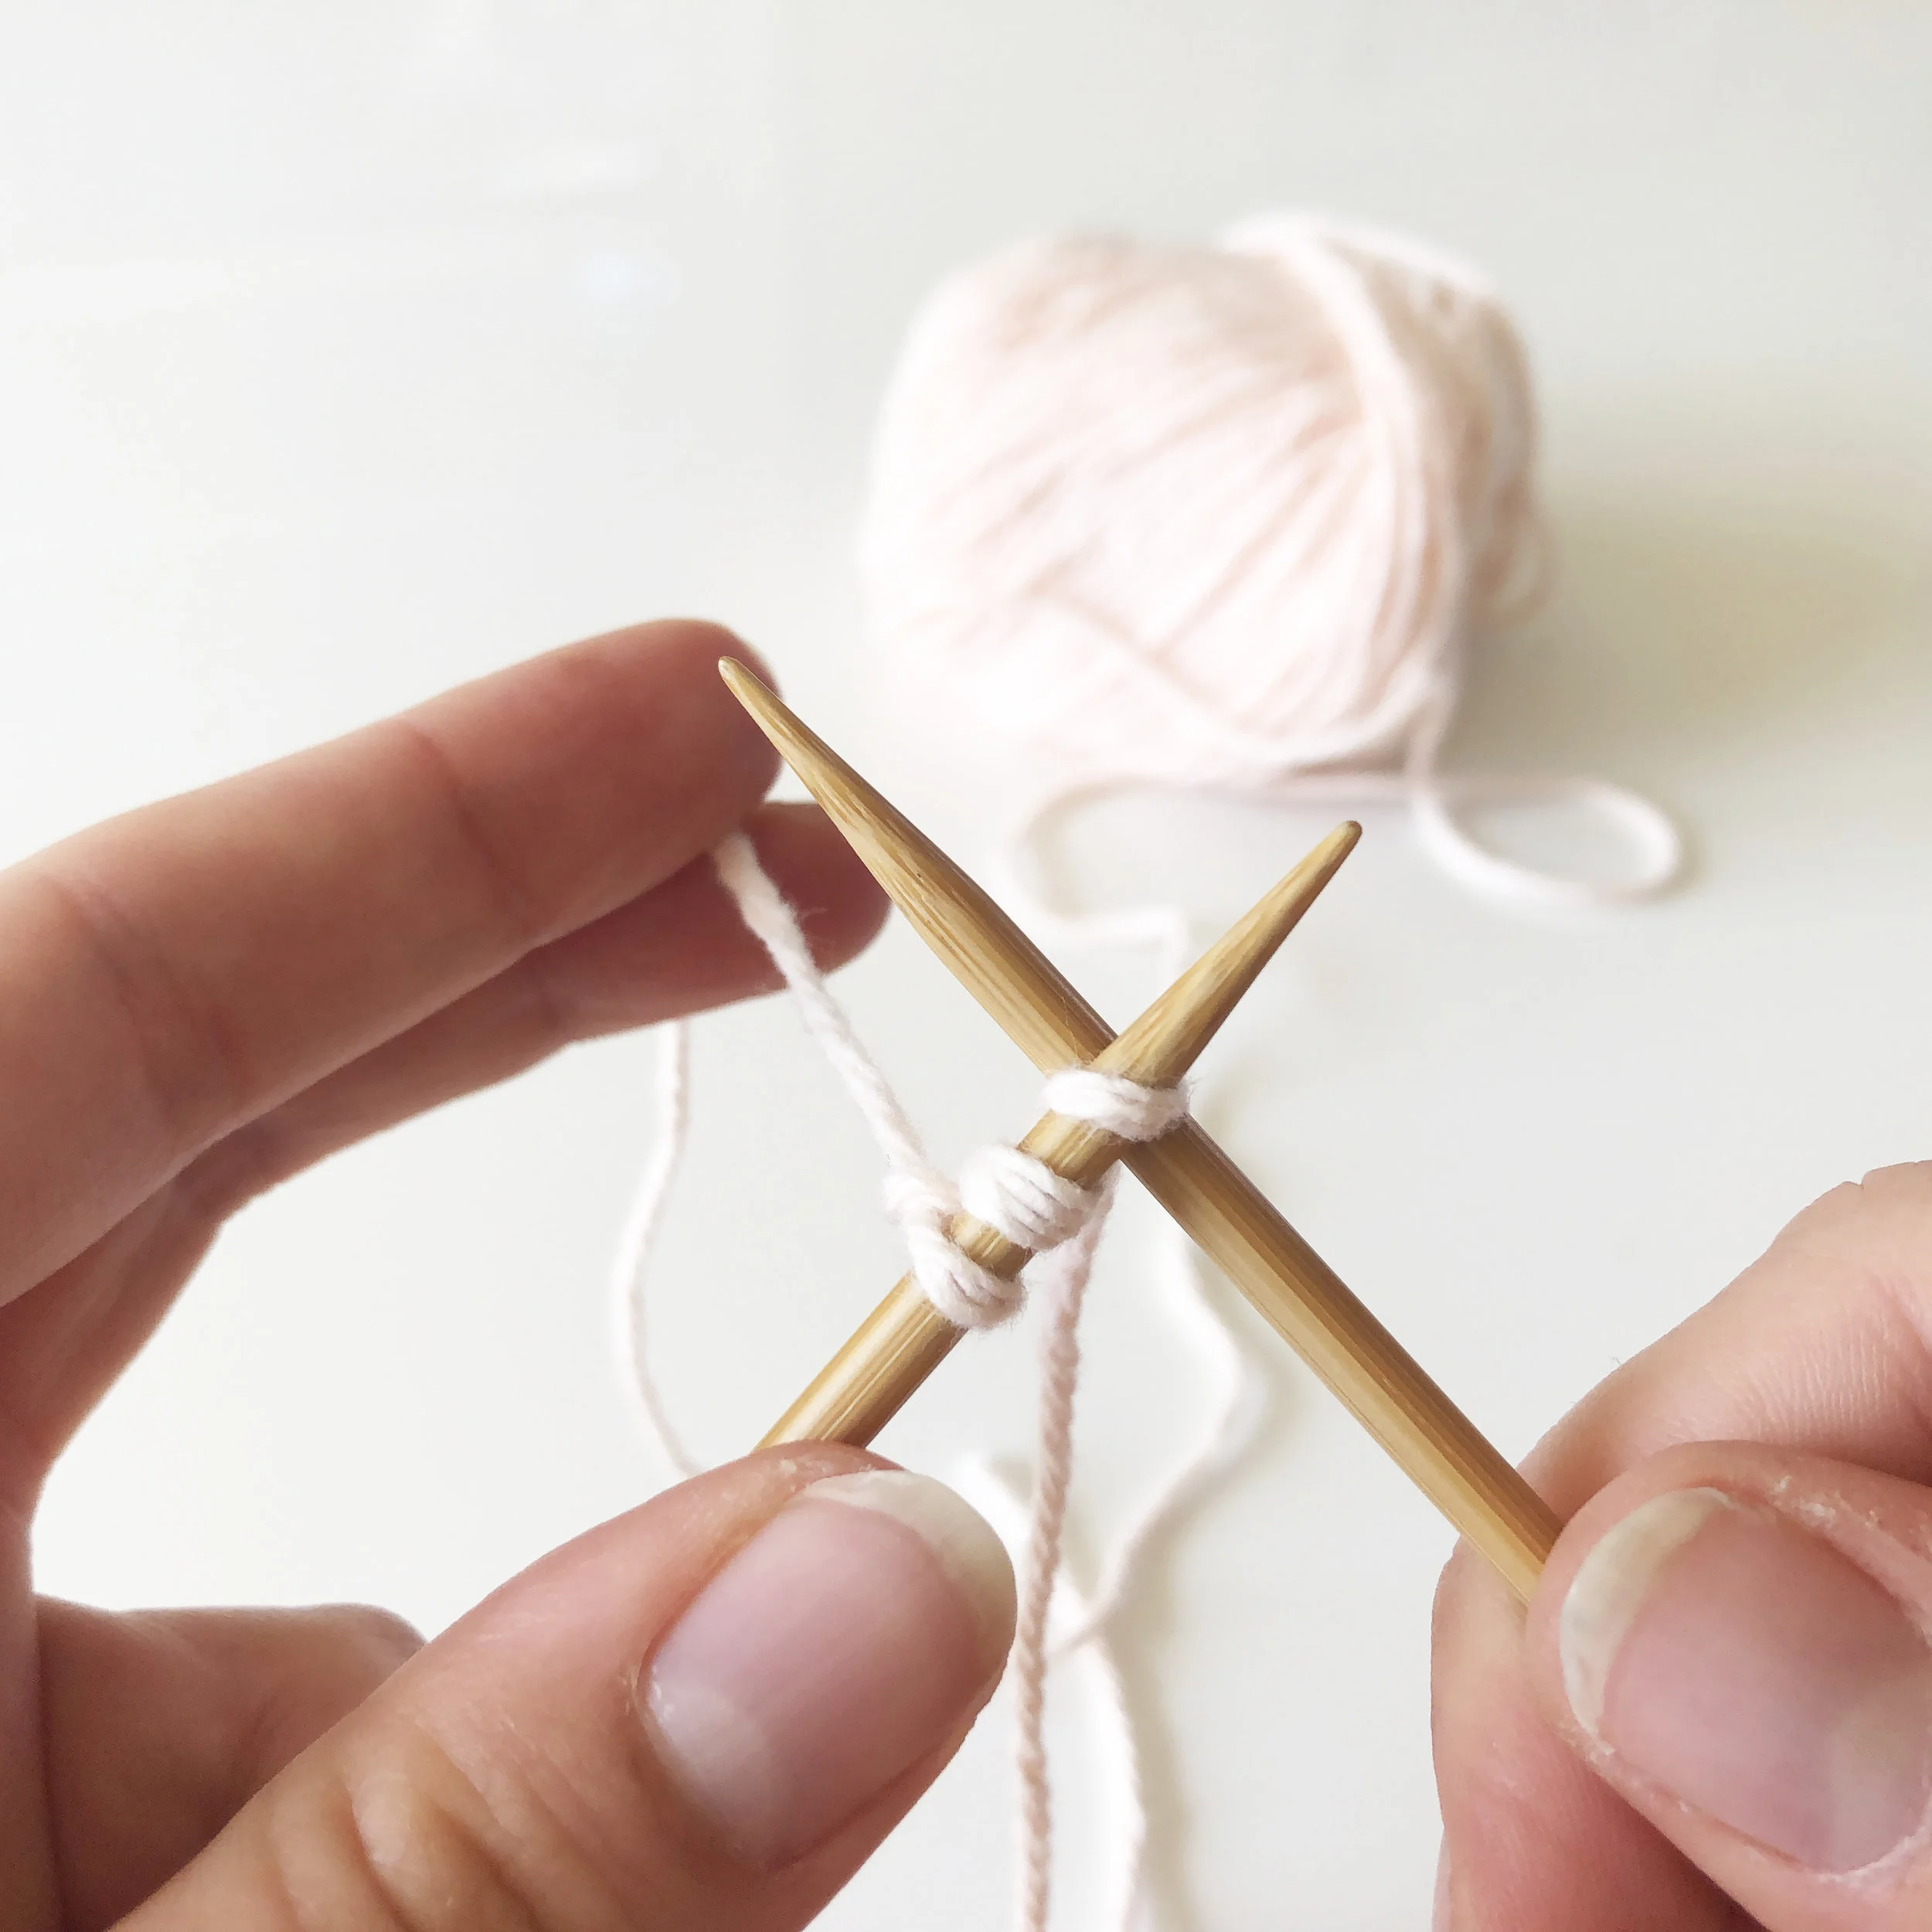
step 4: insert your needle into the now-first stitch (the right-most stitch) and pull the working yarn around. Knit into the stitch and across the row as normal.
watch the tutorial video:
repeat steps 3 and 4 until your i-cord measures approximately 15” (or approximately 5-6” smaller than your total head circumference).
bind off as normal. Break yarn leaving an approximate 10” tail.
part 2: attach the elastic hair tie

1. gather supplies
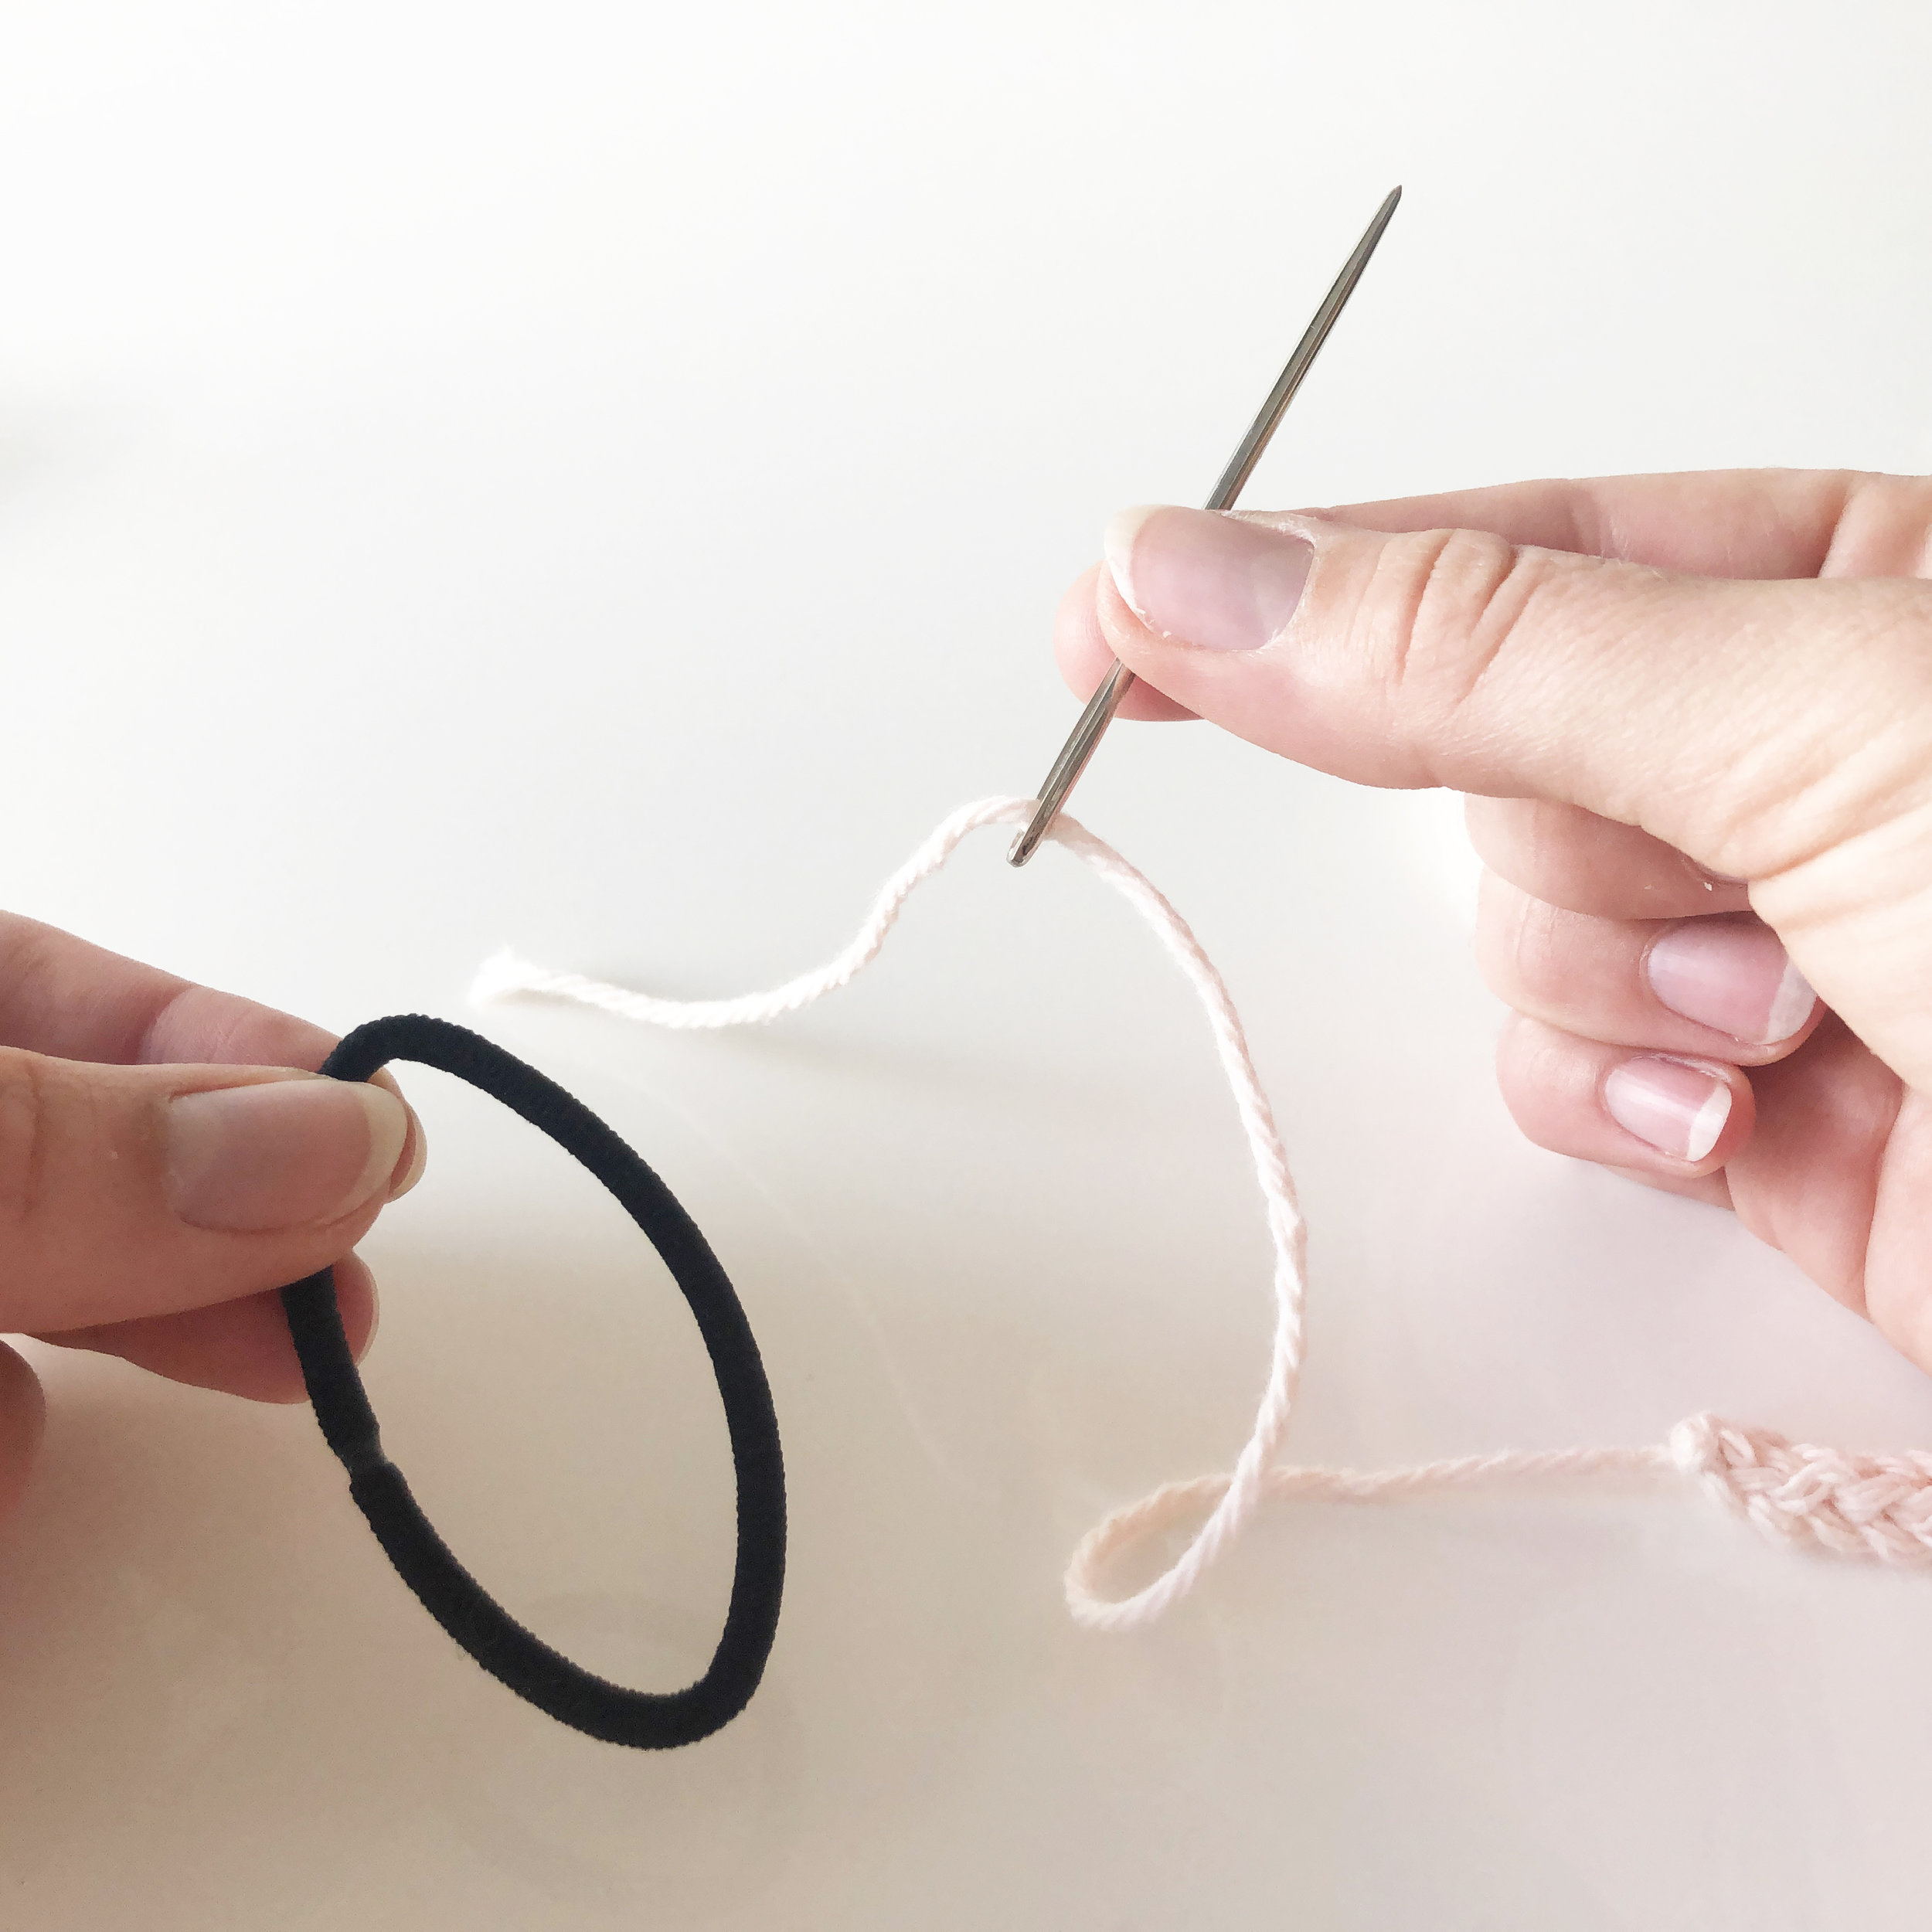
2. thread tapestry needle

3. run needle through elastic

4. pull tight to base of i-cord

5. insert needle into bound off stitches of i-cord

6. pull needle through and pull tight to elastic

7. repeat 3-4 times until i-cord is tightly secured

8. to finish, insert needle into base of i-cord

9. guide needle up 1-2” through the middle of the i-cord
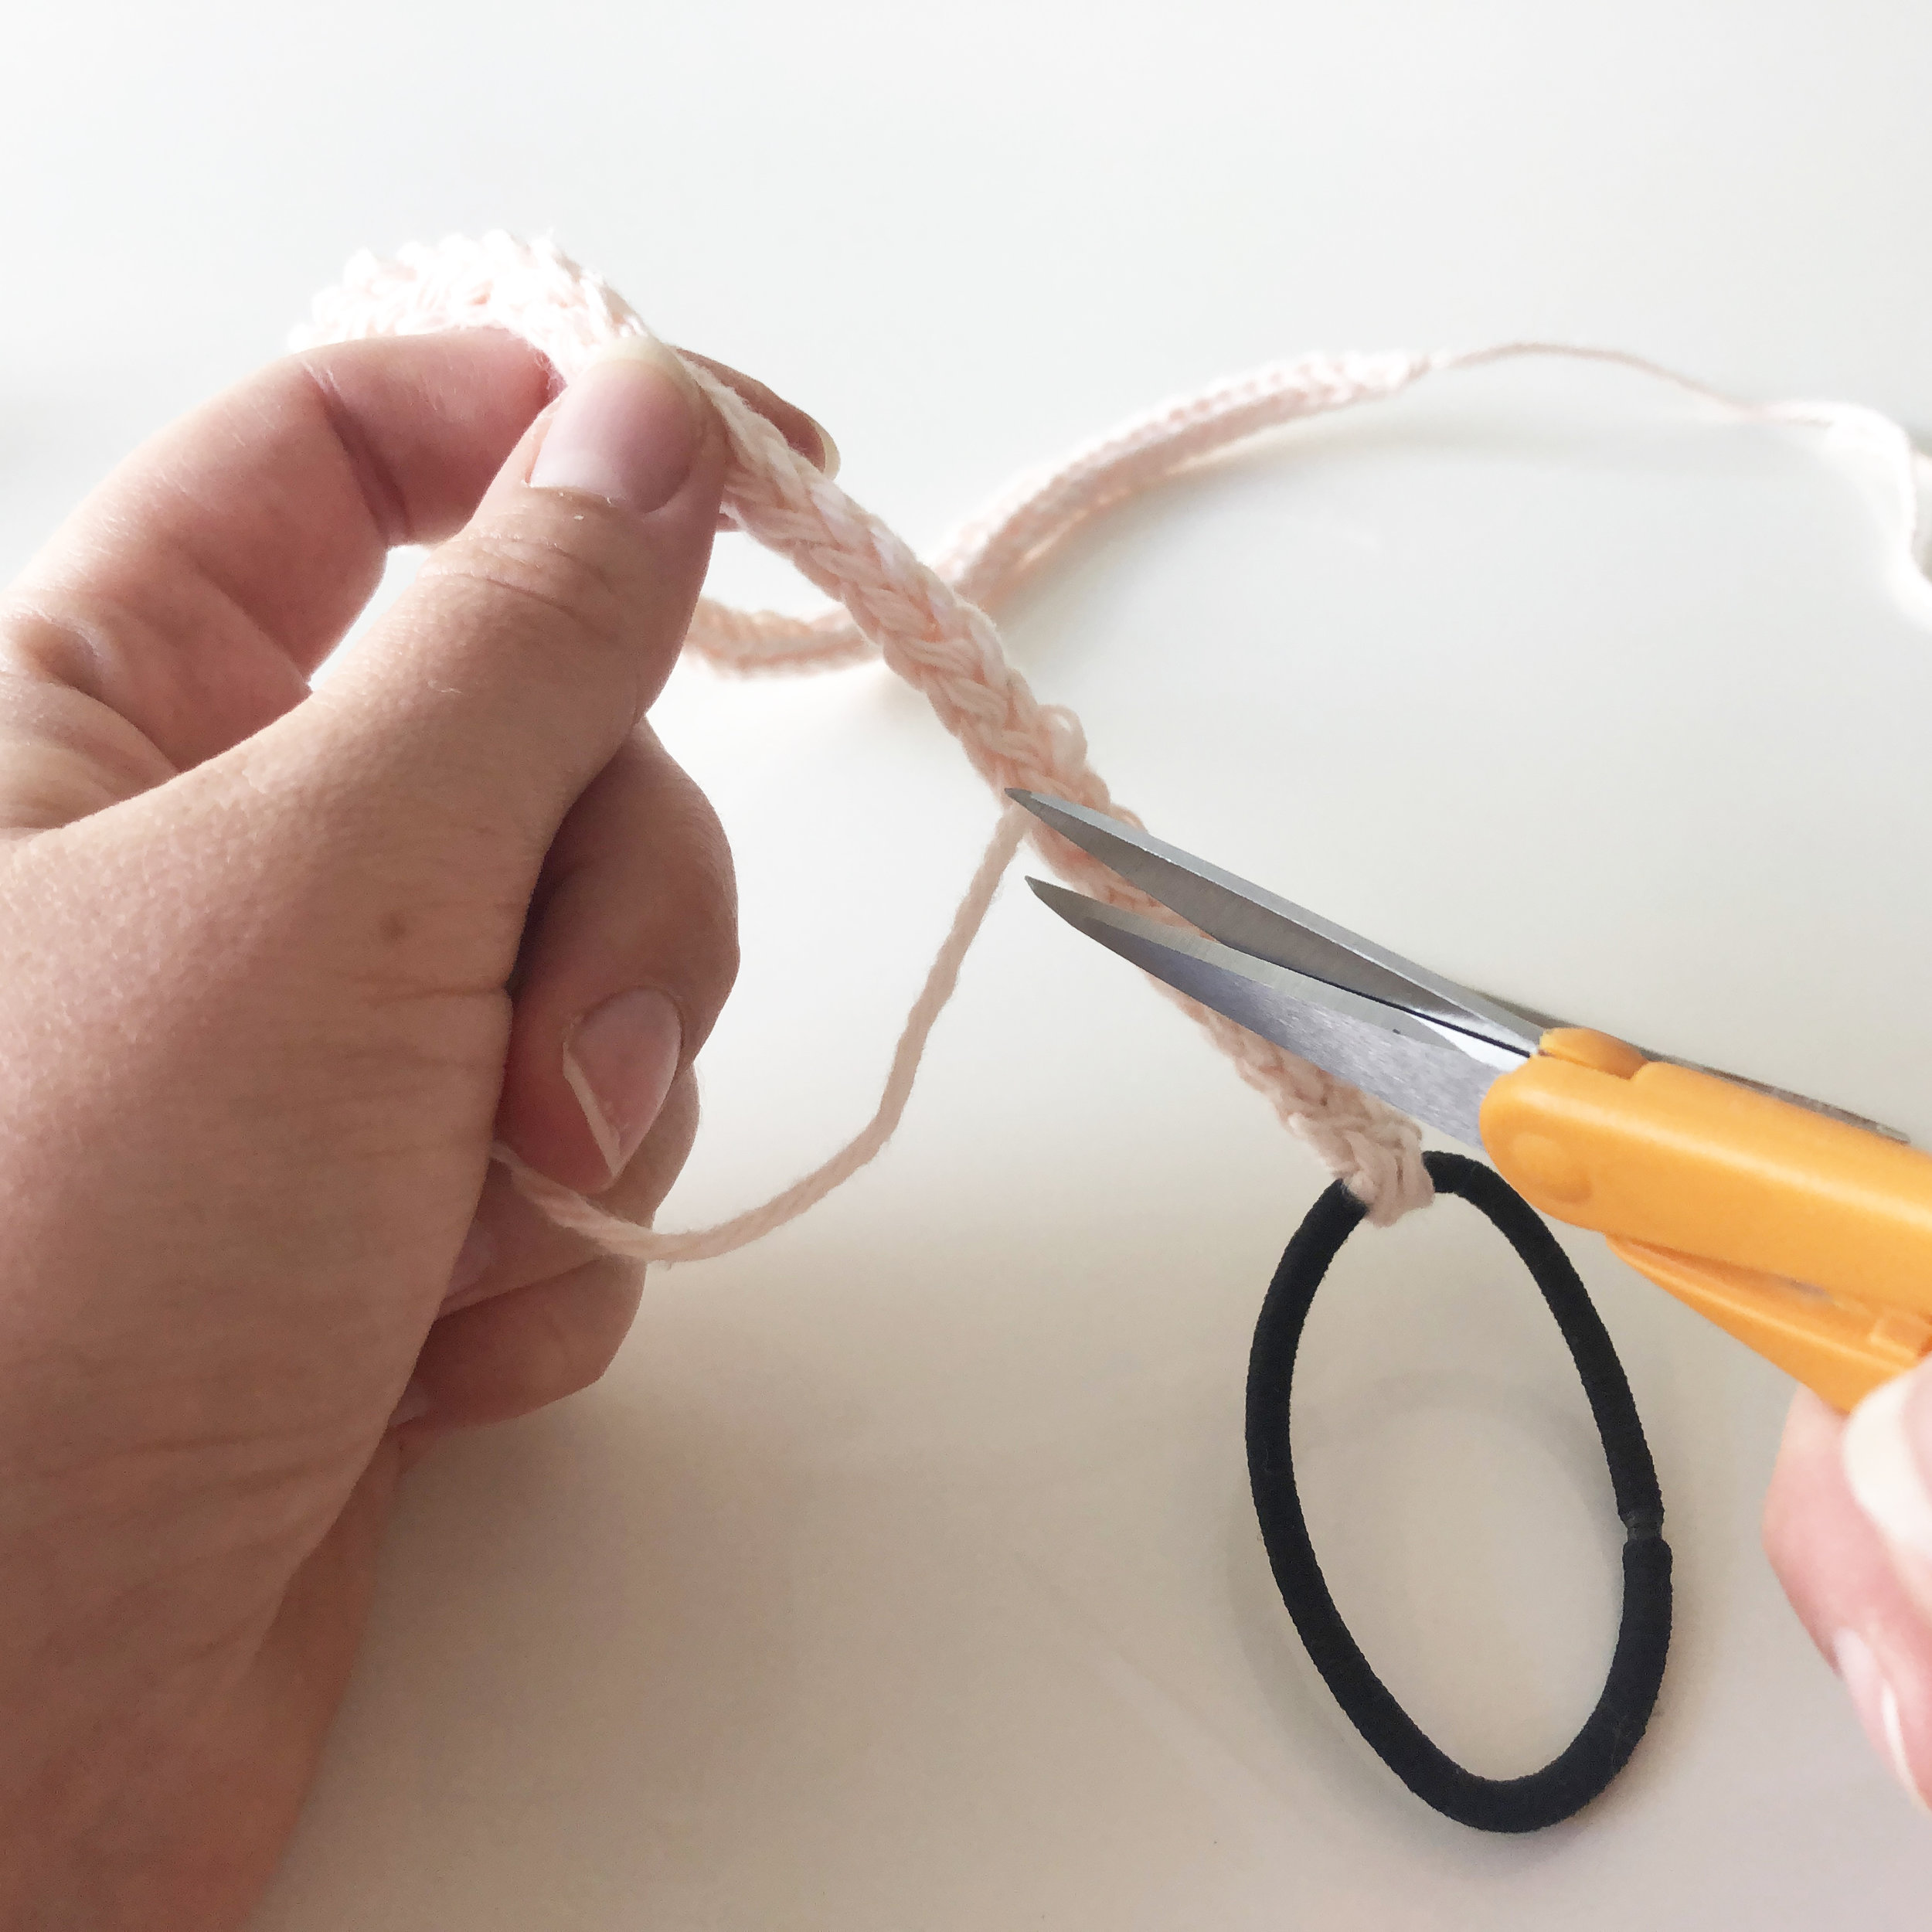
10. pull yarn through and trim

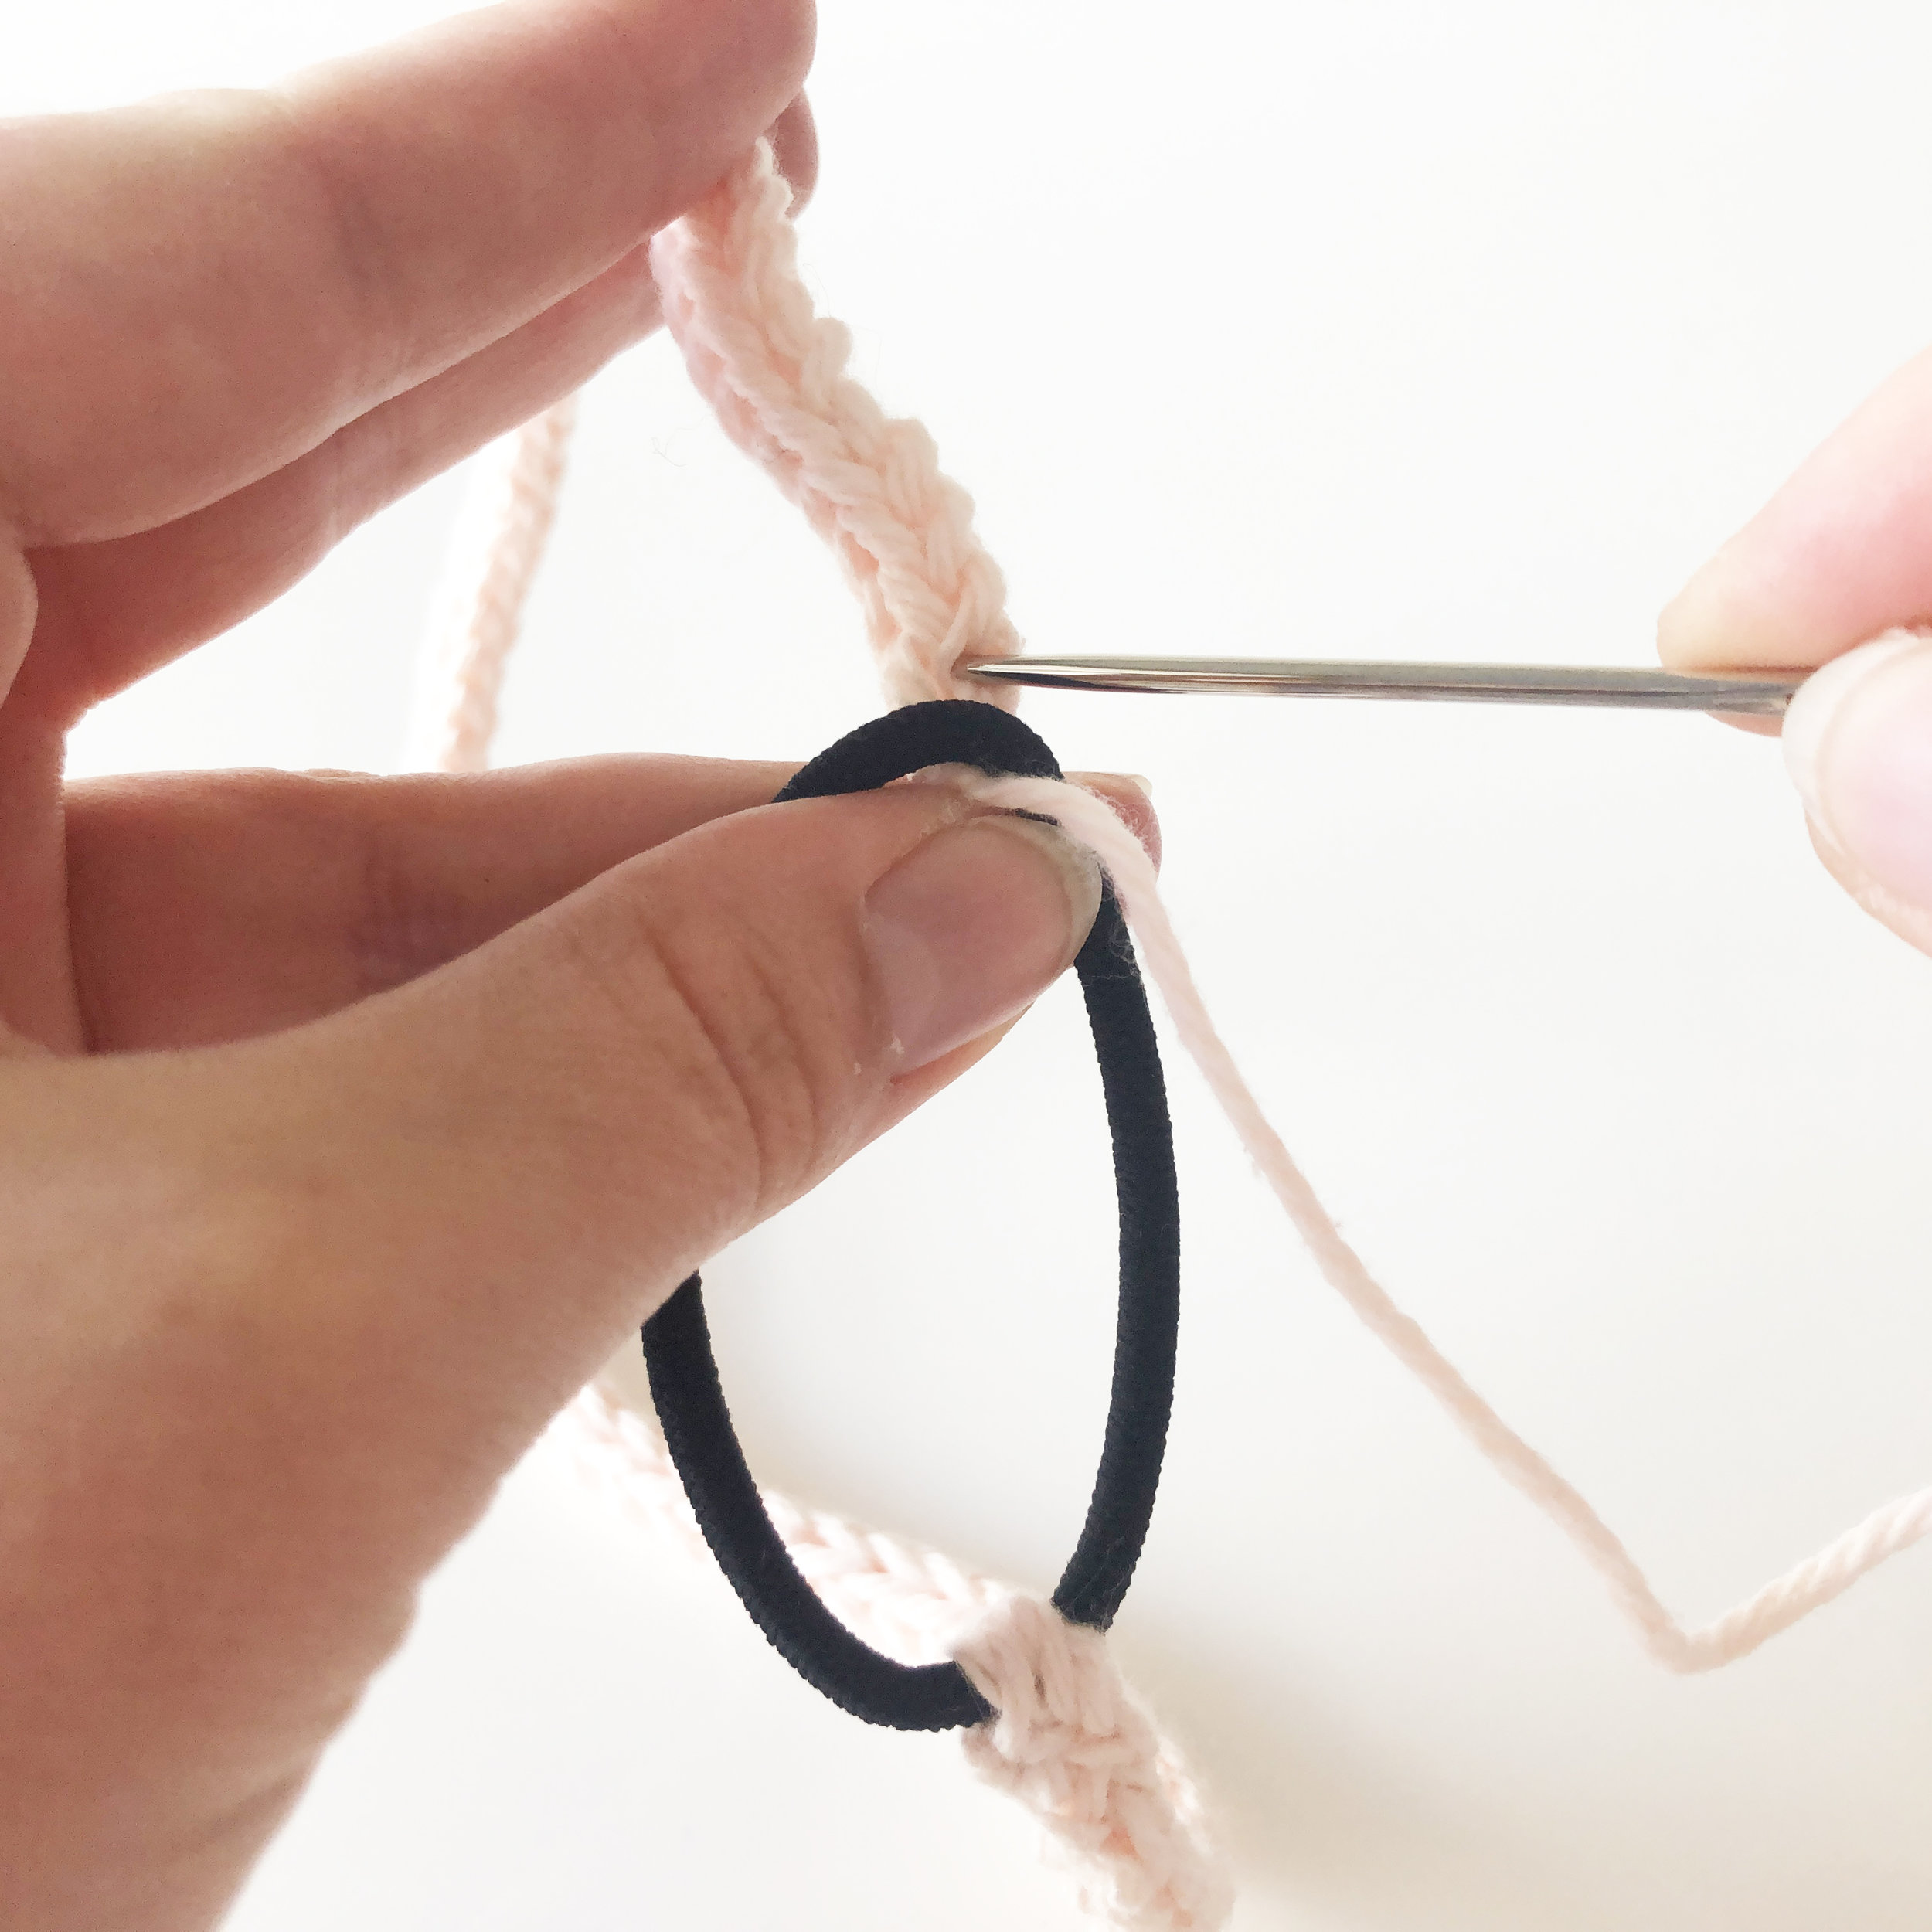
11. repeat directions on the other side!
enjoy your new headband!
if you have pattern questions or need support, please email me at elisemade@gmail.com.
please share your projects on instagram using #icordworkoutheadband and by tagging me @elisemade!

diy: free chunky cabled hat pattern

when i asked my best friend sammie what she wanted for christmas 2017 (handknit, of course!), she knew her answer right away: a basic black hat. I was more than happy to oblige! wanting to honor her wishes for "basic" but also wanting to make her something special, i knew a hat full of chunky cables was the answer.
since i used a super bulky wool, the hat knit up very fast (aren't quick projects the best?) and the cable pattern is very easy and repetitive. so grab your needles and some chunky yarn and cast on this cozy winter hat!
materials:
US 13 (9mm) double-pointed needles
cable needle, extra dpn, or stitch holder for cabling
yarn: wool and the gang crazy sexy wool in space black or another super bulky yarn
tapestry needle
key:
k - knit
p - purl
c2l - cable two stitches in front, to the left
k2t - knit two stitches together
pattern:
cast on 40 stitches across 4 needles (10 stitches/needle)
alternate K1/p1 ribbing for 6 rows
* P1, K4, p1, k4 across each needle
repeat 4 times
row 5: p1, C2L, p1, c2l across each needle
repeat pattern from * 4 times
to decrease:
R1: P1, k2t, k2t, p1, k2t, k2t across each needle
r2: p1, k2T, p1, k2T across each needle
r3: p1, k2T, p1, k2t
r4: weave end through remaining 8 stitches to bind off

the finished hat is a great winter basic that still has visual interest. if you're into pompoms i think this hat would look super cute with one!
what color chunky cabled hat would you make?
DIY Knit bunny toy - free PDF downloadable knitting pattern by elisemade
please enjoy this link to a free pattern for an adorable knit bunny toy! perfect for easter baskets, newborns, or anyone who loves bunnies.
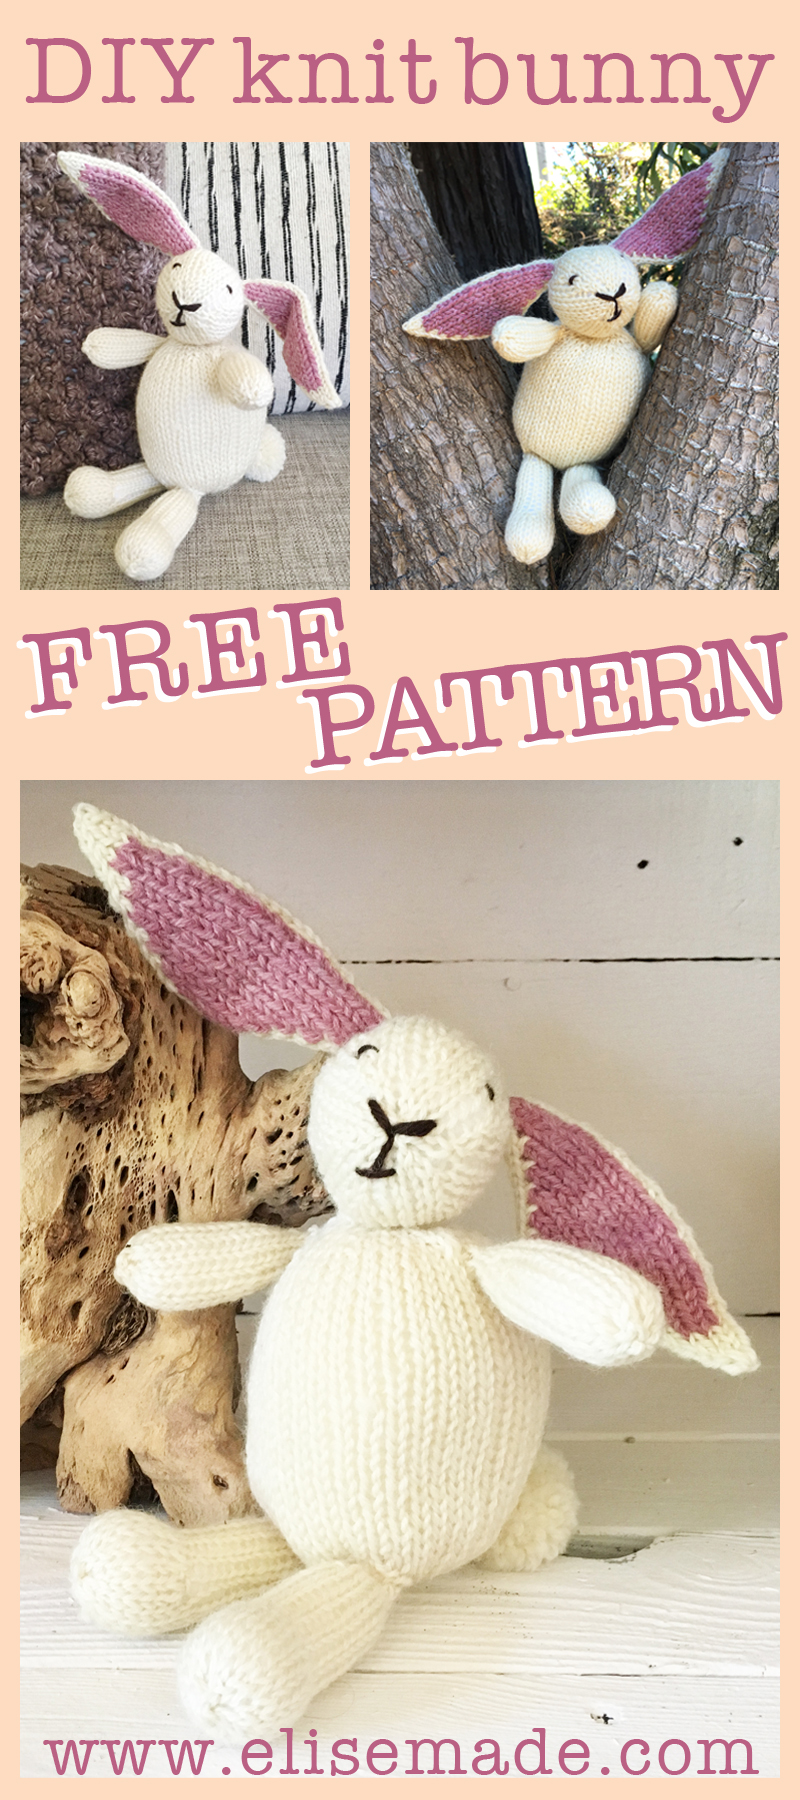
i designed this stuffed bunny in early 2016 for my nephew's first easter, and since then i've probably made half a dozen for all my friends welcoming new babies into the world. this pattern is super easy and great for beginners looking to try new projects in the round!
i like to use patons classic worsted wool in aran for this project because it's 100% wool, affordable, and easily found at most jo-ann's and michael's stores! it's a hardworking wool that comes in great neutral and basic colors.

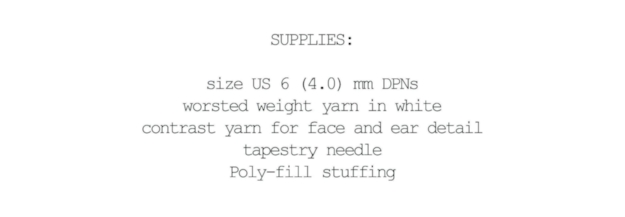
download the free pdf pattern from ravelry by clicking the button below: