
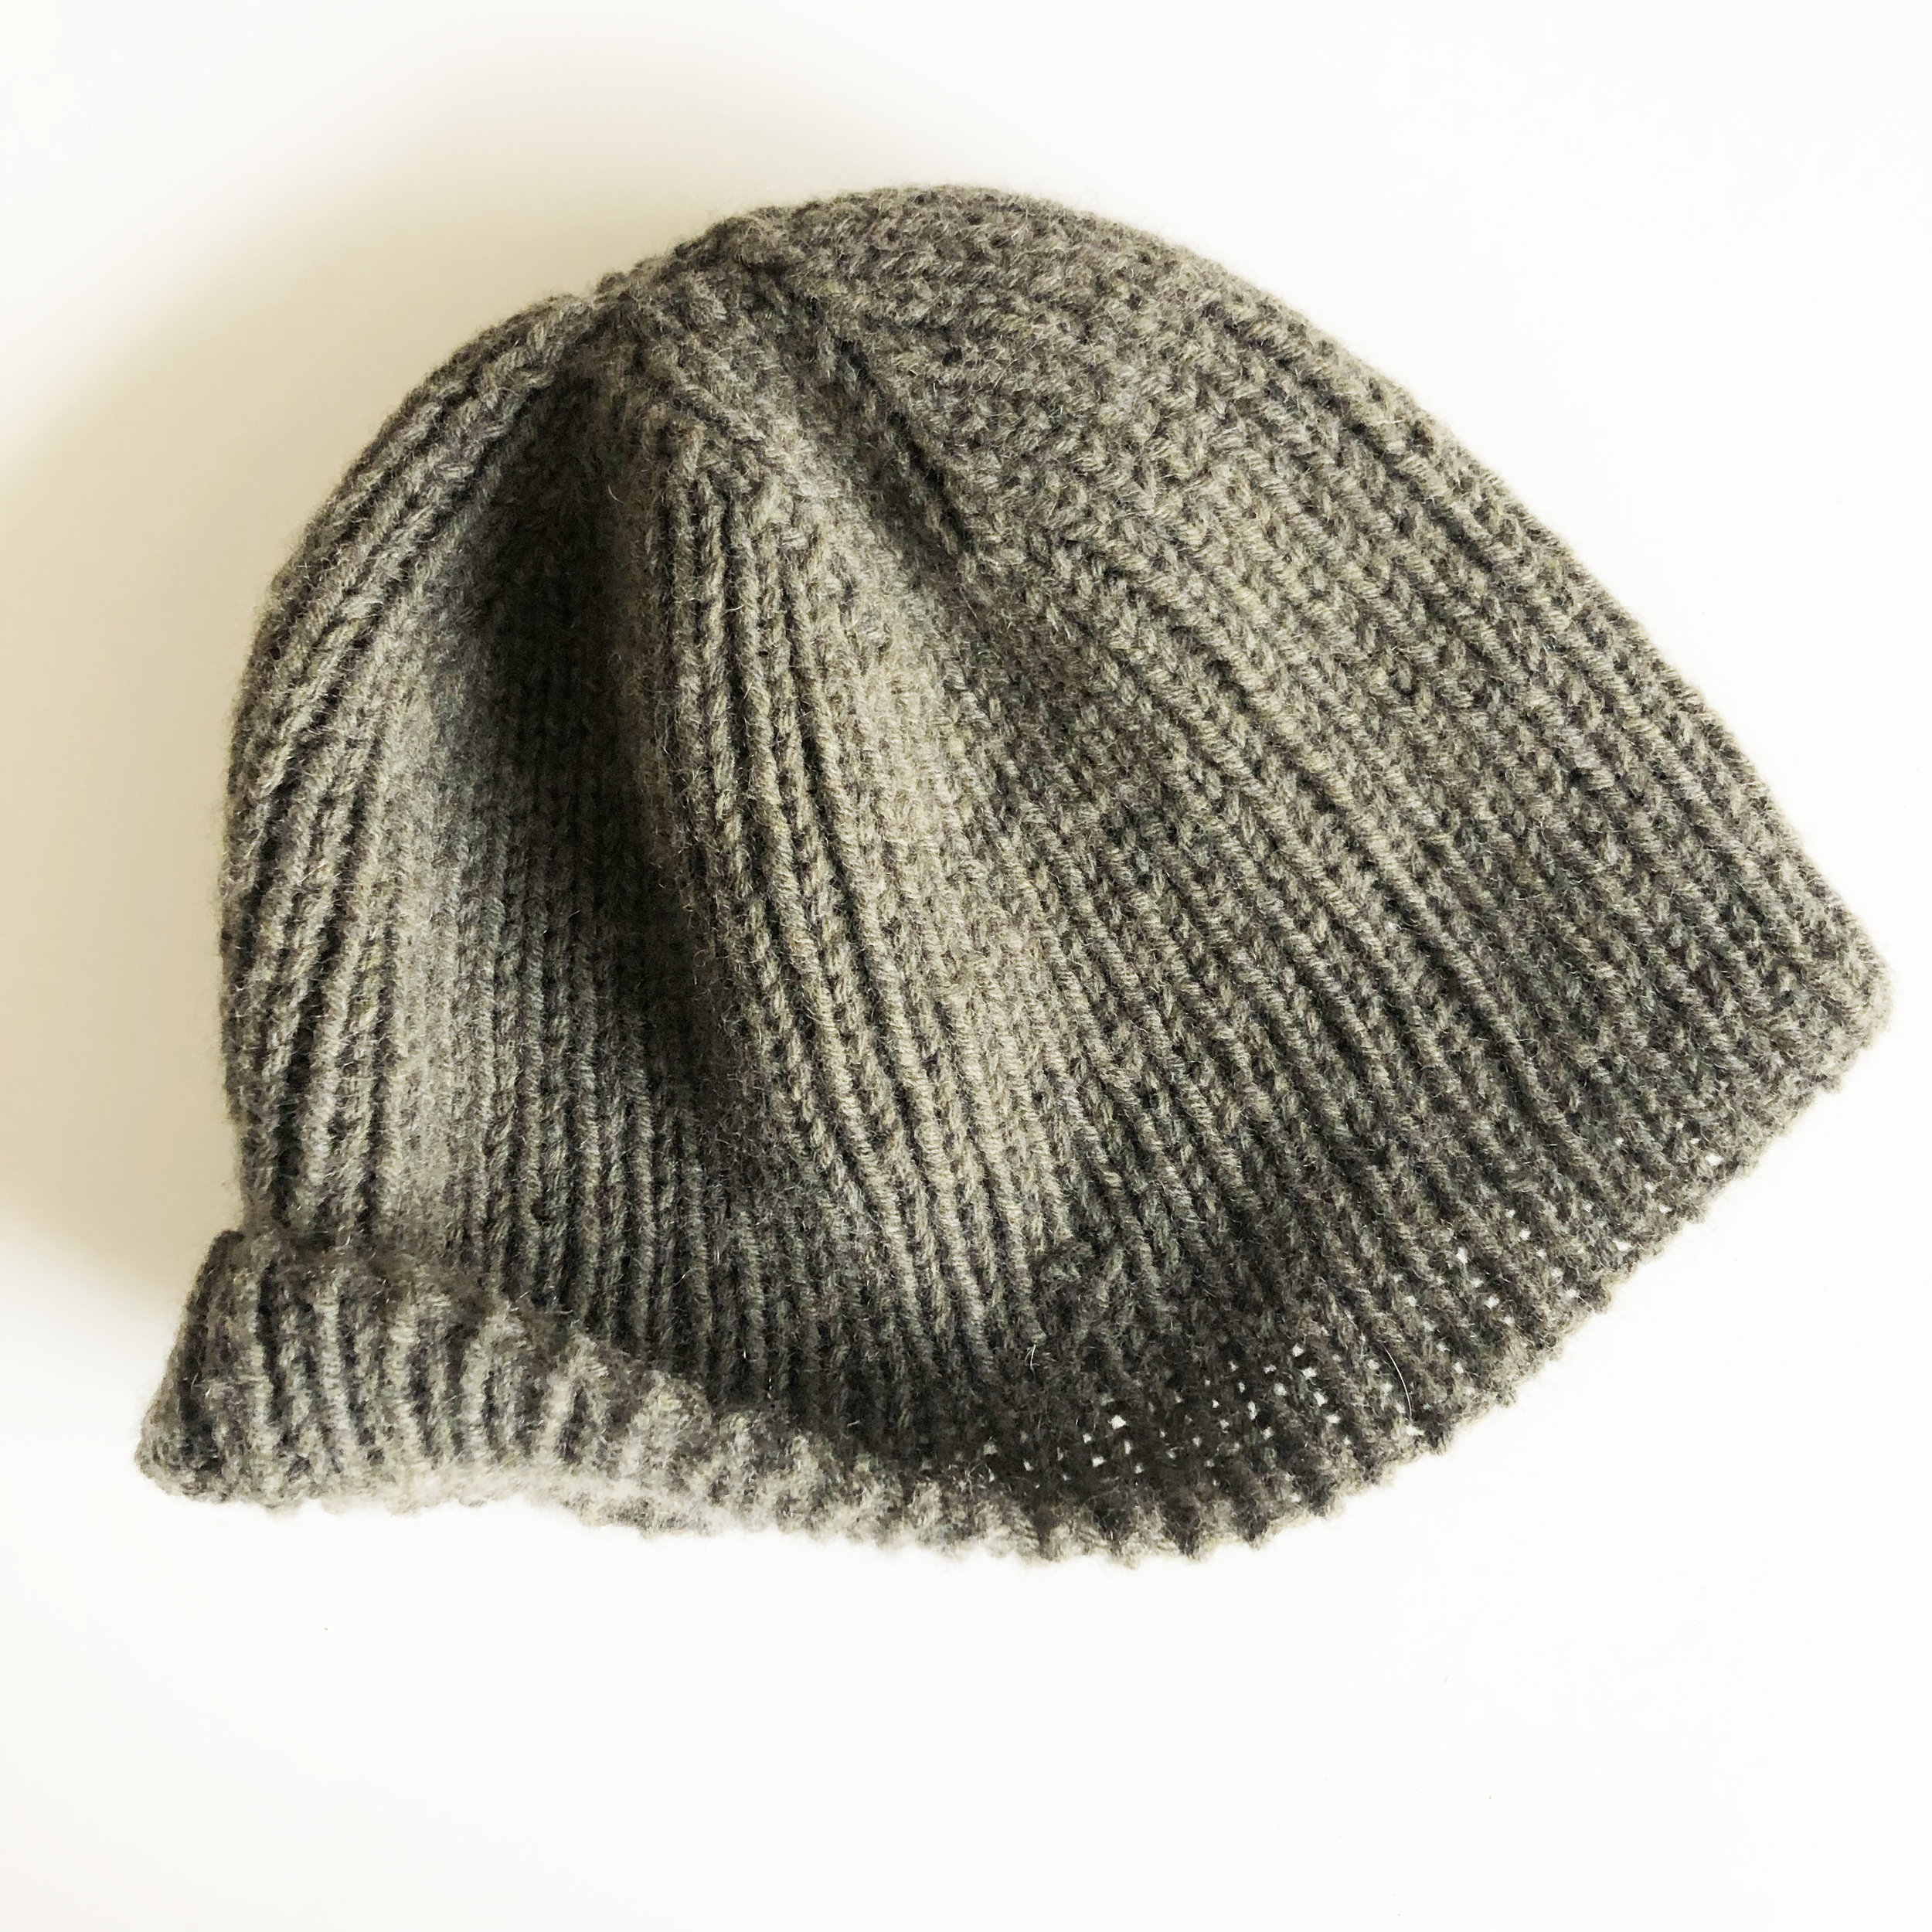
#WIDN: Mawson Hat by Jared Flood

one of my big goals for 2019 is to knit a bunch of other designer’s patterns. when i first started knitting, i was filled with so many ideas and was very headstrong about trying to figure things out for myself. Now, i see the extreme value in trying others’ written patterns. not only do i want (need) to make some of these beautiful designs for myself (another 2019 goal), but i am excited to learn new skills and techniques to expand my own design process.
so, when i was thinking about what to make my dad for his birthday this past december, i settled on a mochimochiland starter gnome and the mawson hat by jared flood, the esteemed designer behind brooklyn tweed. mawson is a simple 1x1 ribbed beanie or folded-brim watchcap with some really cool decreases that make the hat completely reversible. i love that the pattern includes instructions for both styles, and it is written so you can make one in either worsted or dk weight yarn. Basically, this is a great go-to hat pattern for men or women that you can make with almost anything from your stash.

i typically let my dad pick out his own hat yarn, so while i was home in the bay area for the thanksgiving holiday we visited my favorite yarn store in the area, uncommon threads. he sprang almost immediately for a luxurious string yarns Dolcetto cashmere/merino in color 200741/dark khaki. it’s so incredibly soft!

i was excited to learn a new cast-on technique for this pattern, the 1x1 ribbed cable cast on. Though it gave me some trouble at first, once i got the hang of it it was cool to see the ribbing start right from the get go. then, the body of the hat is all 1x1 ribbing. some knitters may really hate endless 1x1 ribbing, but even though it slows me down a bit i find it very soothing.

guys, the decreases for this pattern threw me for a loop! i generally like to listen to podcasts while i knit, and i figured out very quickly that i really needed to focus on this part of the pattern. the technique was not difficult but definitely required all of my attention! but wow, i’m really impressed with the crown shaping on this pattern and the fact that the decreases render the hat completely reversible. so so cool!


even if you’re experienced with the cast on and decrease techniques, i still highly recommend this excellent pattern. first of all, it’s incredibly well written. and, the finished hat came out so great and is the perfect fit for my dad. now that i have it down pat, i’m looking forward to making the watchcap version, most likely for myself :)

#WIDN: Mochimochi Land Starter Gnome

My dad is obsessed with garden gnomes, so for his birthday this past December I made him the Starter Gnome from Mochimochi Land. I love to make 3D toys, and Anna Hrachovec is undoubtedly the master. From her wide selection of incredibly designed toys and patterns to the seriously amazing stop-motion animations she makes, my family and I are huge fans of her work.
This little gnome was so fun to make and knit up very quickly. I used a selection of scrap worsted and doubled-dk weight yarns in various colors from my stash. the best part of knitting up this pattern for me was insight into Anna’s construction methods, particularly the arms and legs - it’s so clever!

isn’t he so cute?


you can find the pattern for the starter gnome on the mochimochiland website here. And be sure to follow along with Anna on instagram so you don’t miss any cuteness!
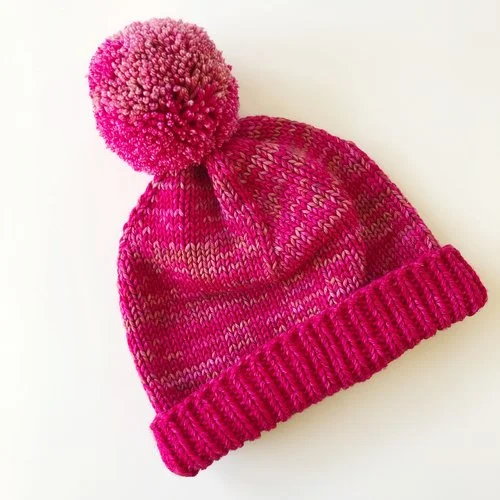
#WIDN: Custom Hat in Malabrigo Rios

One of my recent commissions was a request for a special winter hat, and after being deep in Turkey Hat orders for the last two months I couldn’t think of anything better than taking a break from stuffing and seaming legs than to refresh my brain with some beautiful yarn and a quick new project.
I went to pick out yarn at one of my local yarn stores, The Altered Stitch. It was my first time visiting despite driving by all the time, and I’m so grateful for the commission that sent me there seeking yarn...they have the most amazing selection of indie-dyed yarn from a large range of makers and it was hard not to desperately covet all the sock yarn (Hedgehog Fibres Typewriter was particularly calling to me!)
I ended up choosing two skeins of Malabrigo Rios, an incredibly beautiful 4-ply superwash merino. My client particularly wanted something very fun and bright, and these colors jumped out at me almost immediately.

I chose two skeins of color 093 Fucsia (a solid color with some very, very subtle variances that make it very rich and interesting) and one skein of 057 English Rose, just a mind-blowing variegated in all the colors that make me drool.
In true Elise fashion, I didn’t reference or use any patterns…I just kind of jumped right in. I’ve made so many hats at this point in my life that I have a pretty good idea of how many stitches to cast on depending on the yarn weight. Using two strands of Rios at the same time felt to me similar to worsted weight. So I grabbed some US 6 (4.0 mm) double-pointed needles and got right to work!
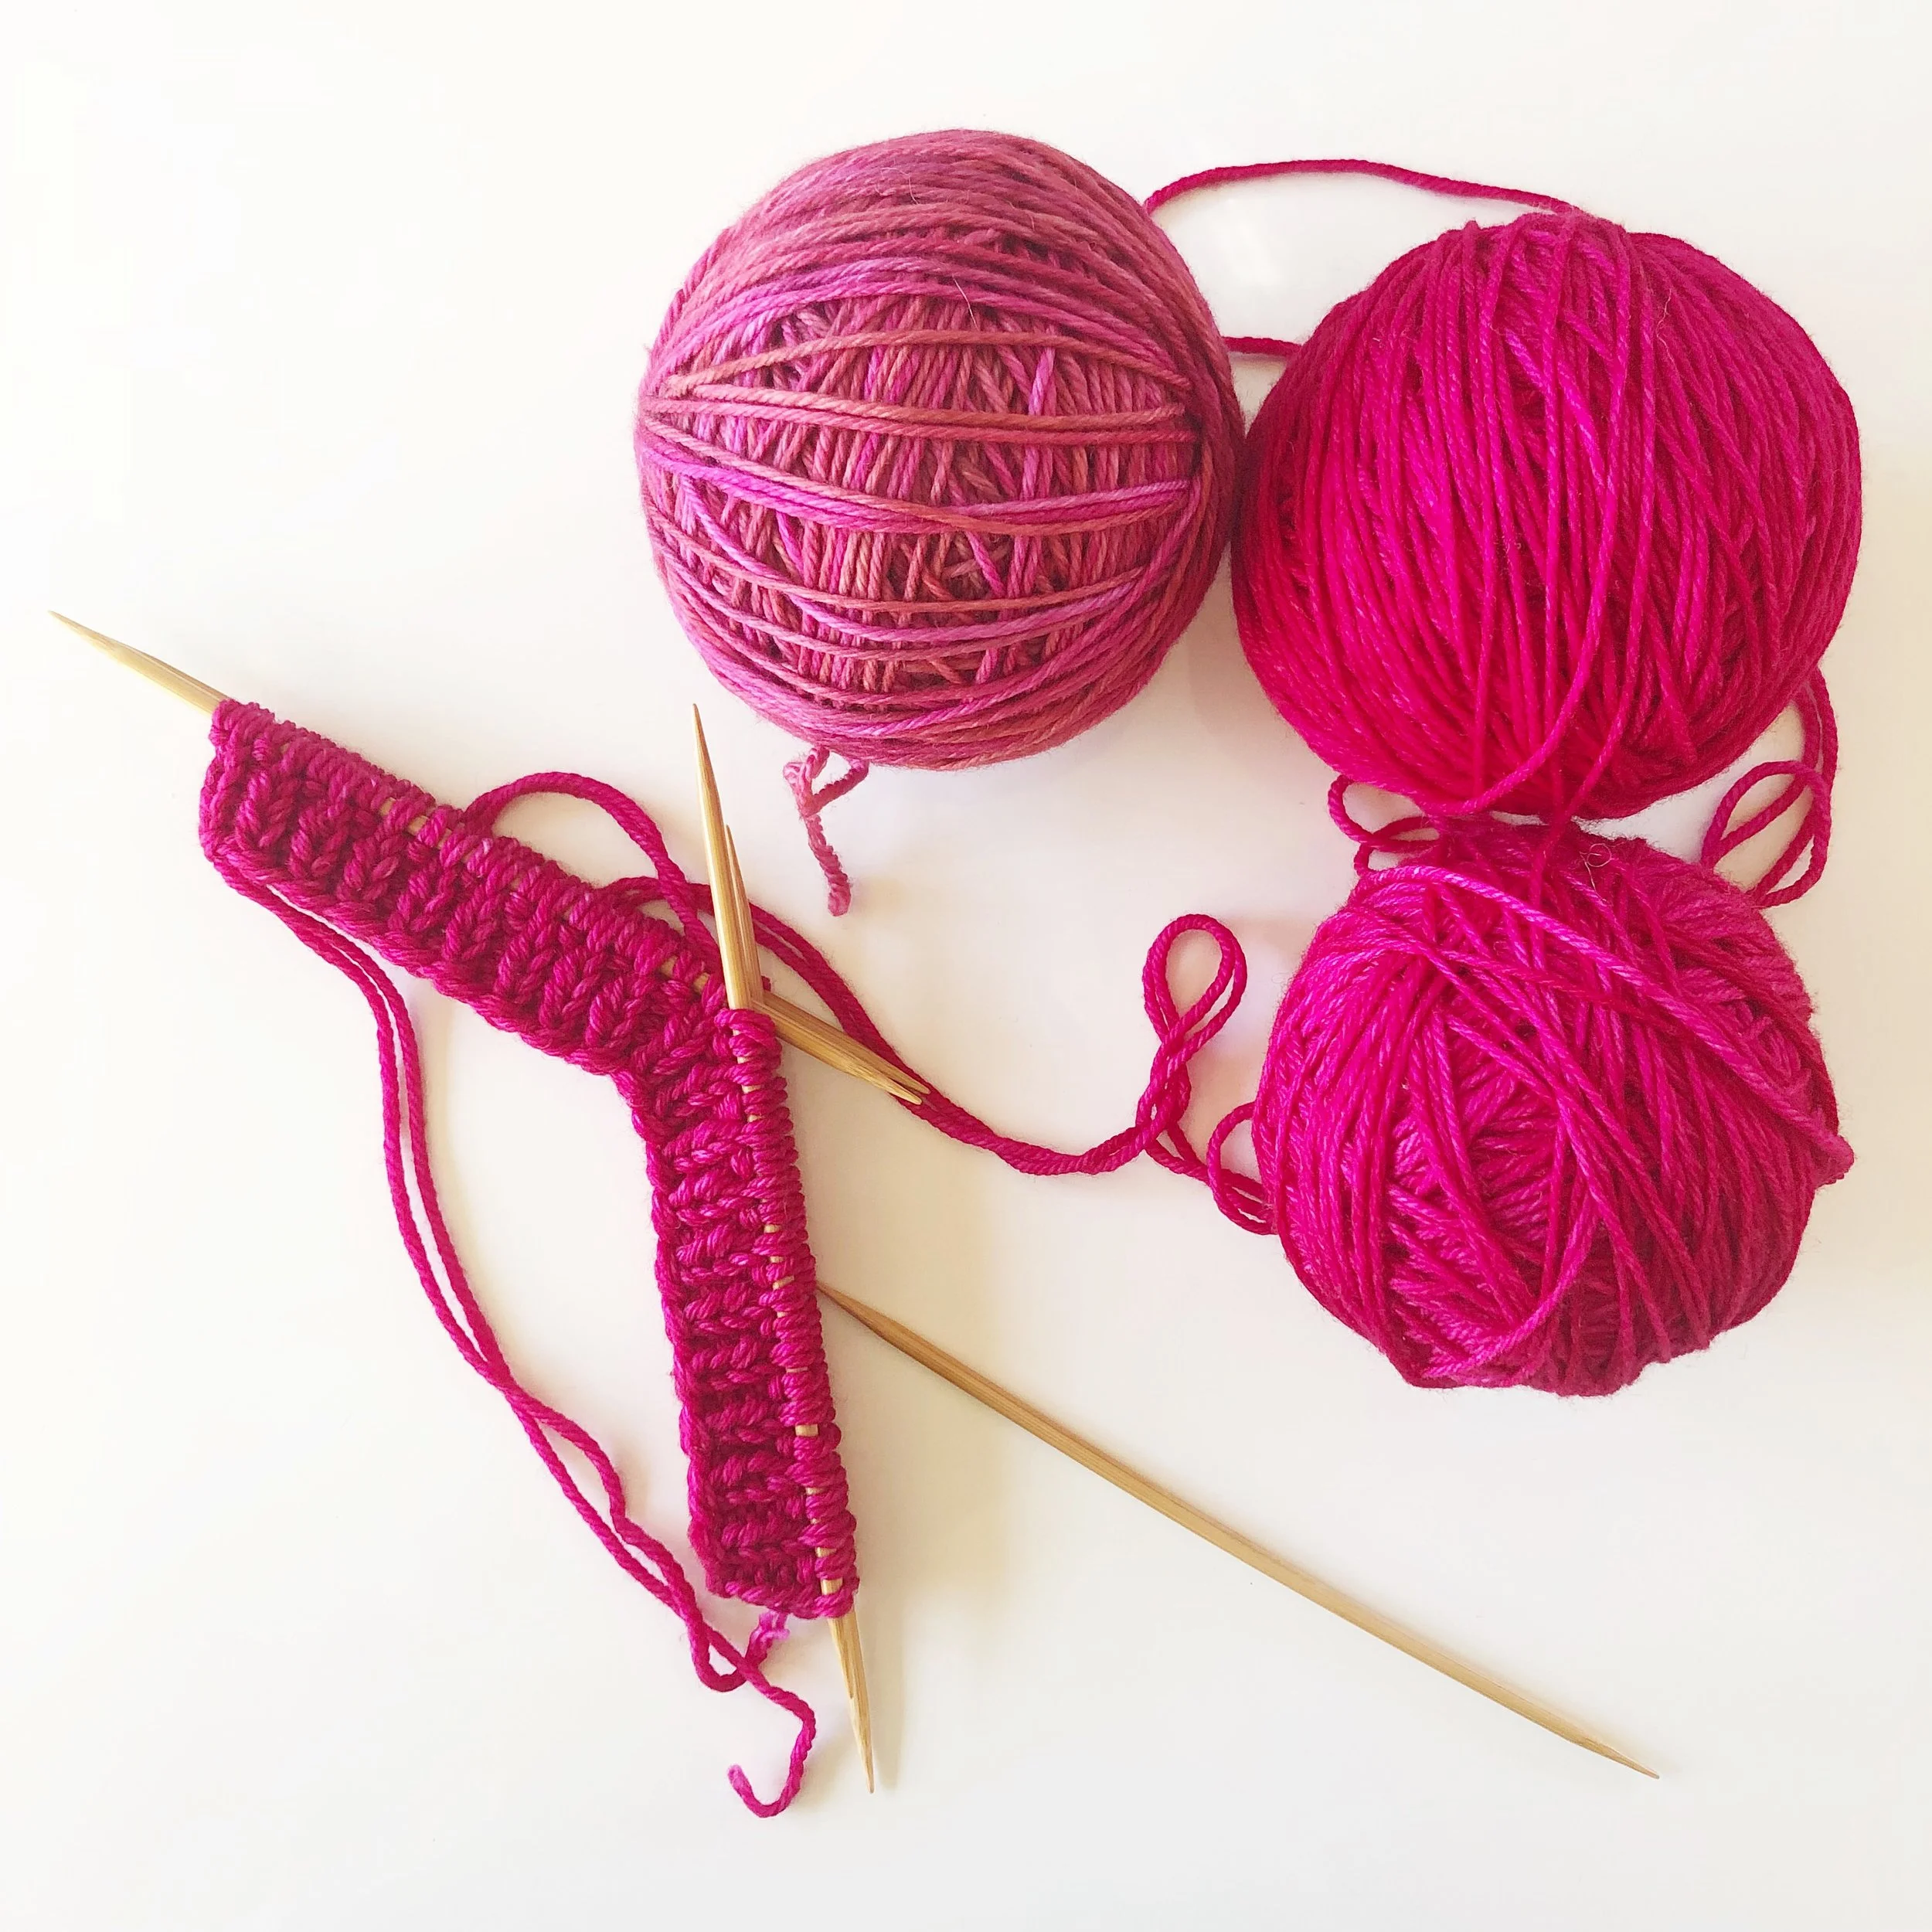
I held two strands of Fucsia together and knit a simple 1x1 rib for the brim. I just love a 1x1 rib...I love how it looks, and I love that it helps the brim keep from getting too stretched out.

For the body of the hat I originally wanted to do a fun stitch pattern like seed/moss stitch or skinny cables, but after I did a quick swatch that all went out the window. The yarn is so pretty and the colors are so vibrant that I thought it looked best showcased in simple stockinette. I finished the body of the hat holding one strand of Fucsia and one strand of English Rose together. I knit the body to make a slouchy fit, long enough so it could also be worn with the brim flipped up for some extra warmth.

And then of course I finished it off with a large pompom, made with a mix of both colors. It’s seriously the best part.


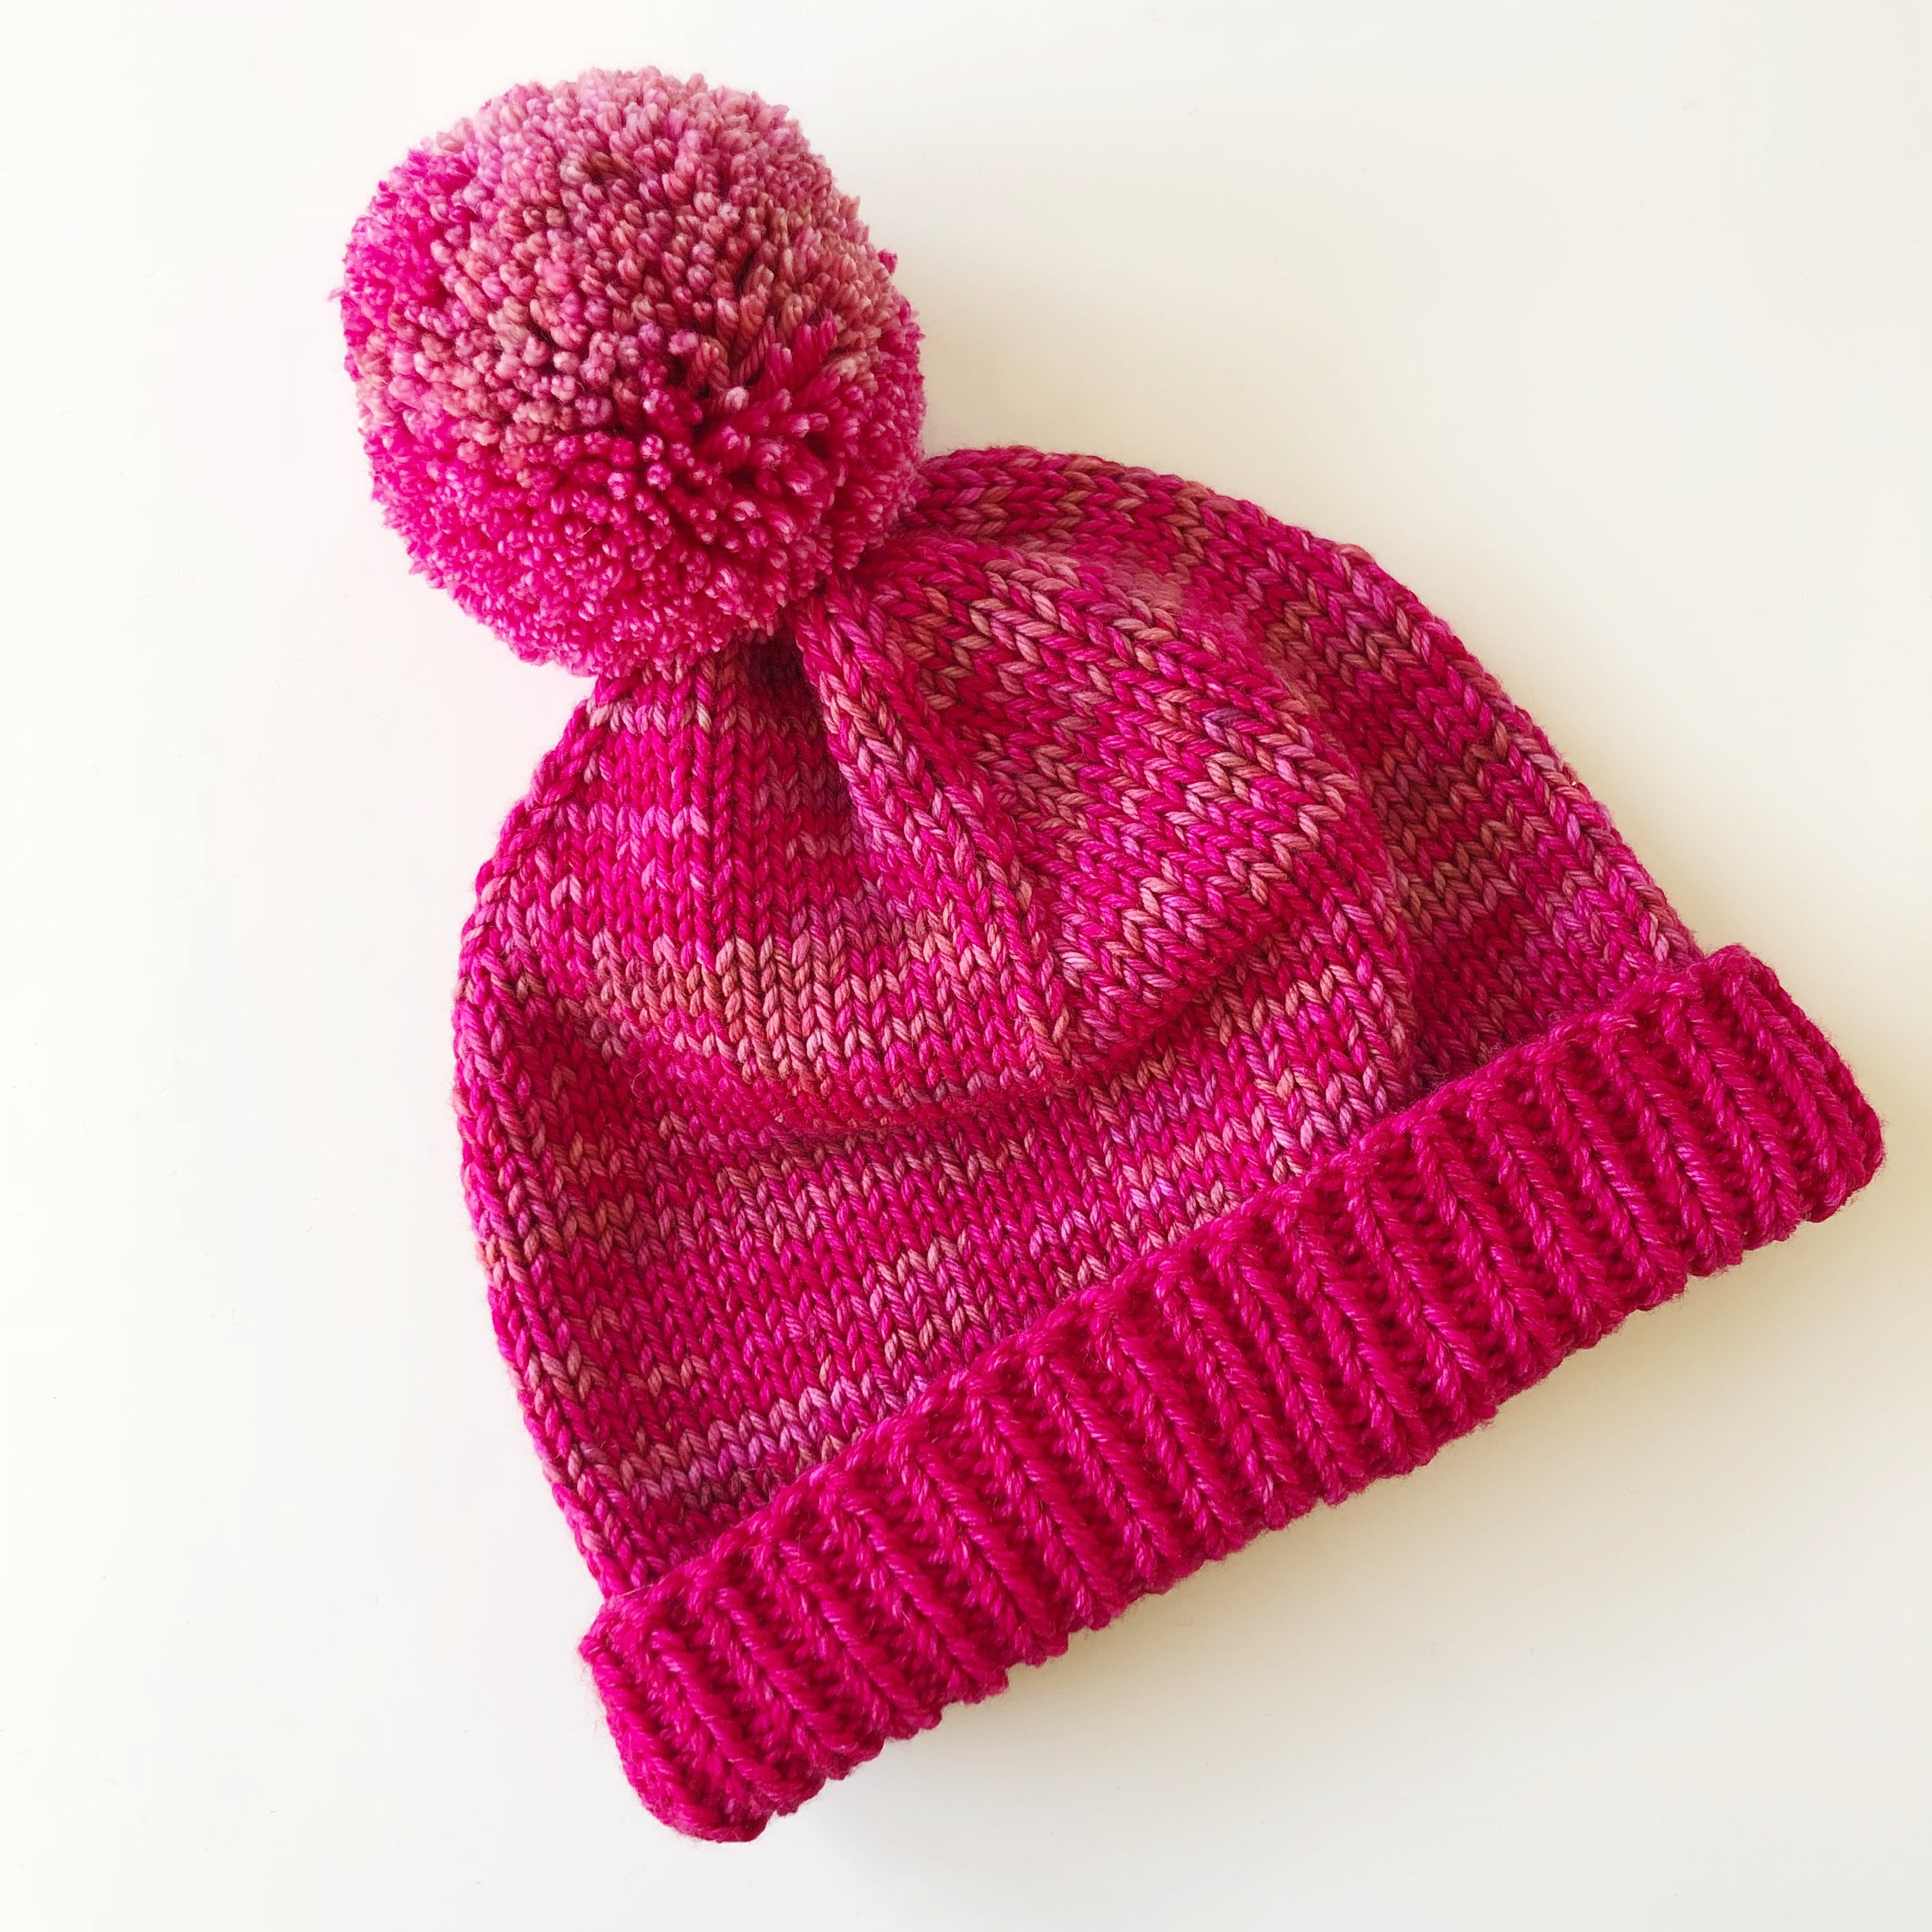
I love how it turned out! The Malabrigo Rios was such a dream to knit with, I’m already scoping out other colorways.
What do you think? Have you knit with this yarn before?
#WIDN: custom knit alligator

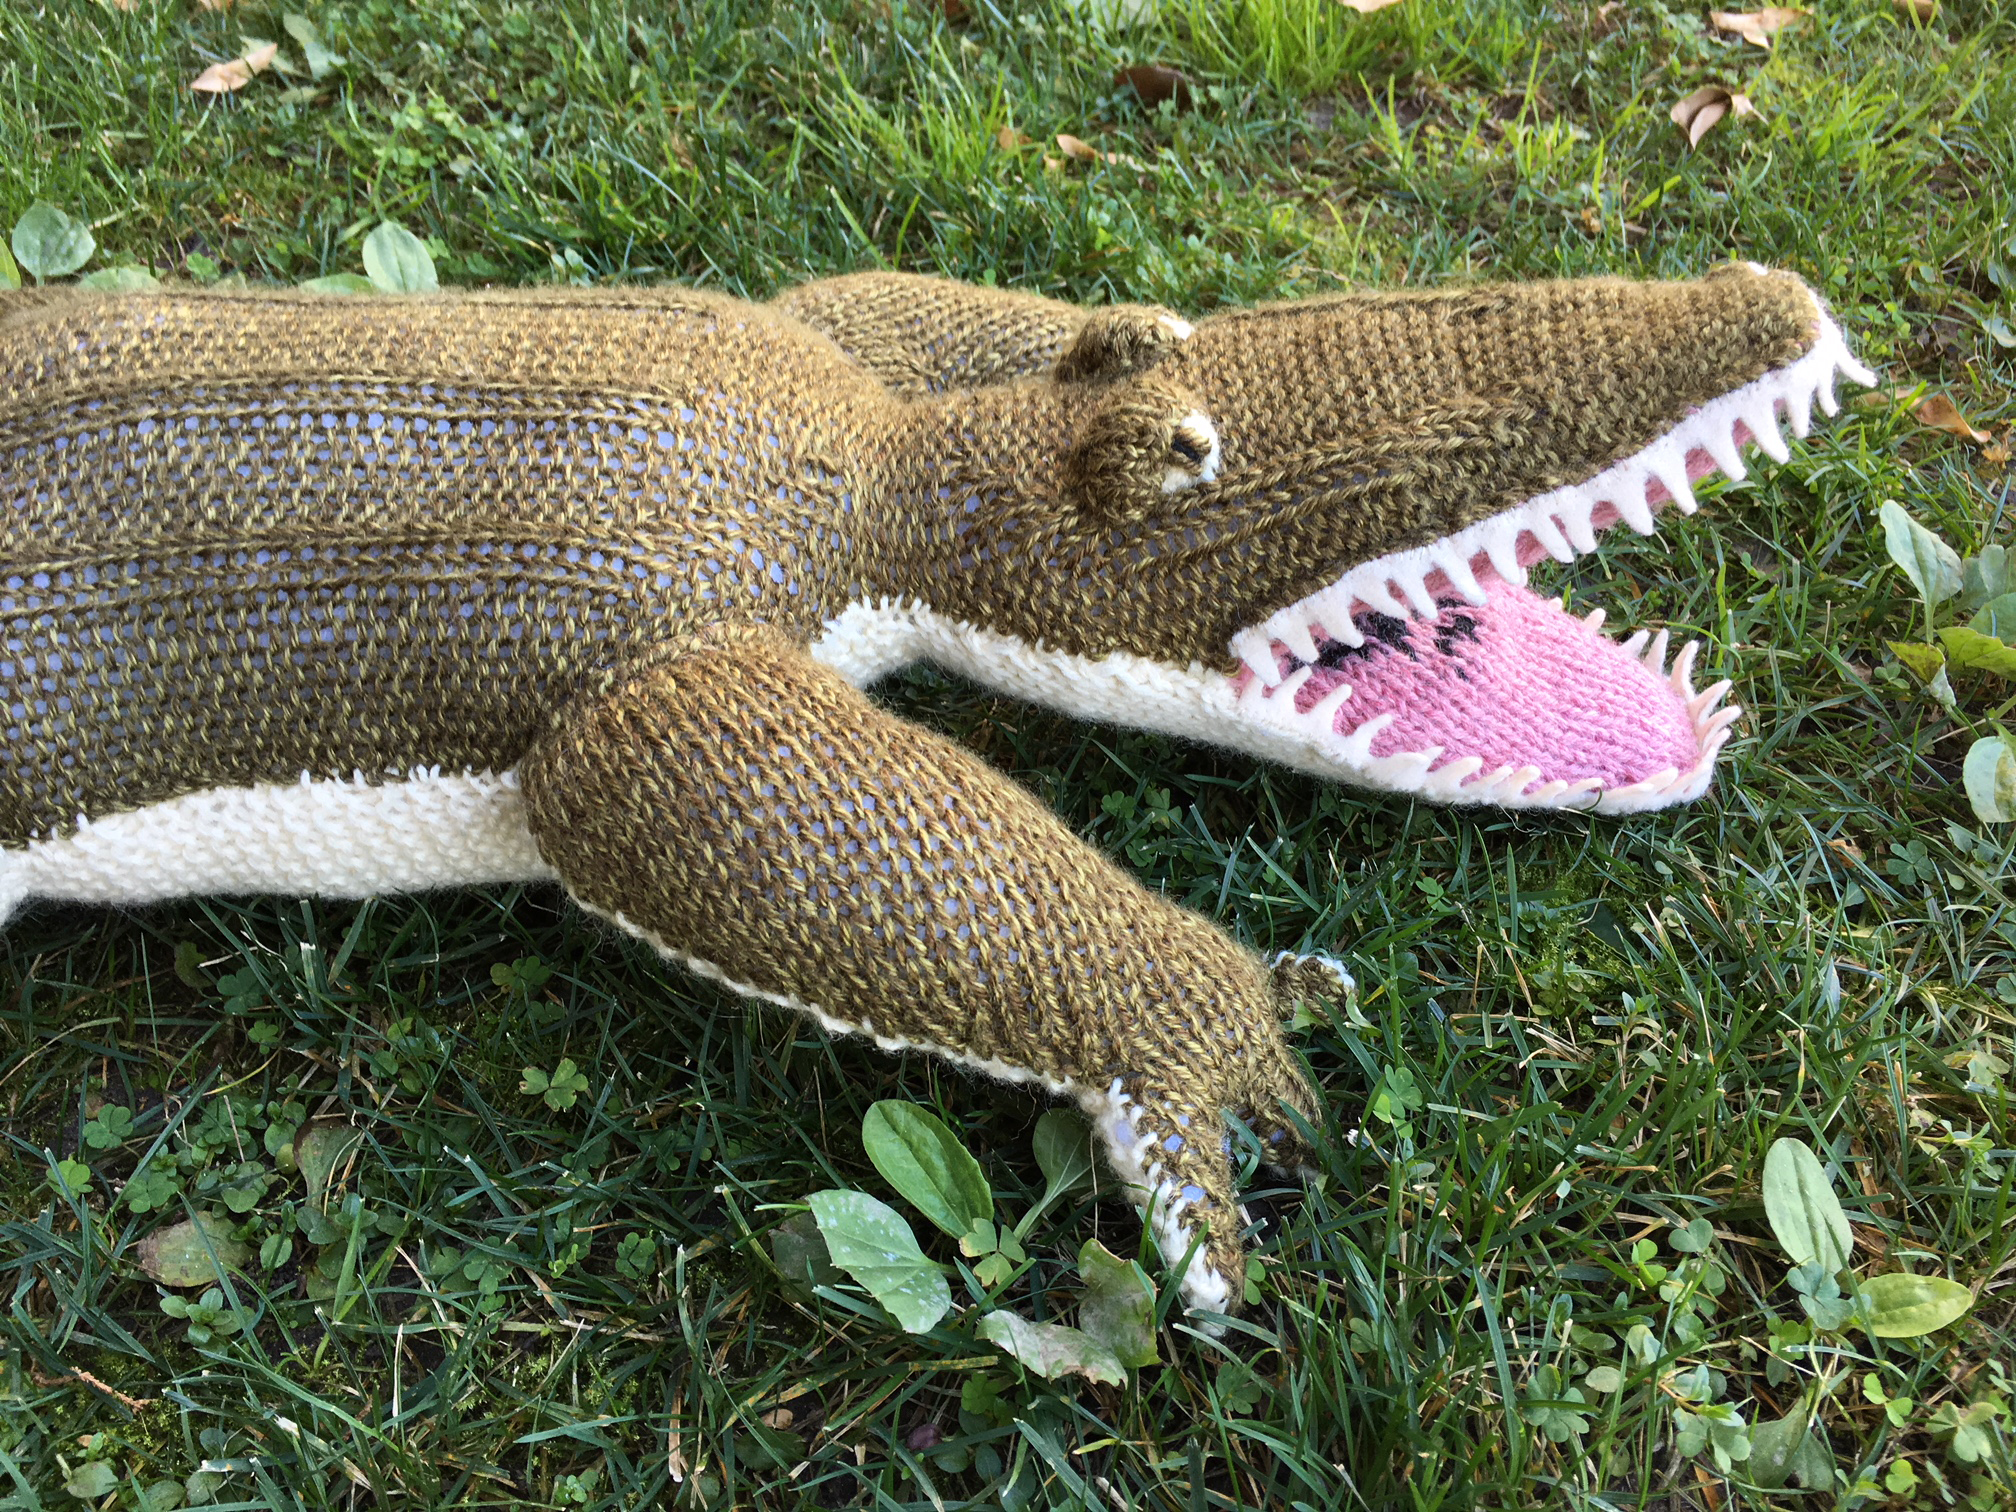
very recently, i designed a large knit alligator toy as a commission for a dear friend who intends to give it as a baby gift. It’s always an honor when I’m asked to make custom knits! i feel simultaneously flattered that someone likes my designs enough to support my work and so excited for the challenge of being trusted to design something great. as someone who grew up loving stuffed animals, there’s something extra special about designing for a baby and creating something that they will hopefully love for years to come.
pattern: elisemade original design, 2017
yarn: patons classic worsted wool in aran & lion brand heartland in joshua tree
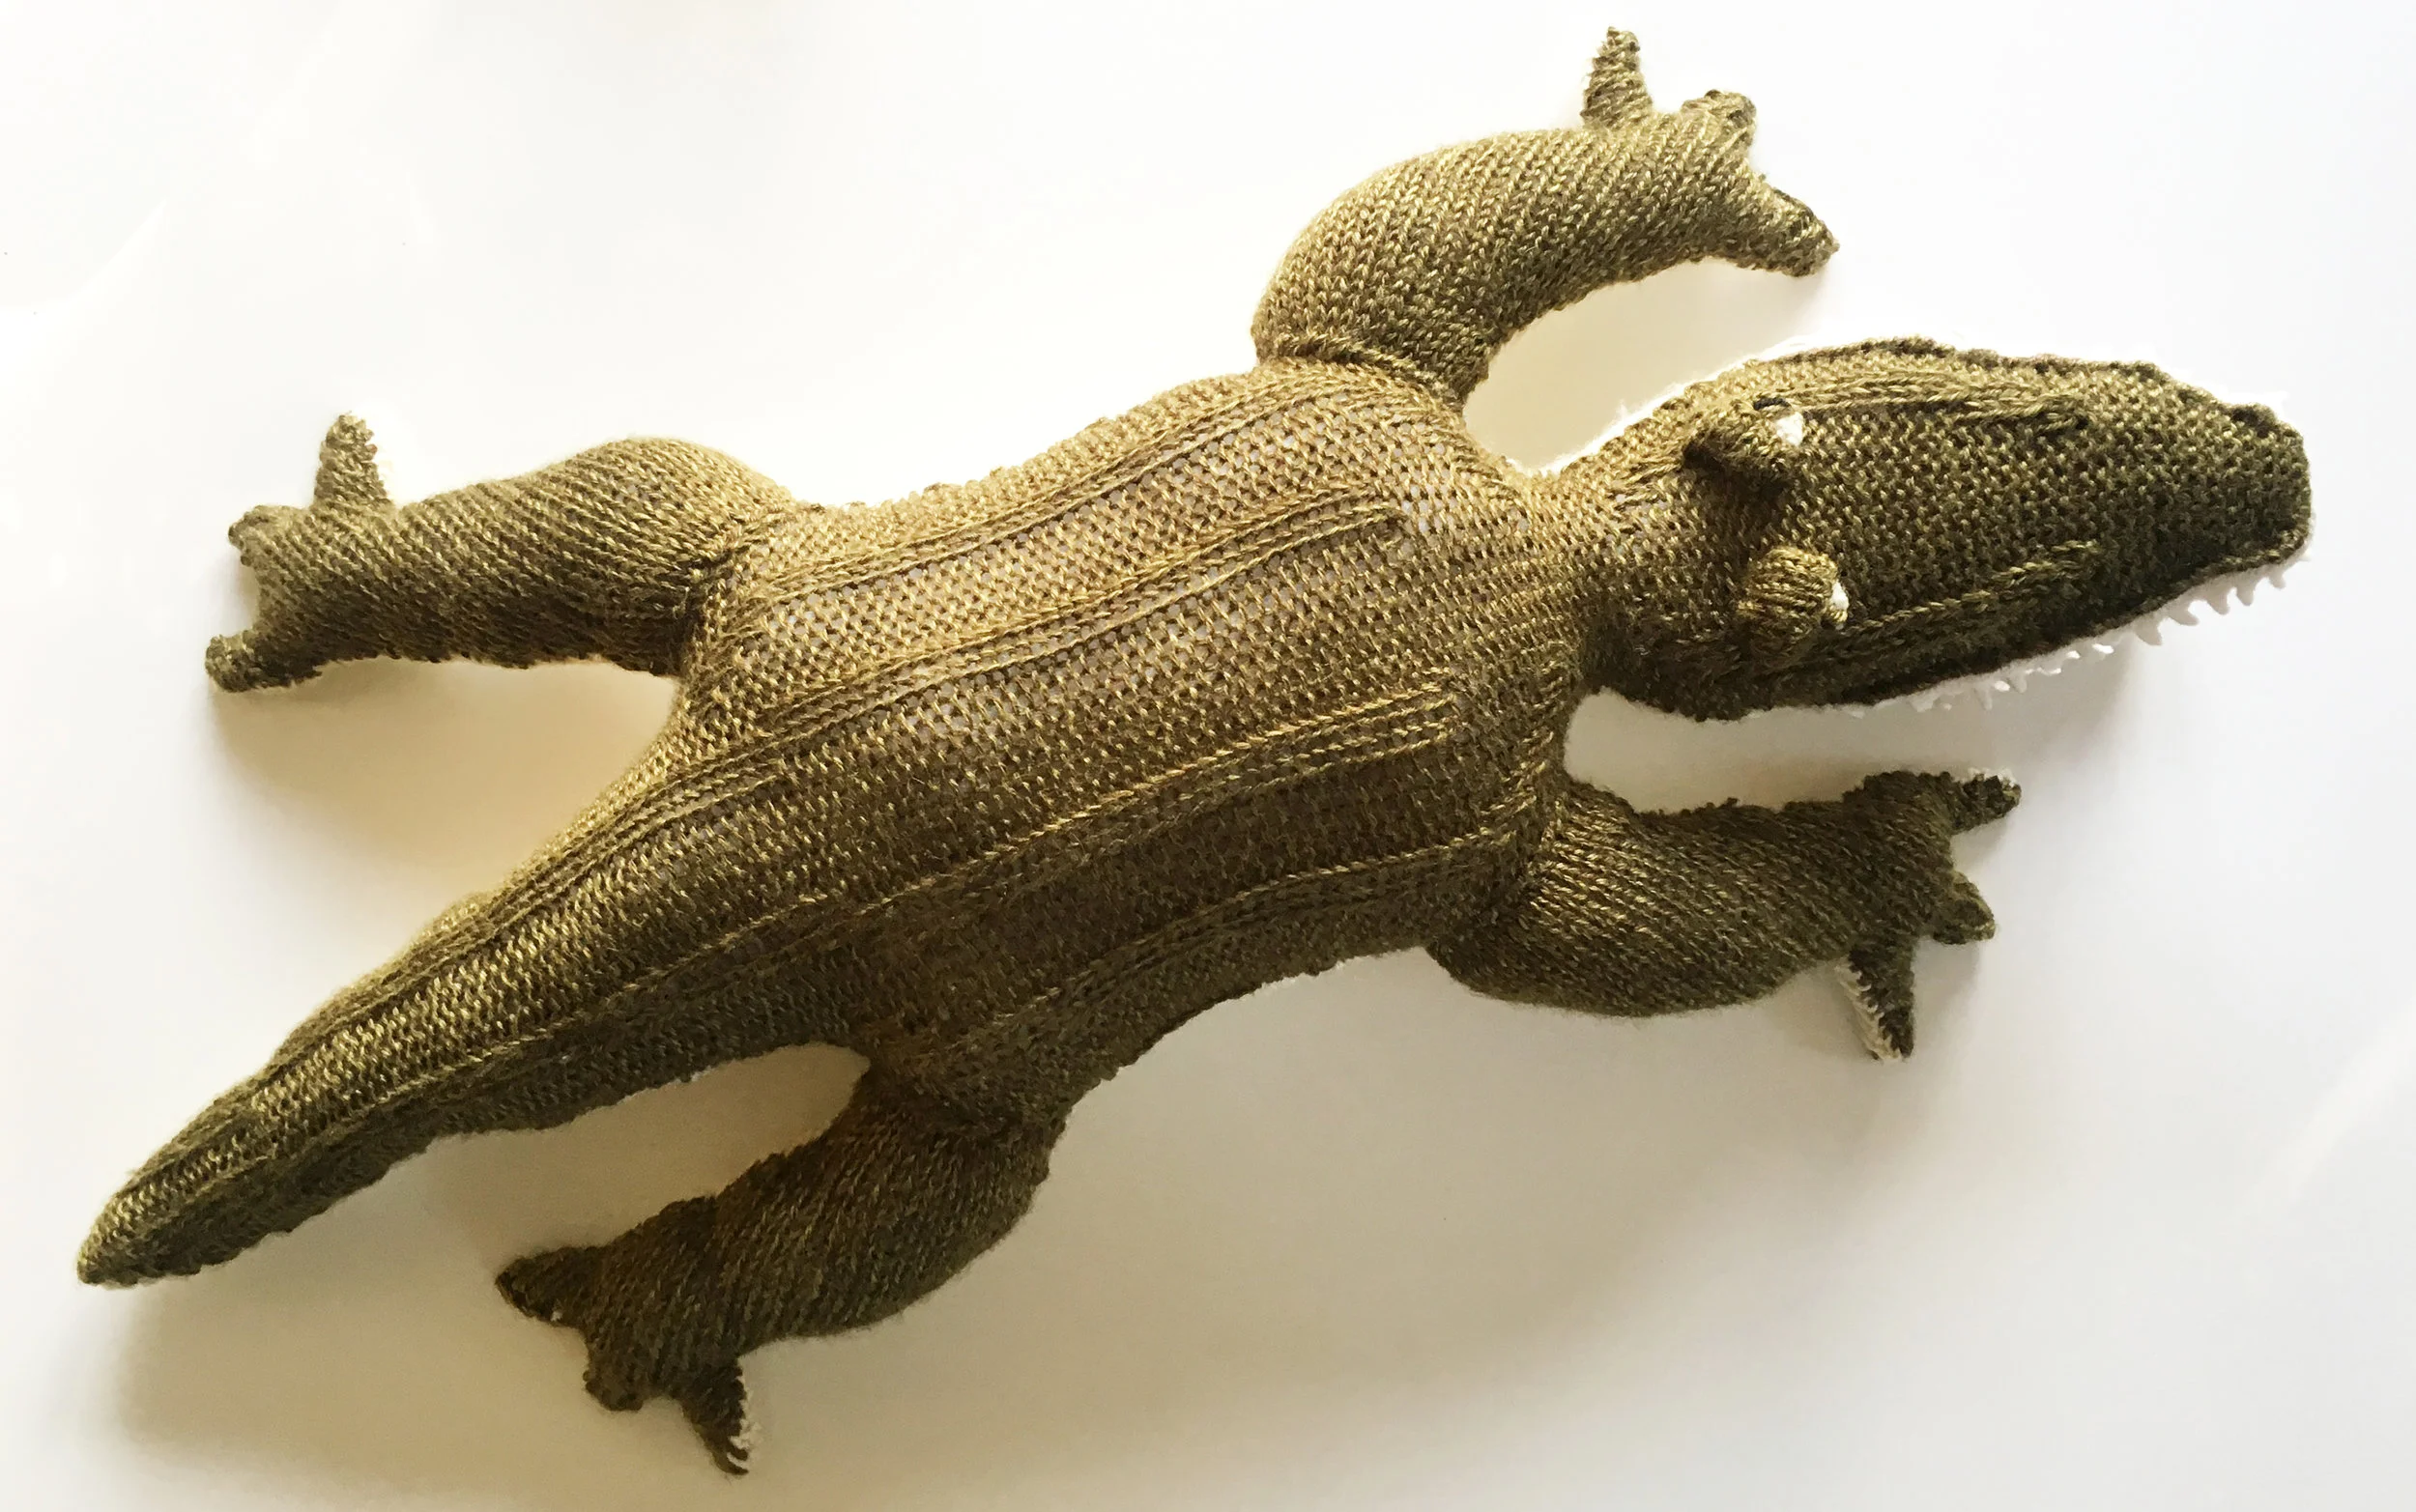
i tried to keep the design as simple as possible by knitting flat the head/torso/tail in two continuous pieces, the back and the underside. i knit the four legs separately, using the same idea of seaming together two flat-knit pieces. the texture on the back is from simple variations of knit/purl stitches across a row.
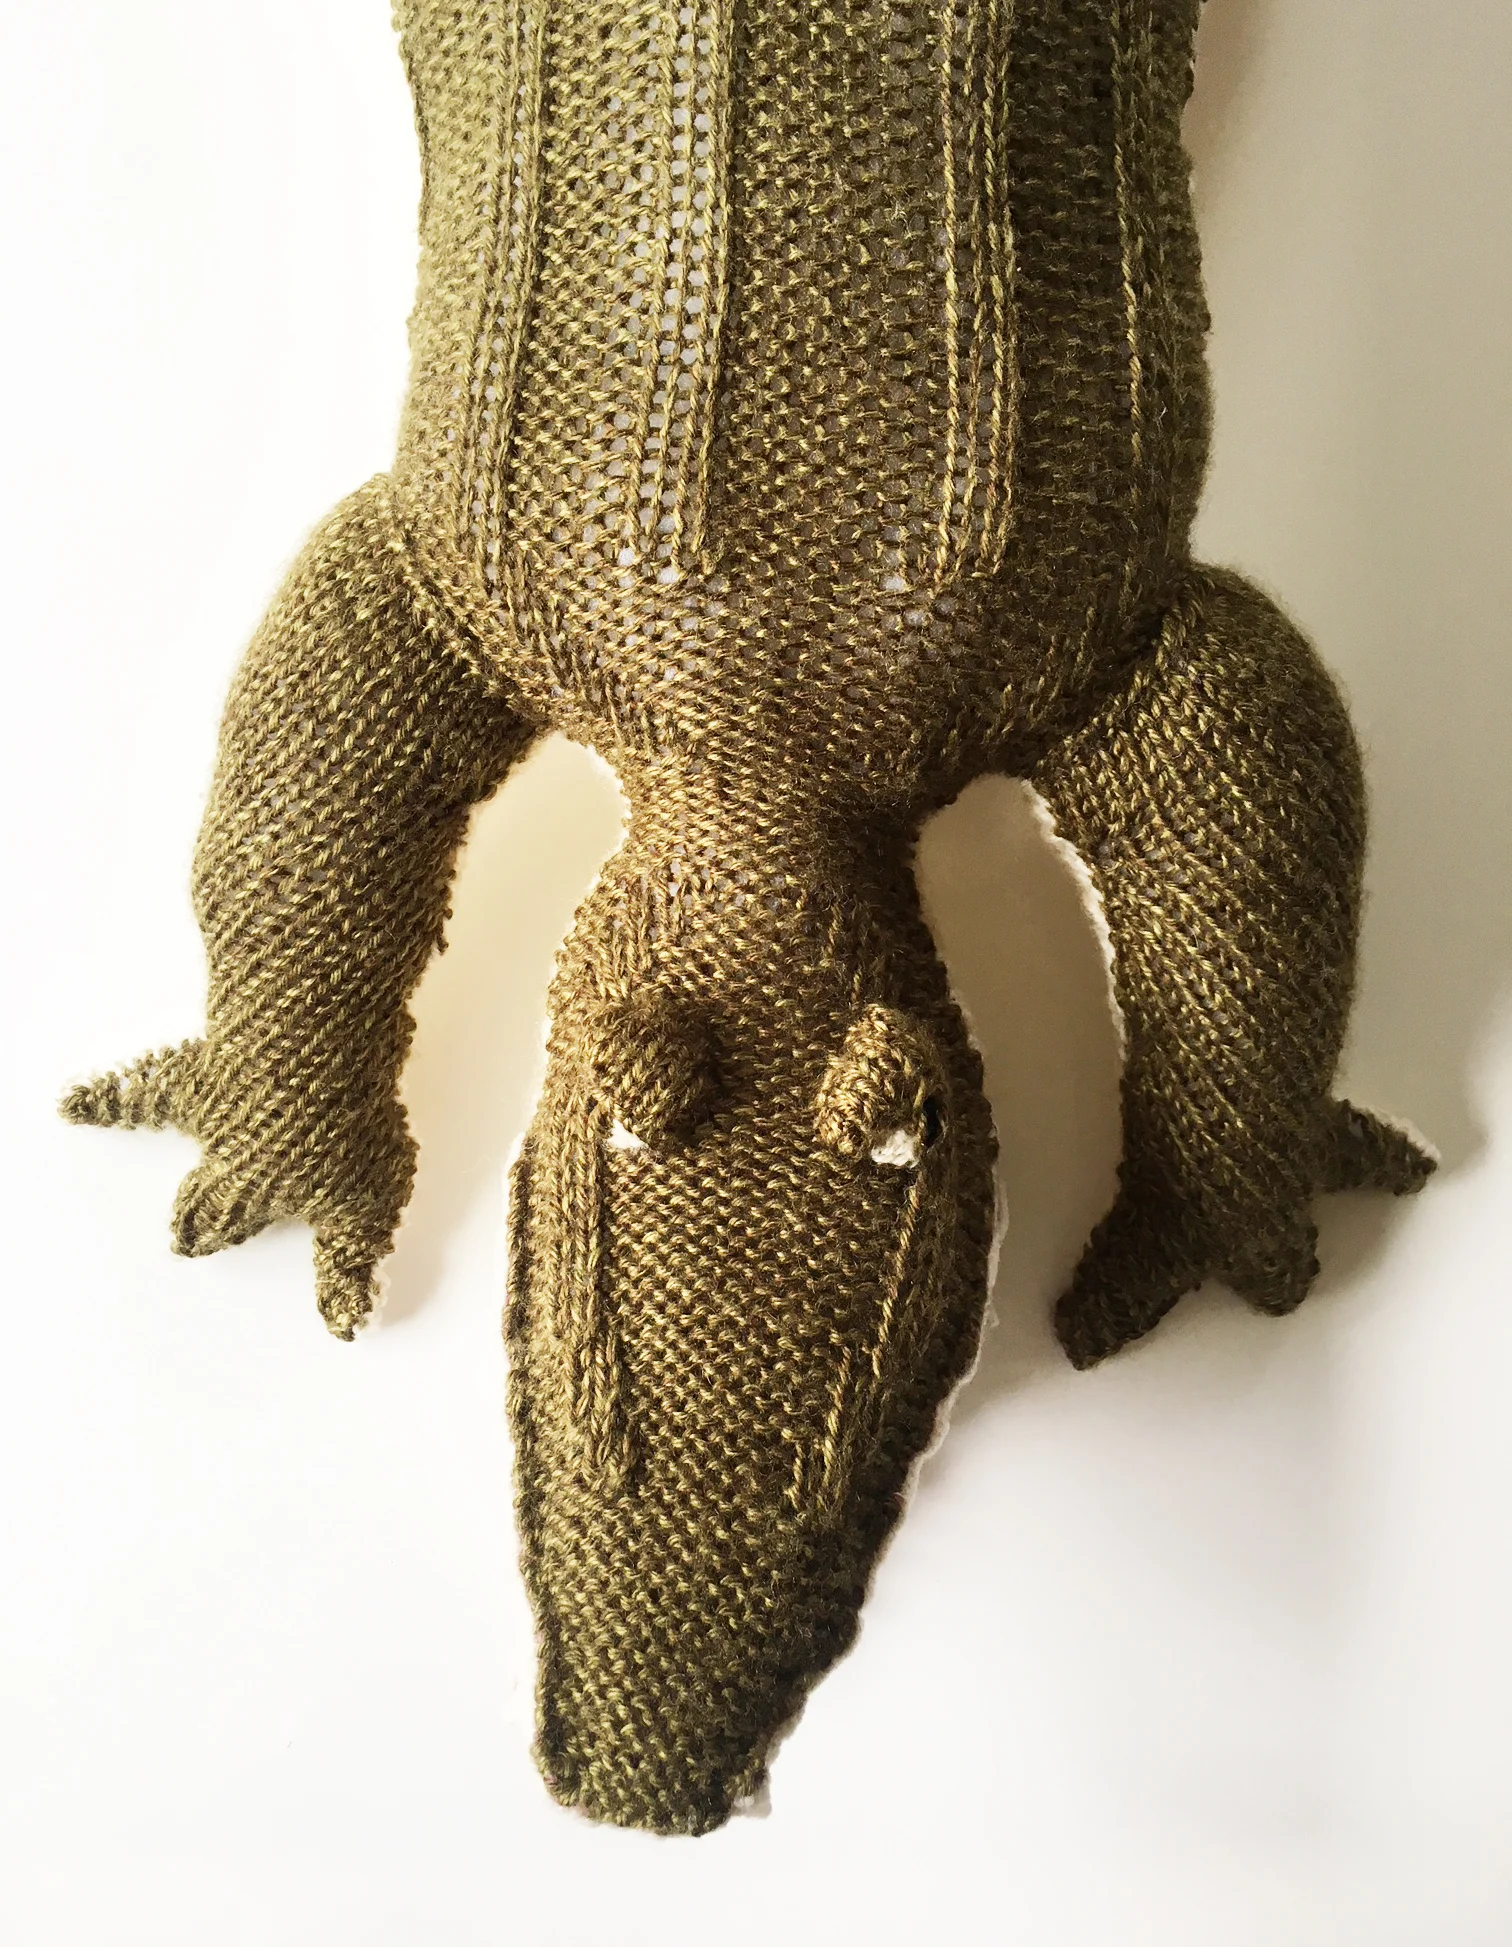
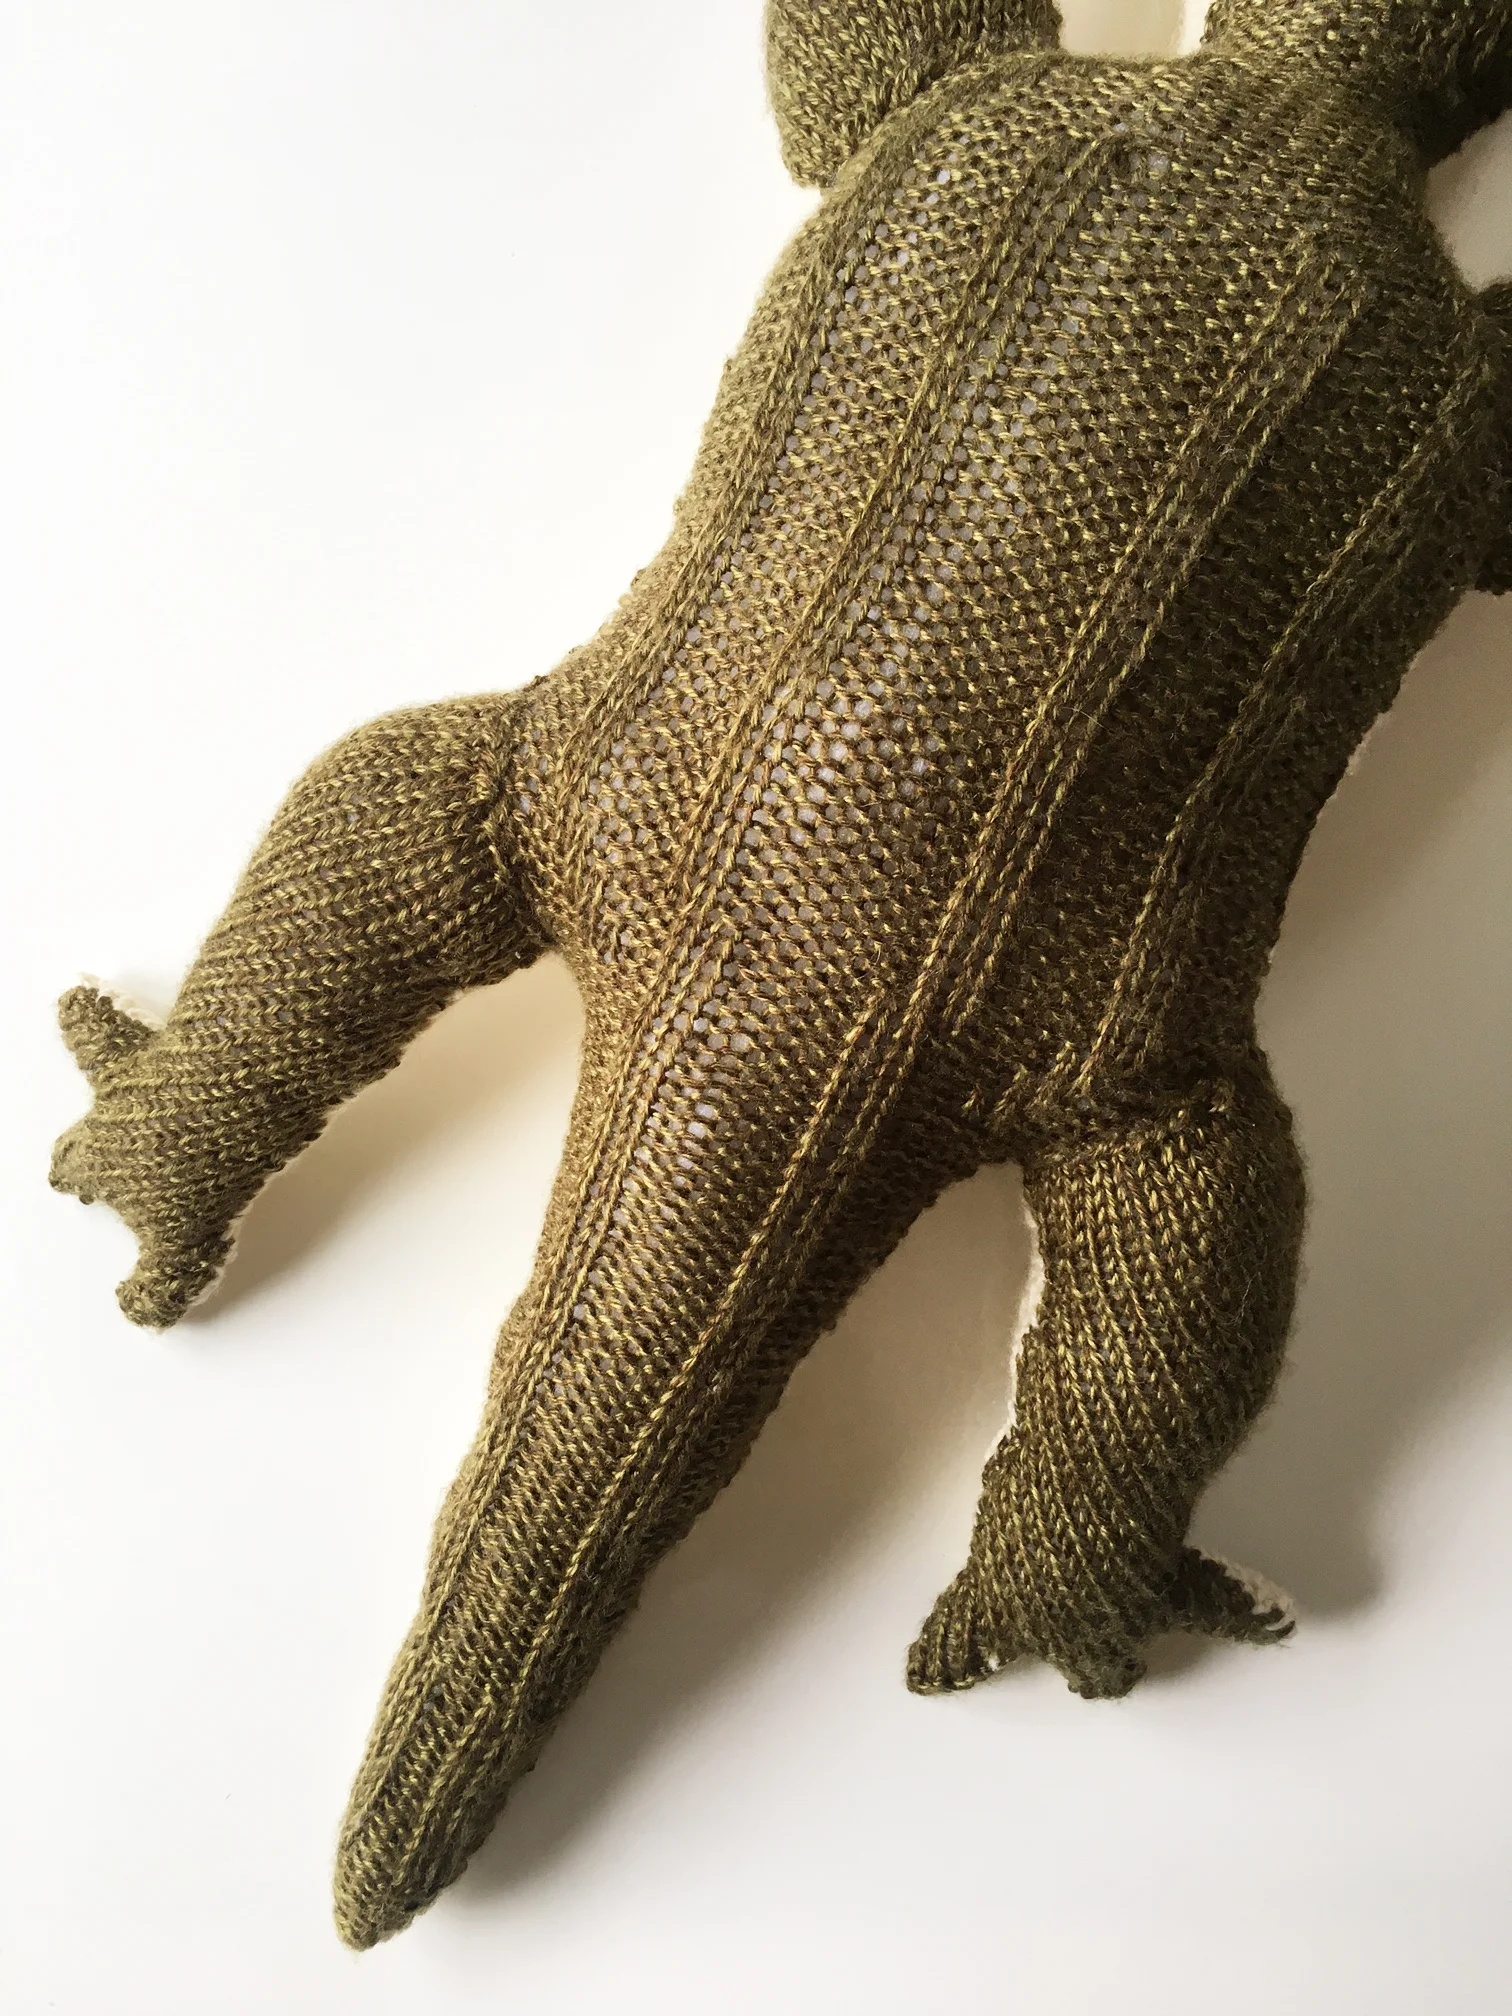
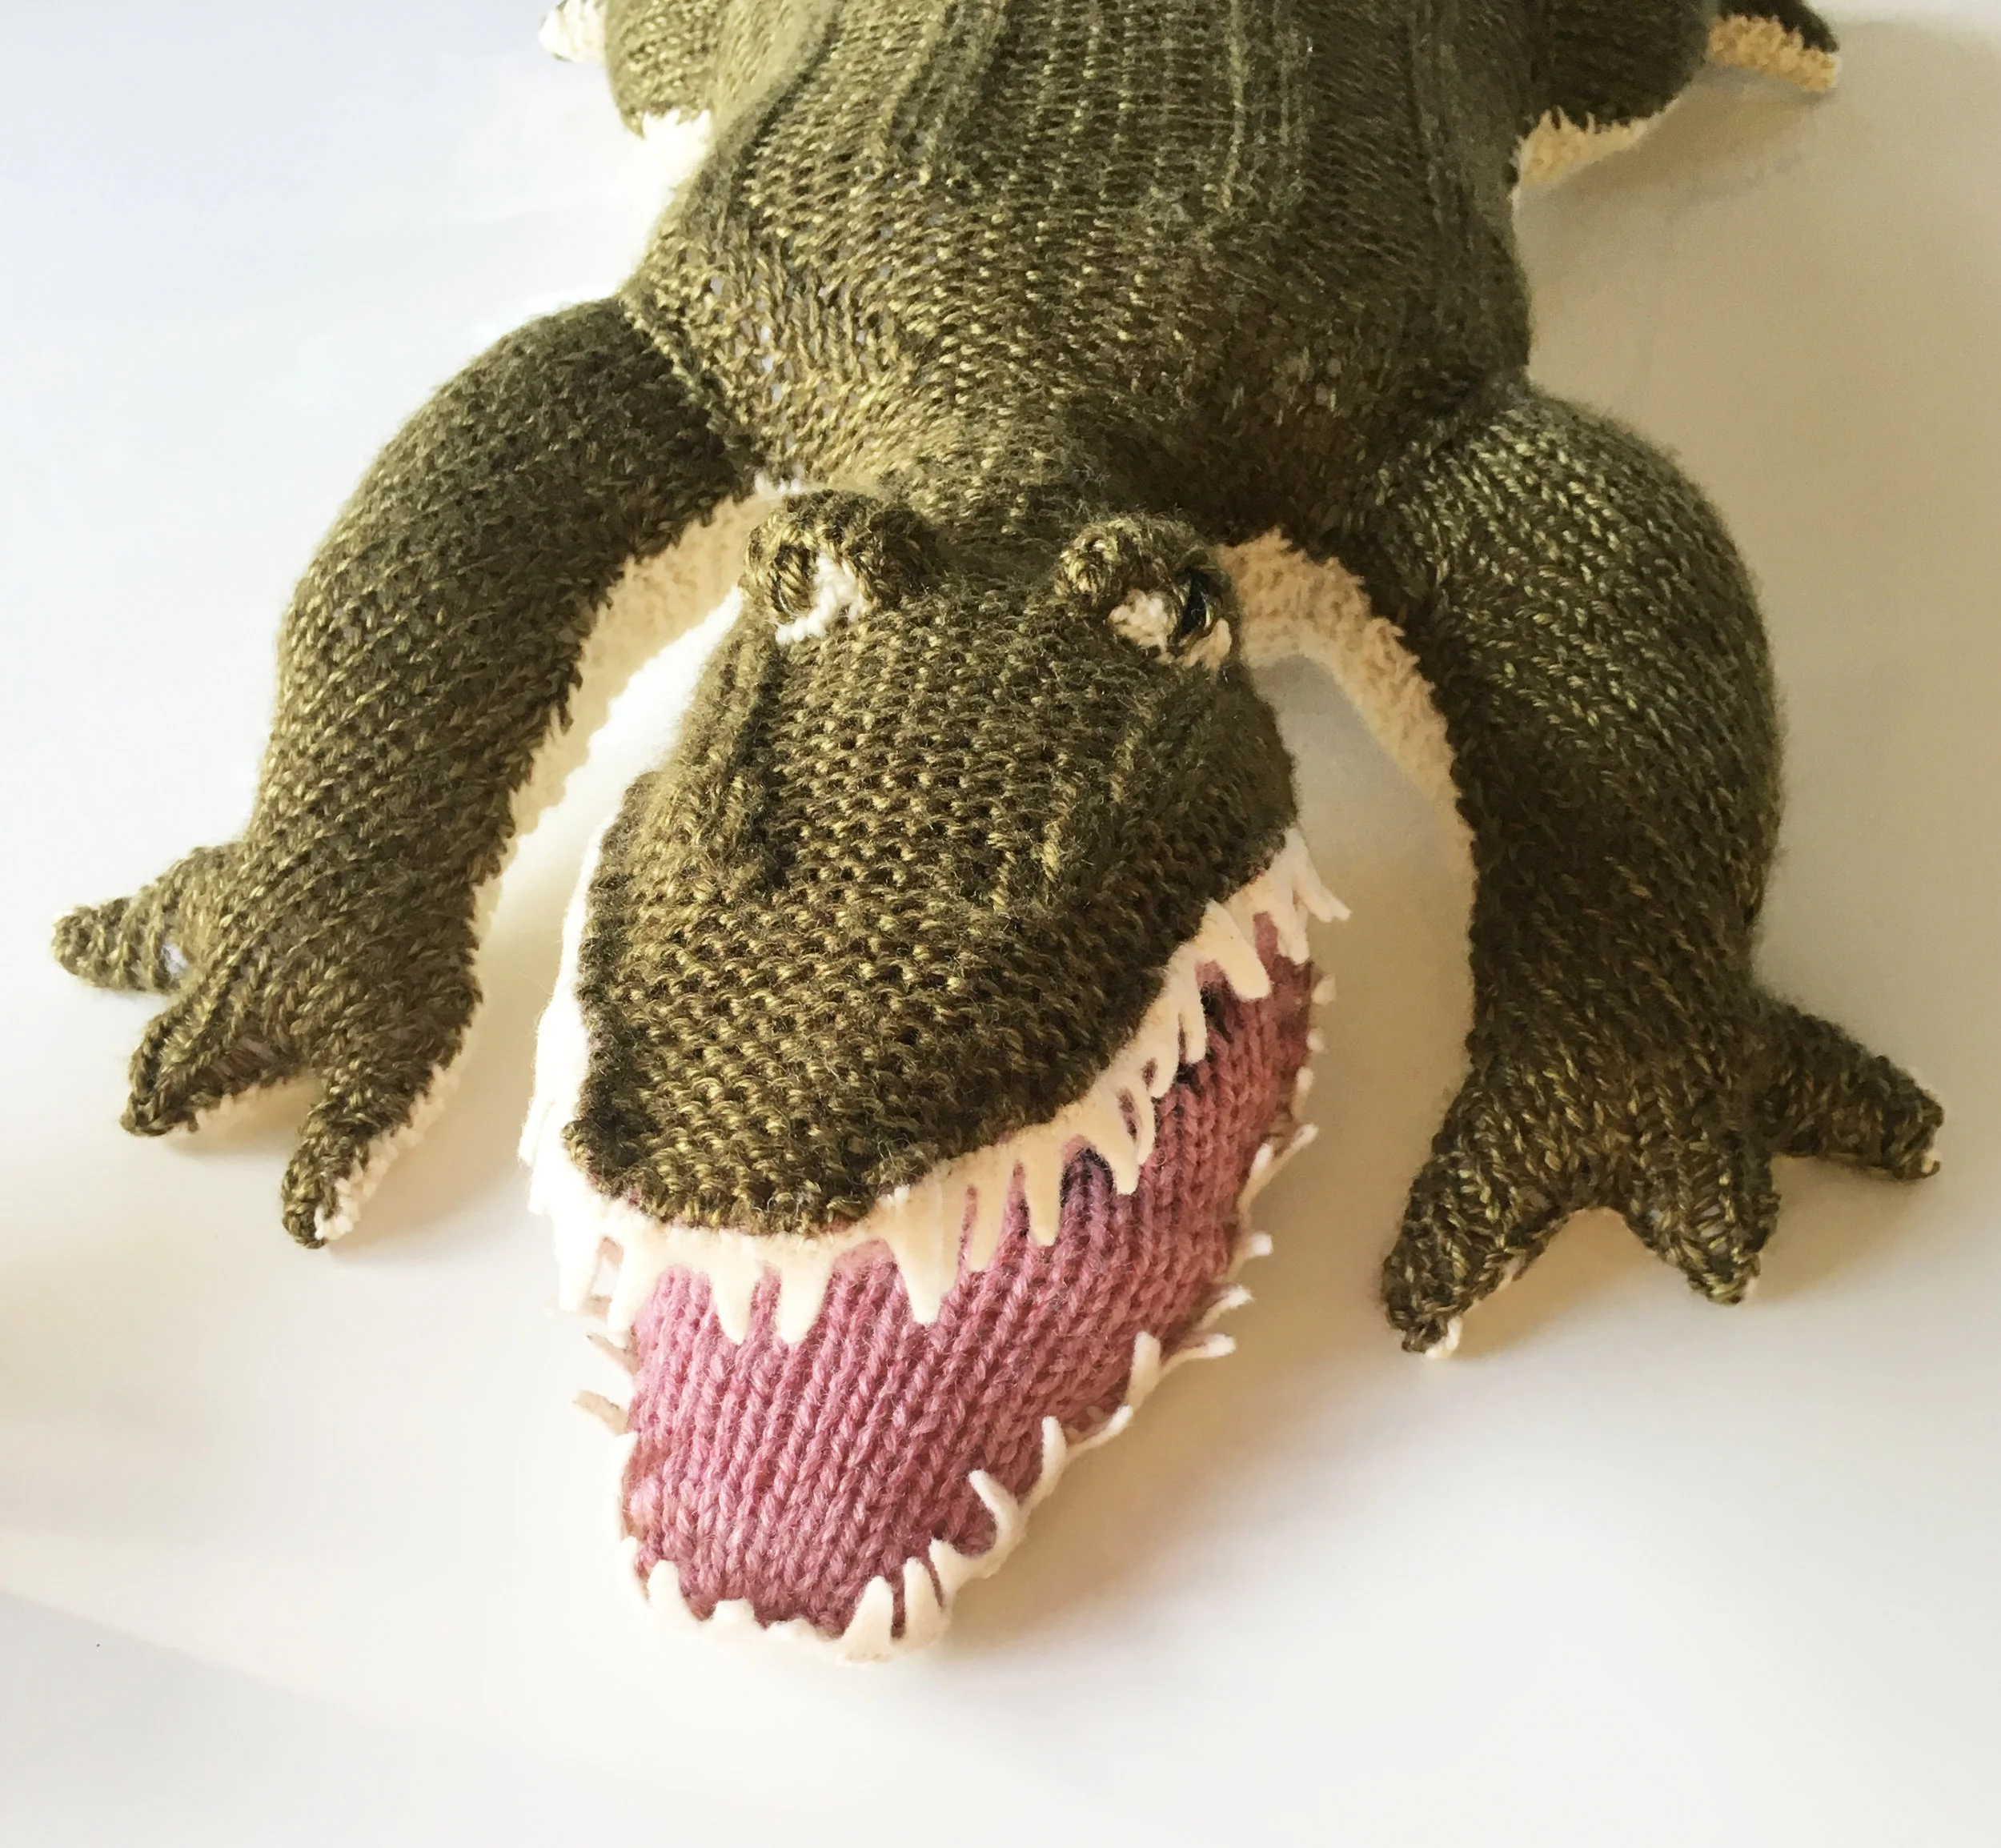
i knit a flat piece in pink and black wool in the same shape as the head and seamed it to the inside to create the "open" mouth.
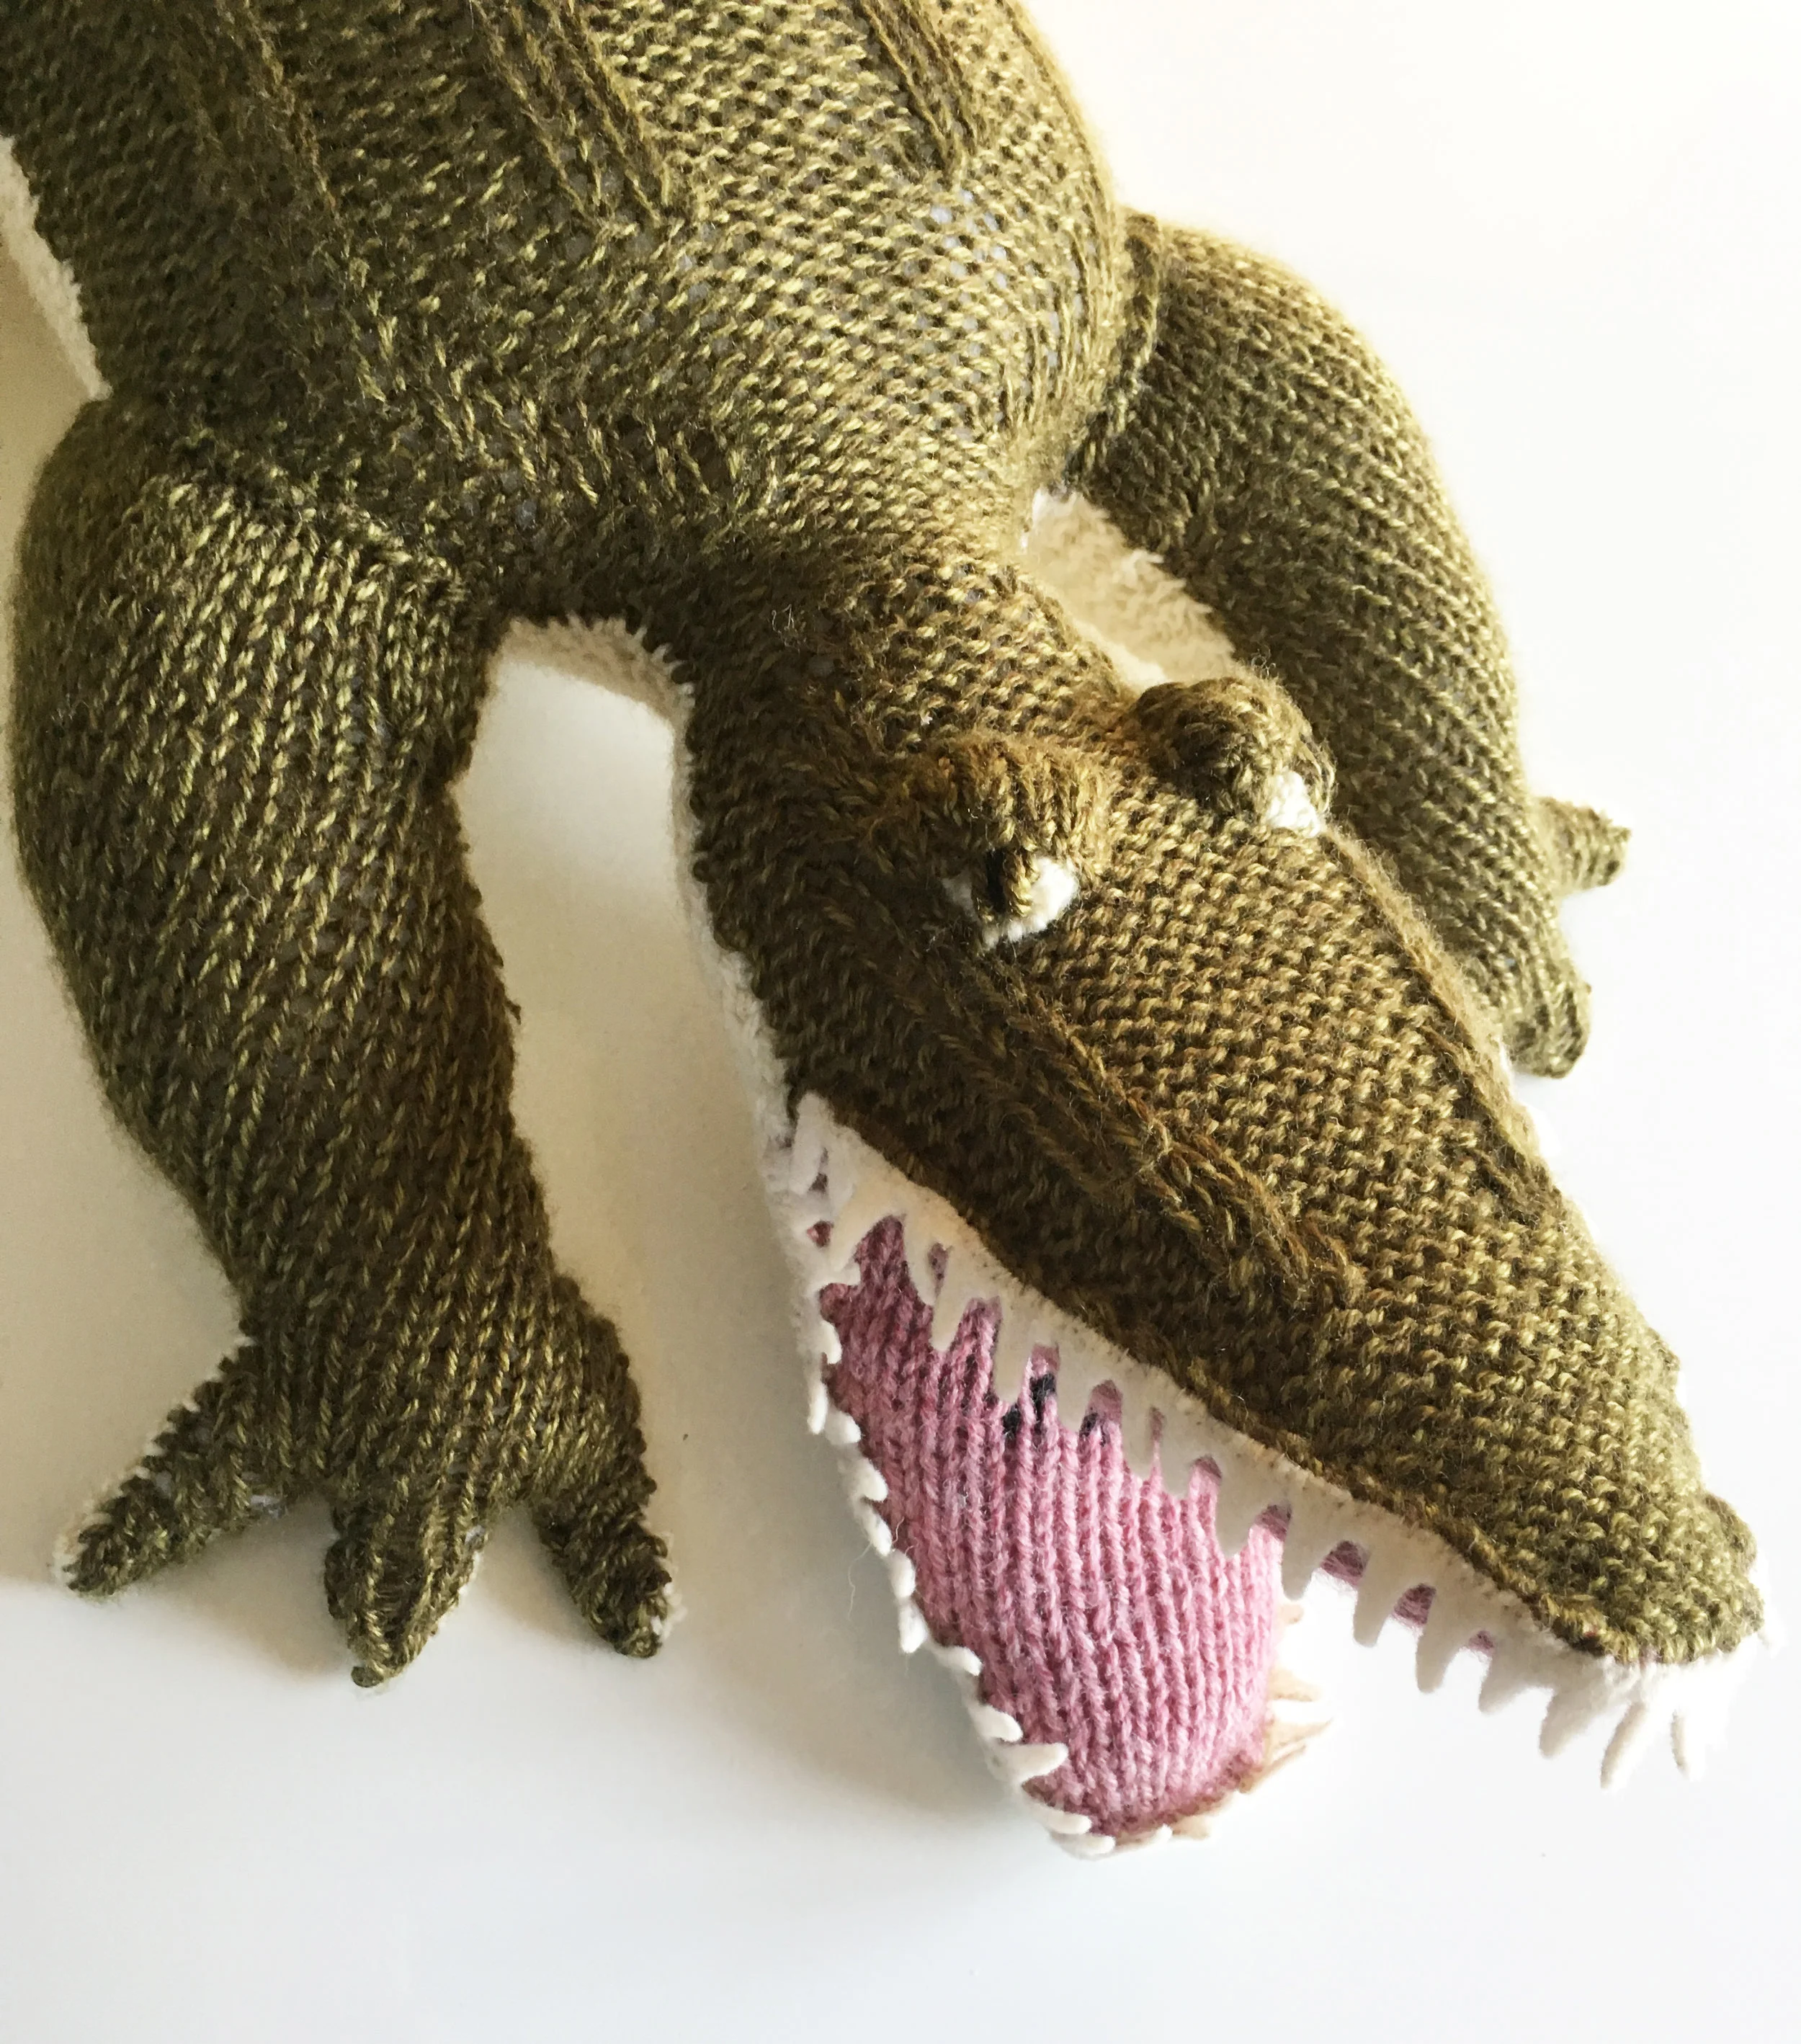
the eyes are simply 2 flat knit pieces (white eye and green lid) seamed to the face and puffed up to make them 3D, and i used a tapestry needle to embroider the iris and pupil.
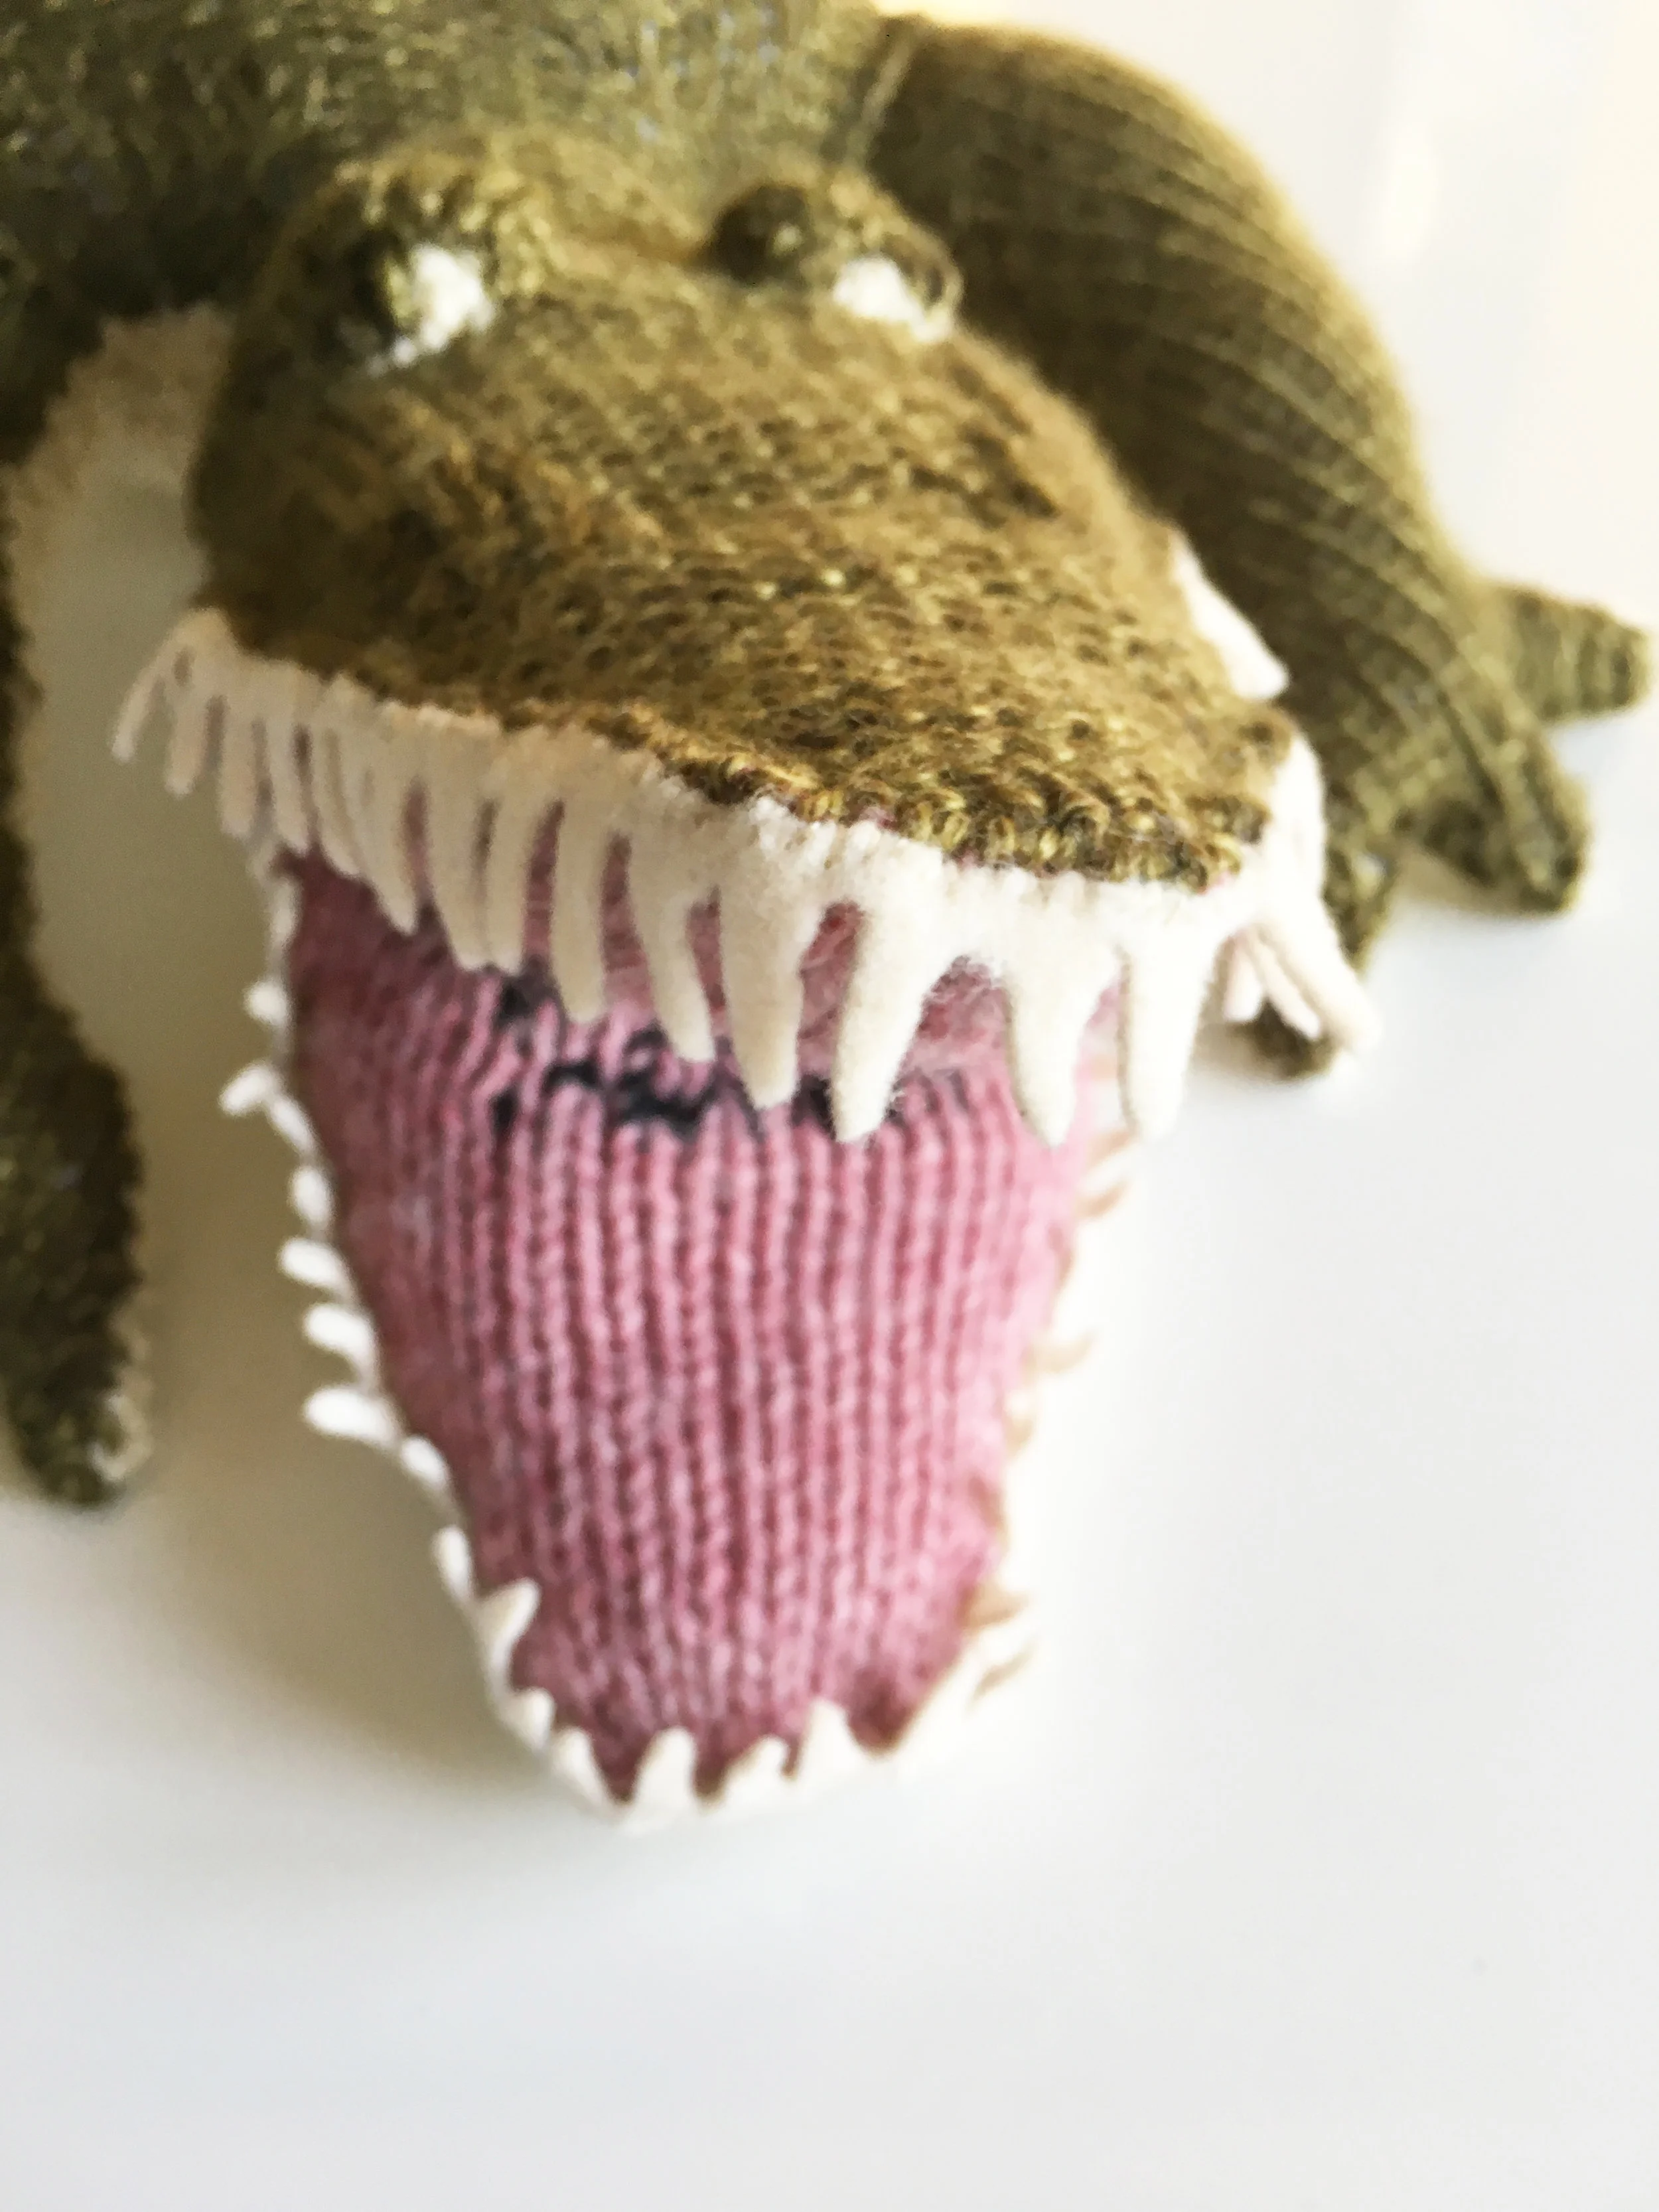
to make the teeth, i cut a narrow wave pattern down the middle of an approximately 2x11” strip of felt. the two halves became the top and bottom teeth and i simply hand-stitched them to the edge of the mouth.
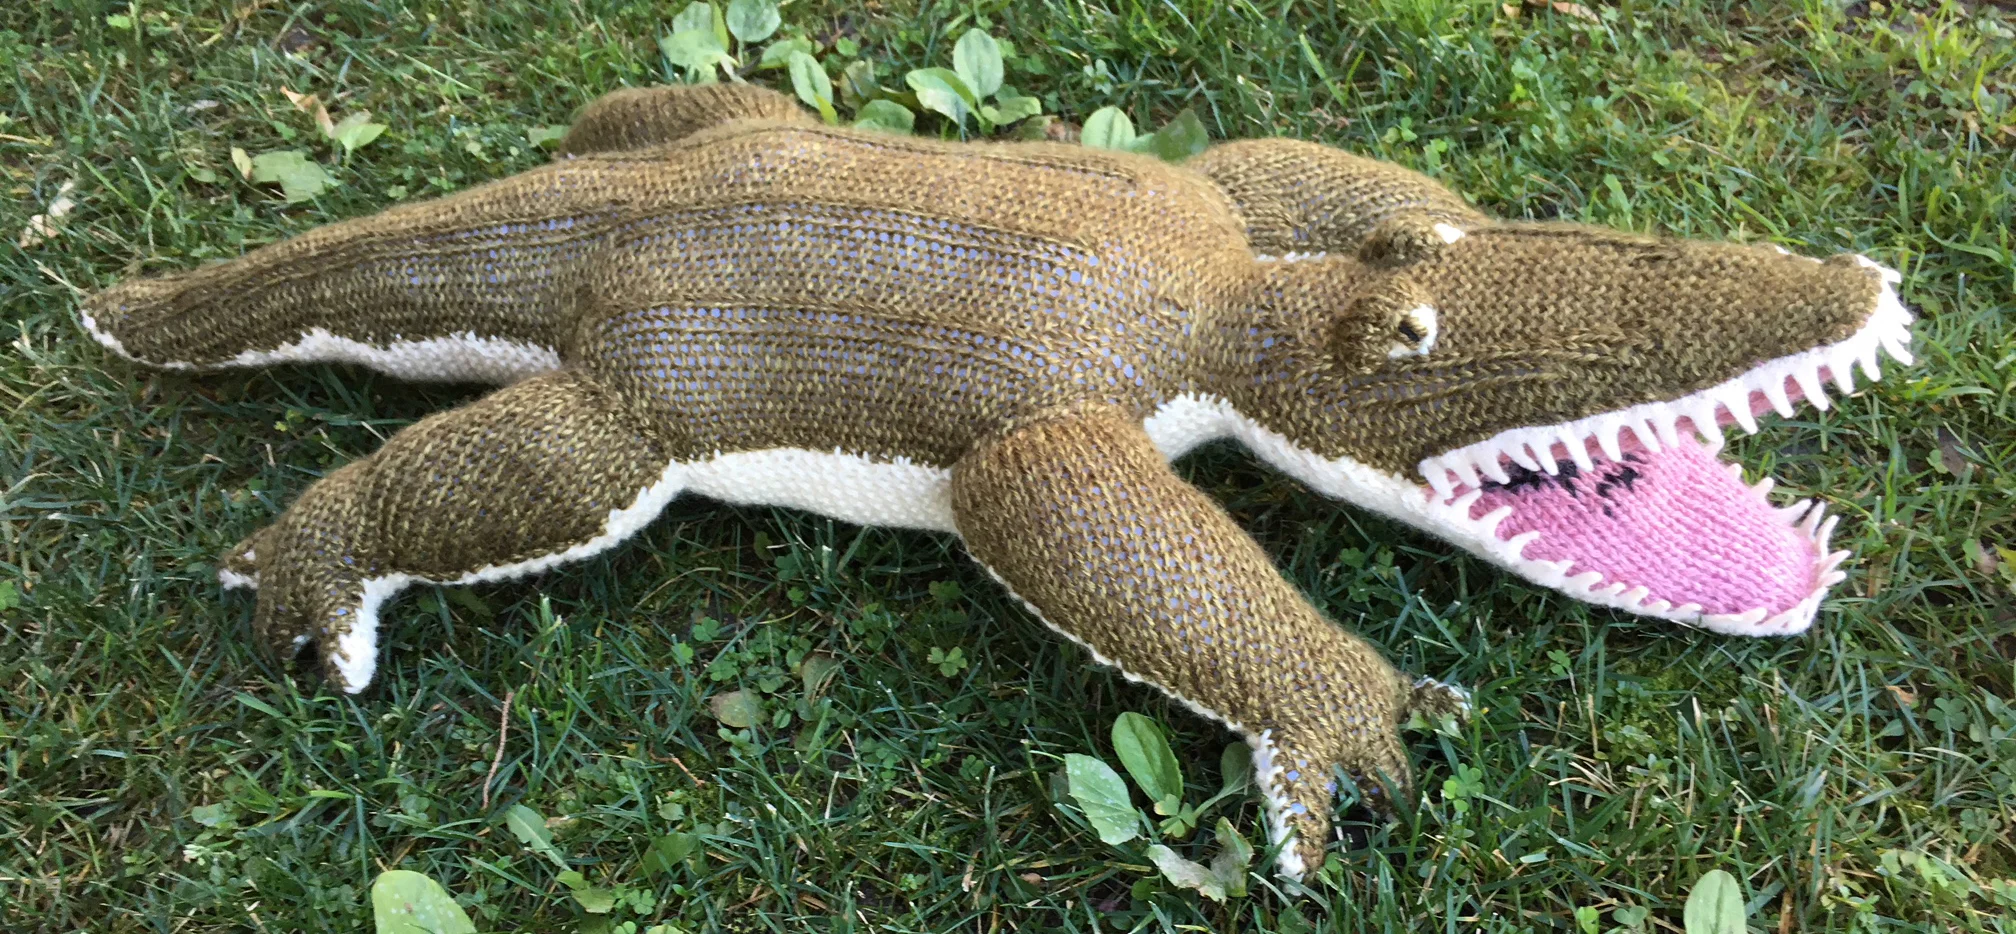
finished dimensions are approximately 12x24".
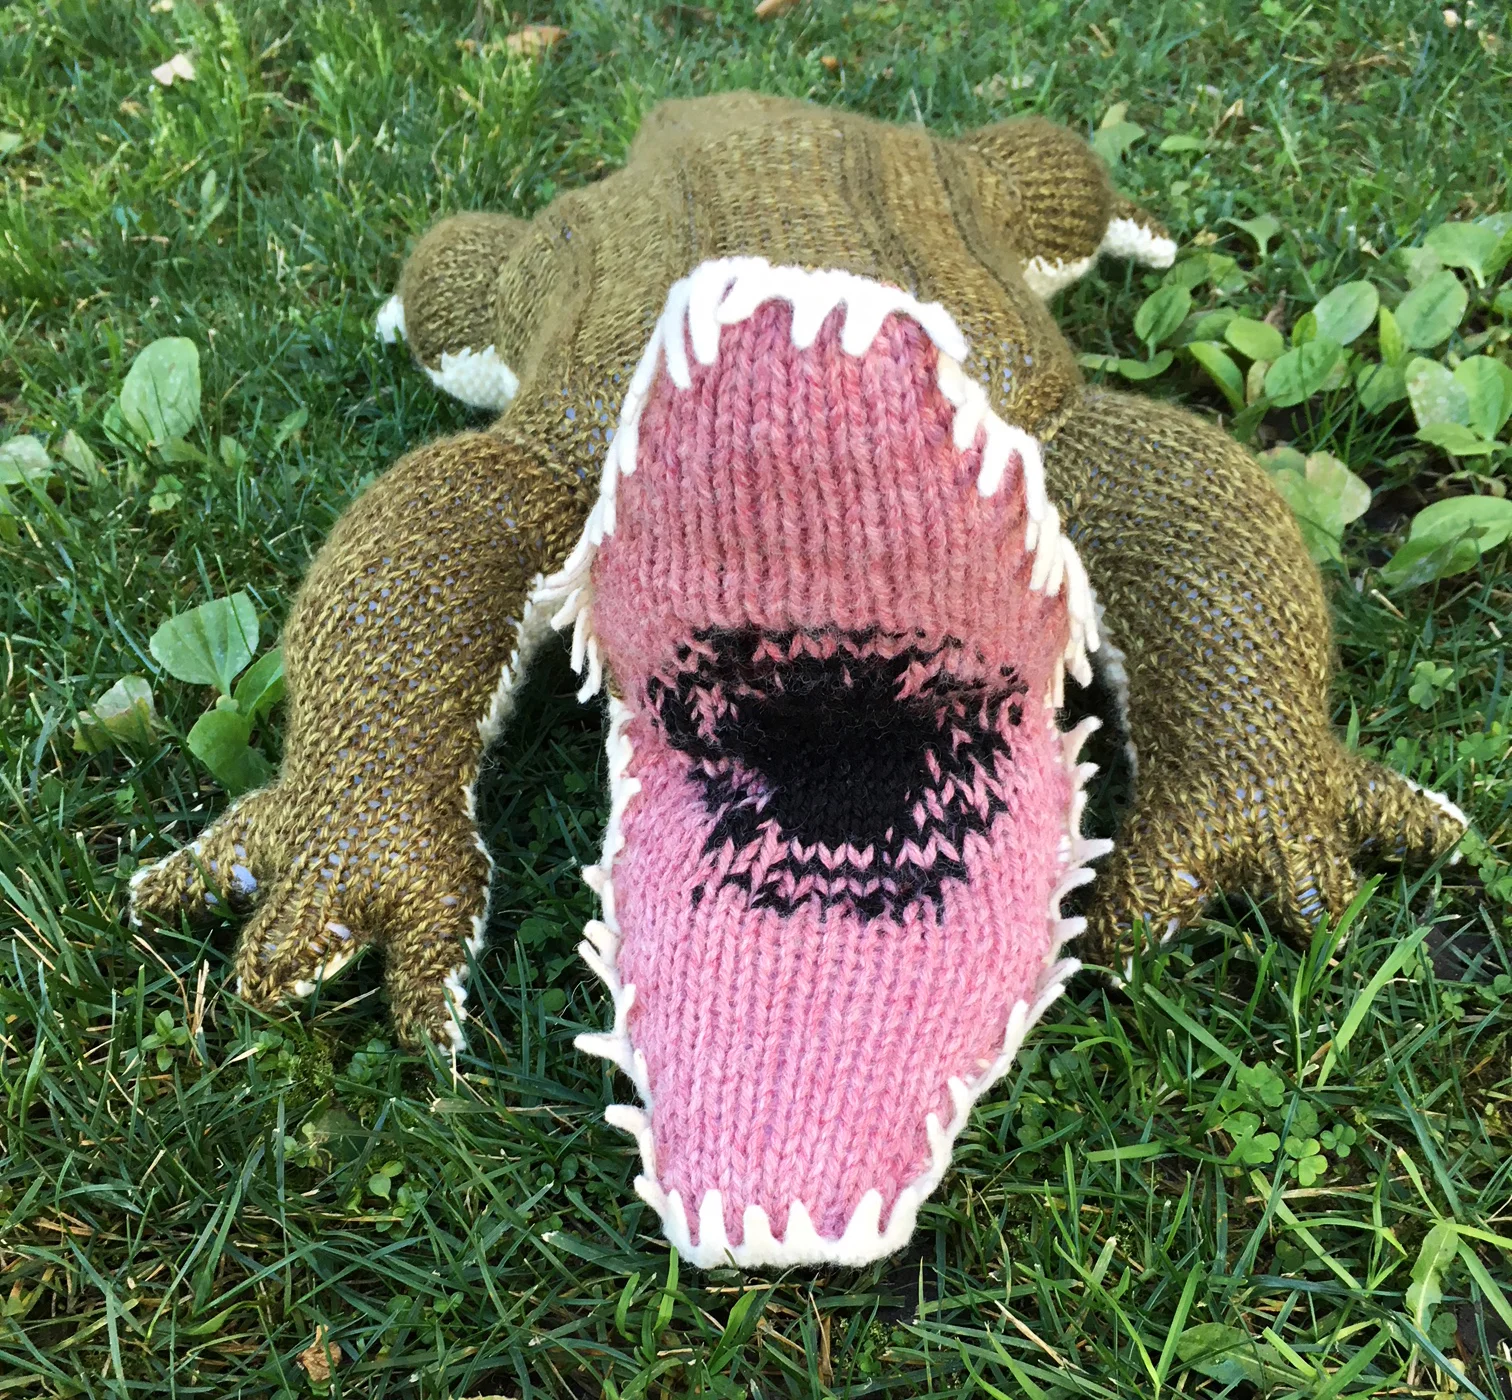
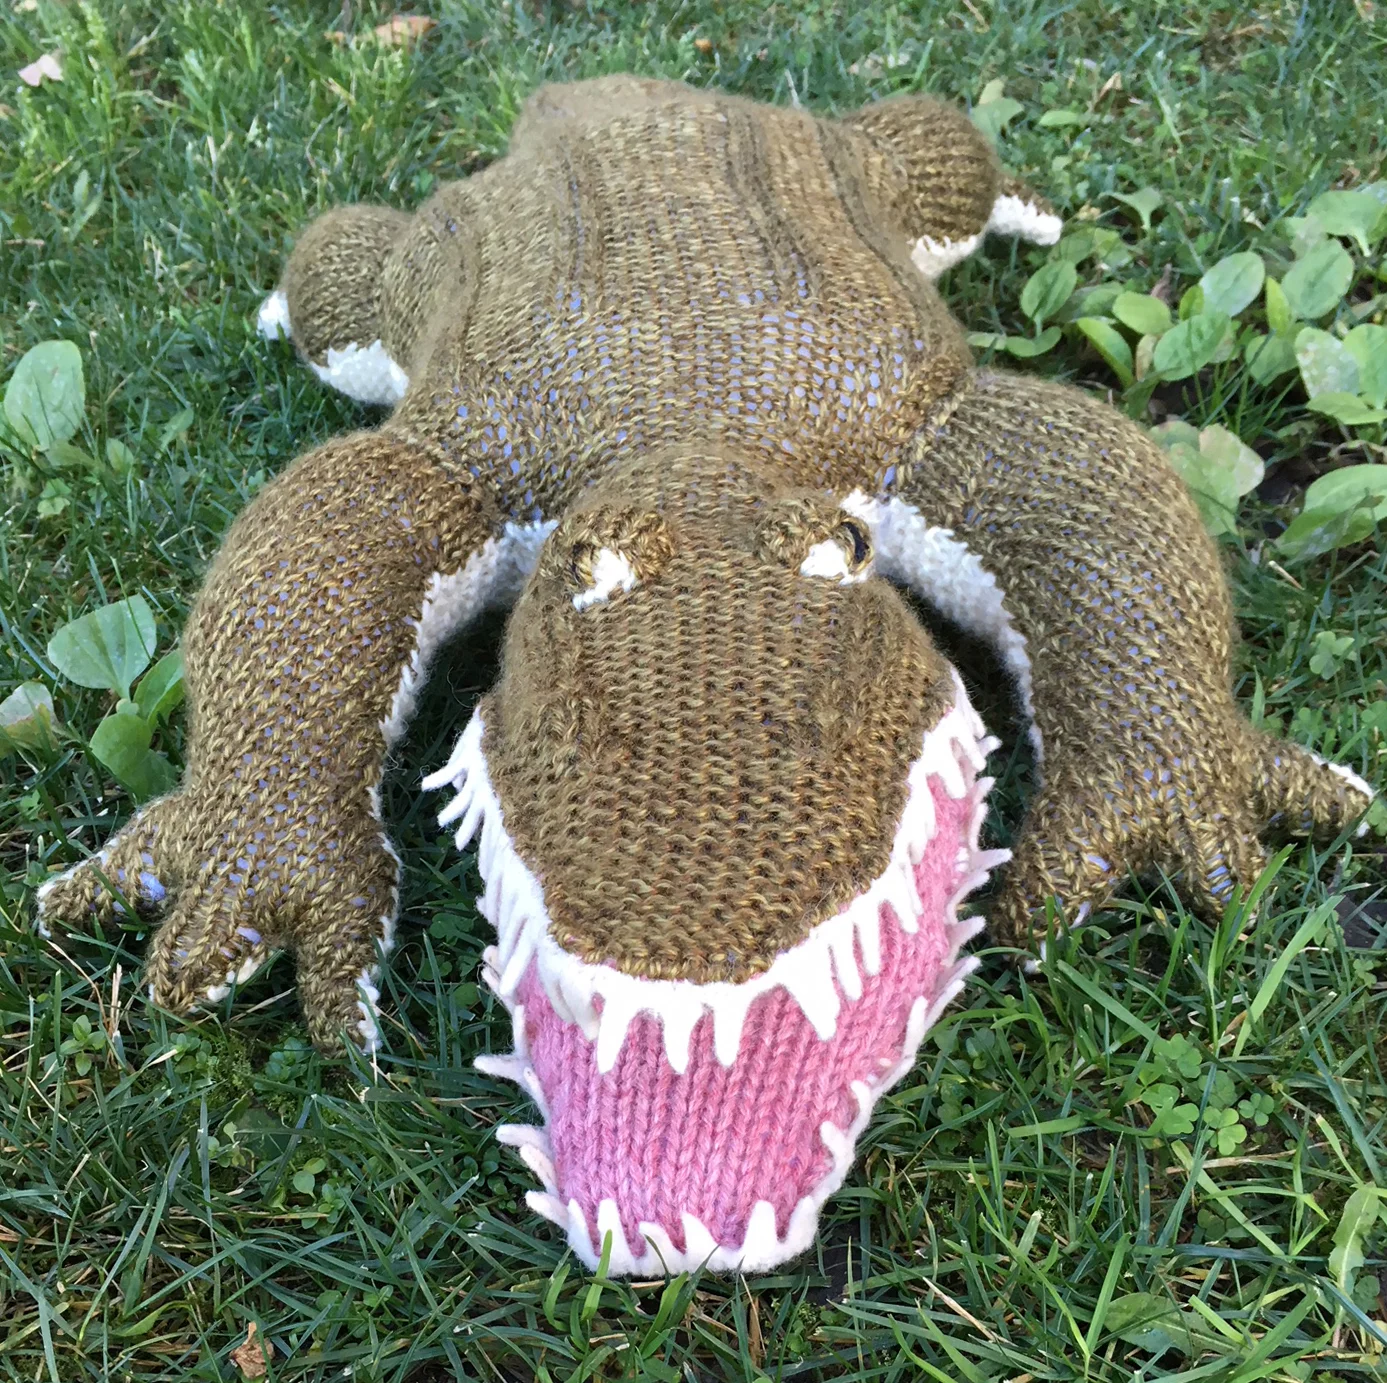
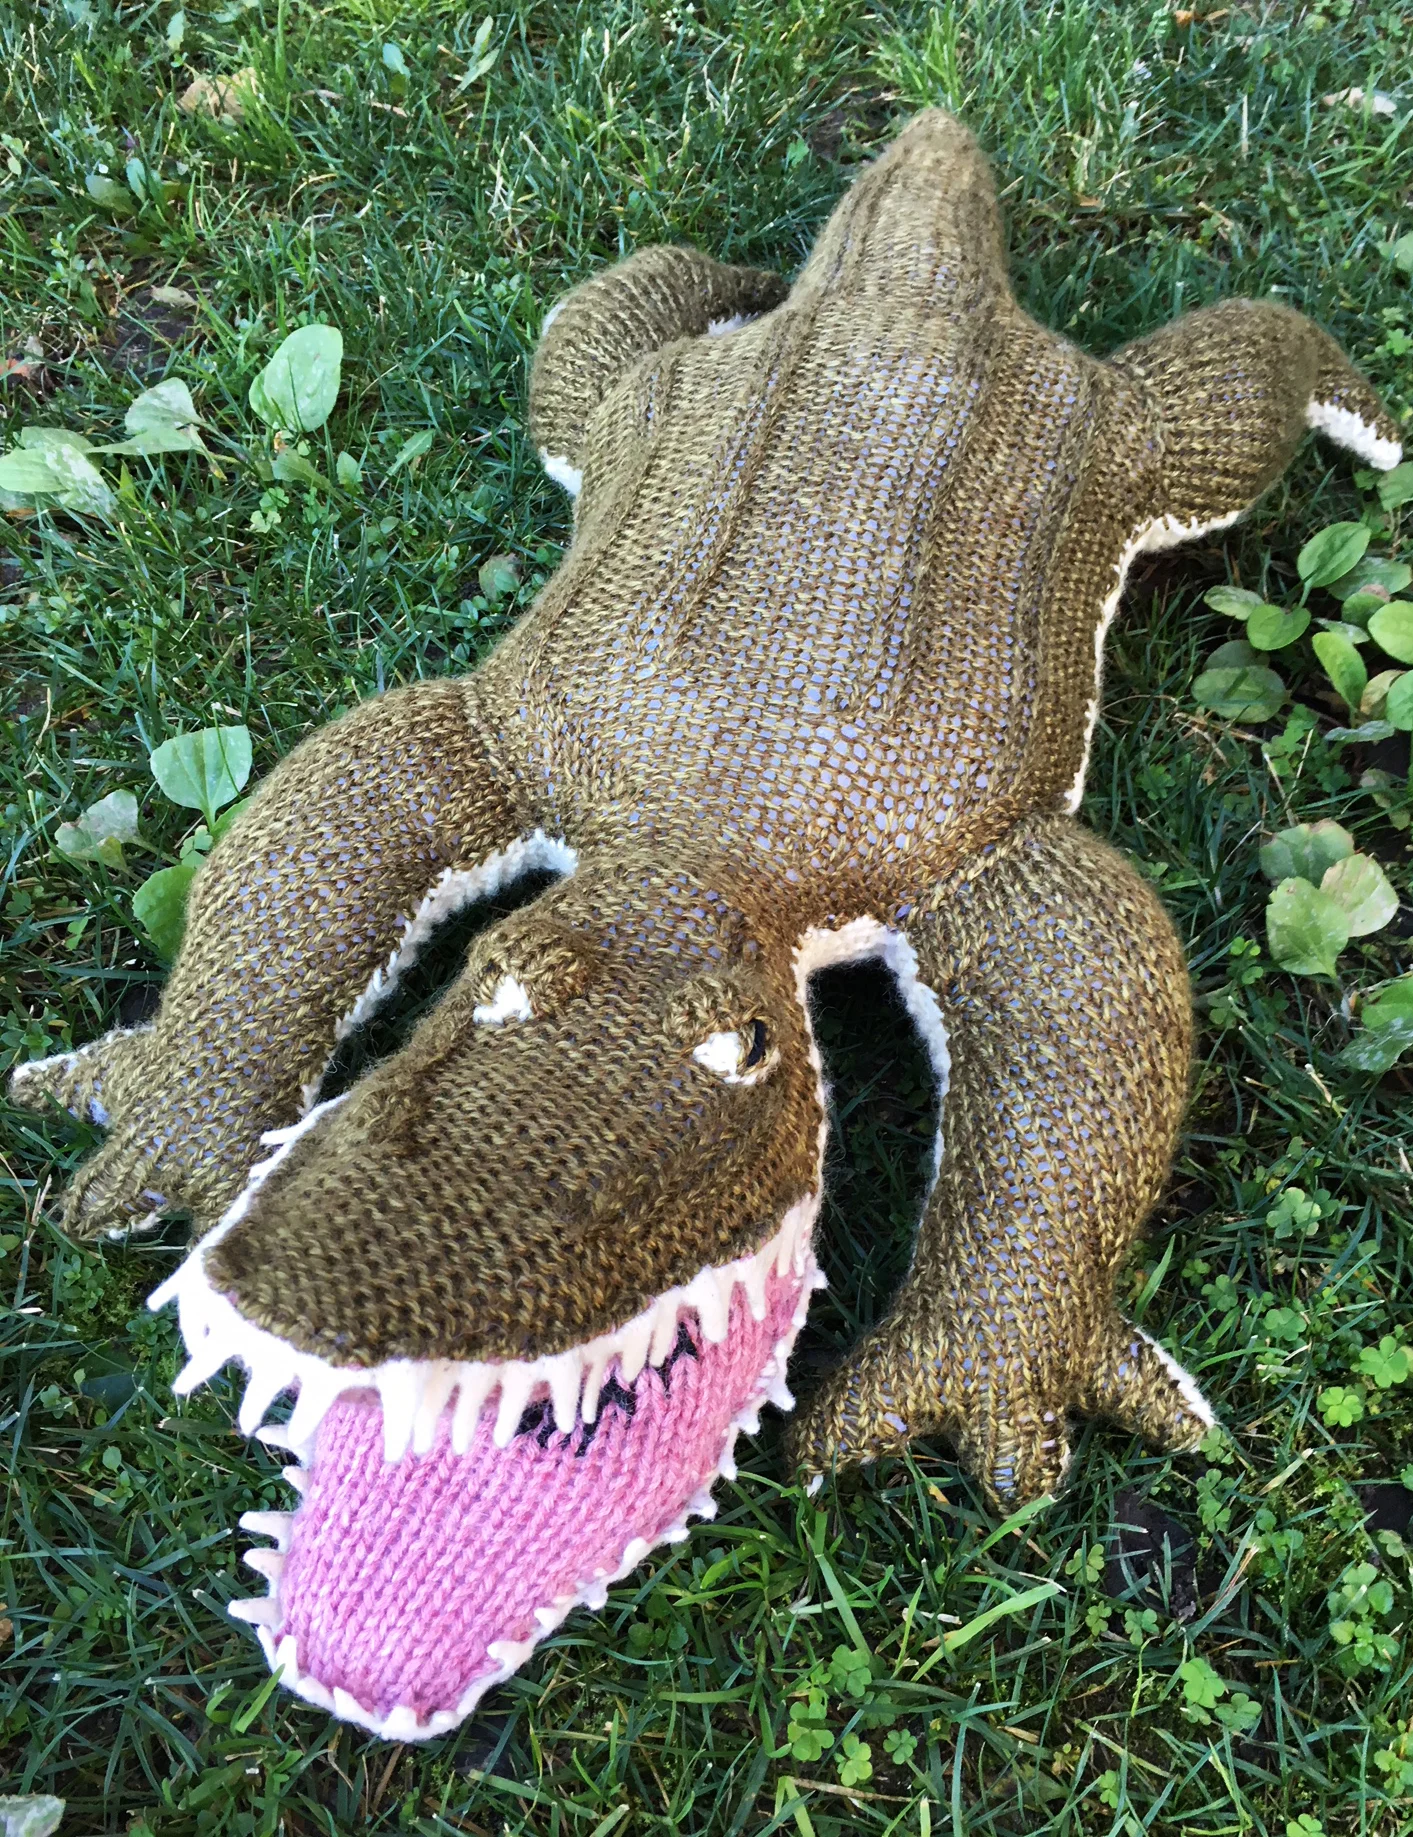
i'm very pleased with the way he turned out! what do you think of my knit alligator design? check out my knit toys page if you'd like to see more photos!
if you'd like to commission a custom toy, please email me at elisemade@gmail.com <3

#WIDN: patching jeans with crocheted lace
i follow and admire so many amazing artists on instagram, so my feed is a constant source of inspiration for knitting, crochet, weaving, embroidery, hand-lettering, illustration, and more. the visual candy is so good and there is so much that sometimes (okay maybe a lot) it takes me down crazy art-overload time warps that i emerge from, wide-eyed and blinking, wondering where the hour went and why i haven't made anything yet.
but every once in a while, i come across a really cool idea that makes me put down my phone and run to my stash. this time, it was a post from lion brand yarn linking to a great blog tutorial showing how to use a bit of crocheted lace to patch holey jeans.
i gasped! it was exciting for two reasons: first, anyone that knows me knows that i'm desperately searching for any excuse to embellish things with yarn (#PutASweaterOnIt), and secondly, i recently taught myself to crochet so i loved the idea of playing around with some lace! having just patched a hole in the crotch my vintage 501s with some shibori embroidery, i knew a knee hole patch was the next step in their fibery customization.
the blog tutorial references and links to the original blog post that inspired her, and wow...talk about inspo!

but, being stubborn and wanting to try my luck at a freehand pattern (and also admittedly not knowing how to read crochet patterns very well), i grabbed a 3.75mm hook and some variegated fingering-weight silk wool and just started going for it.
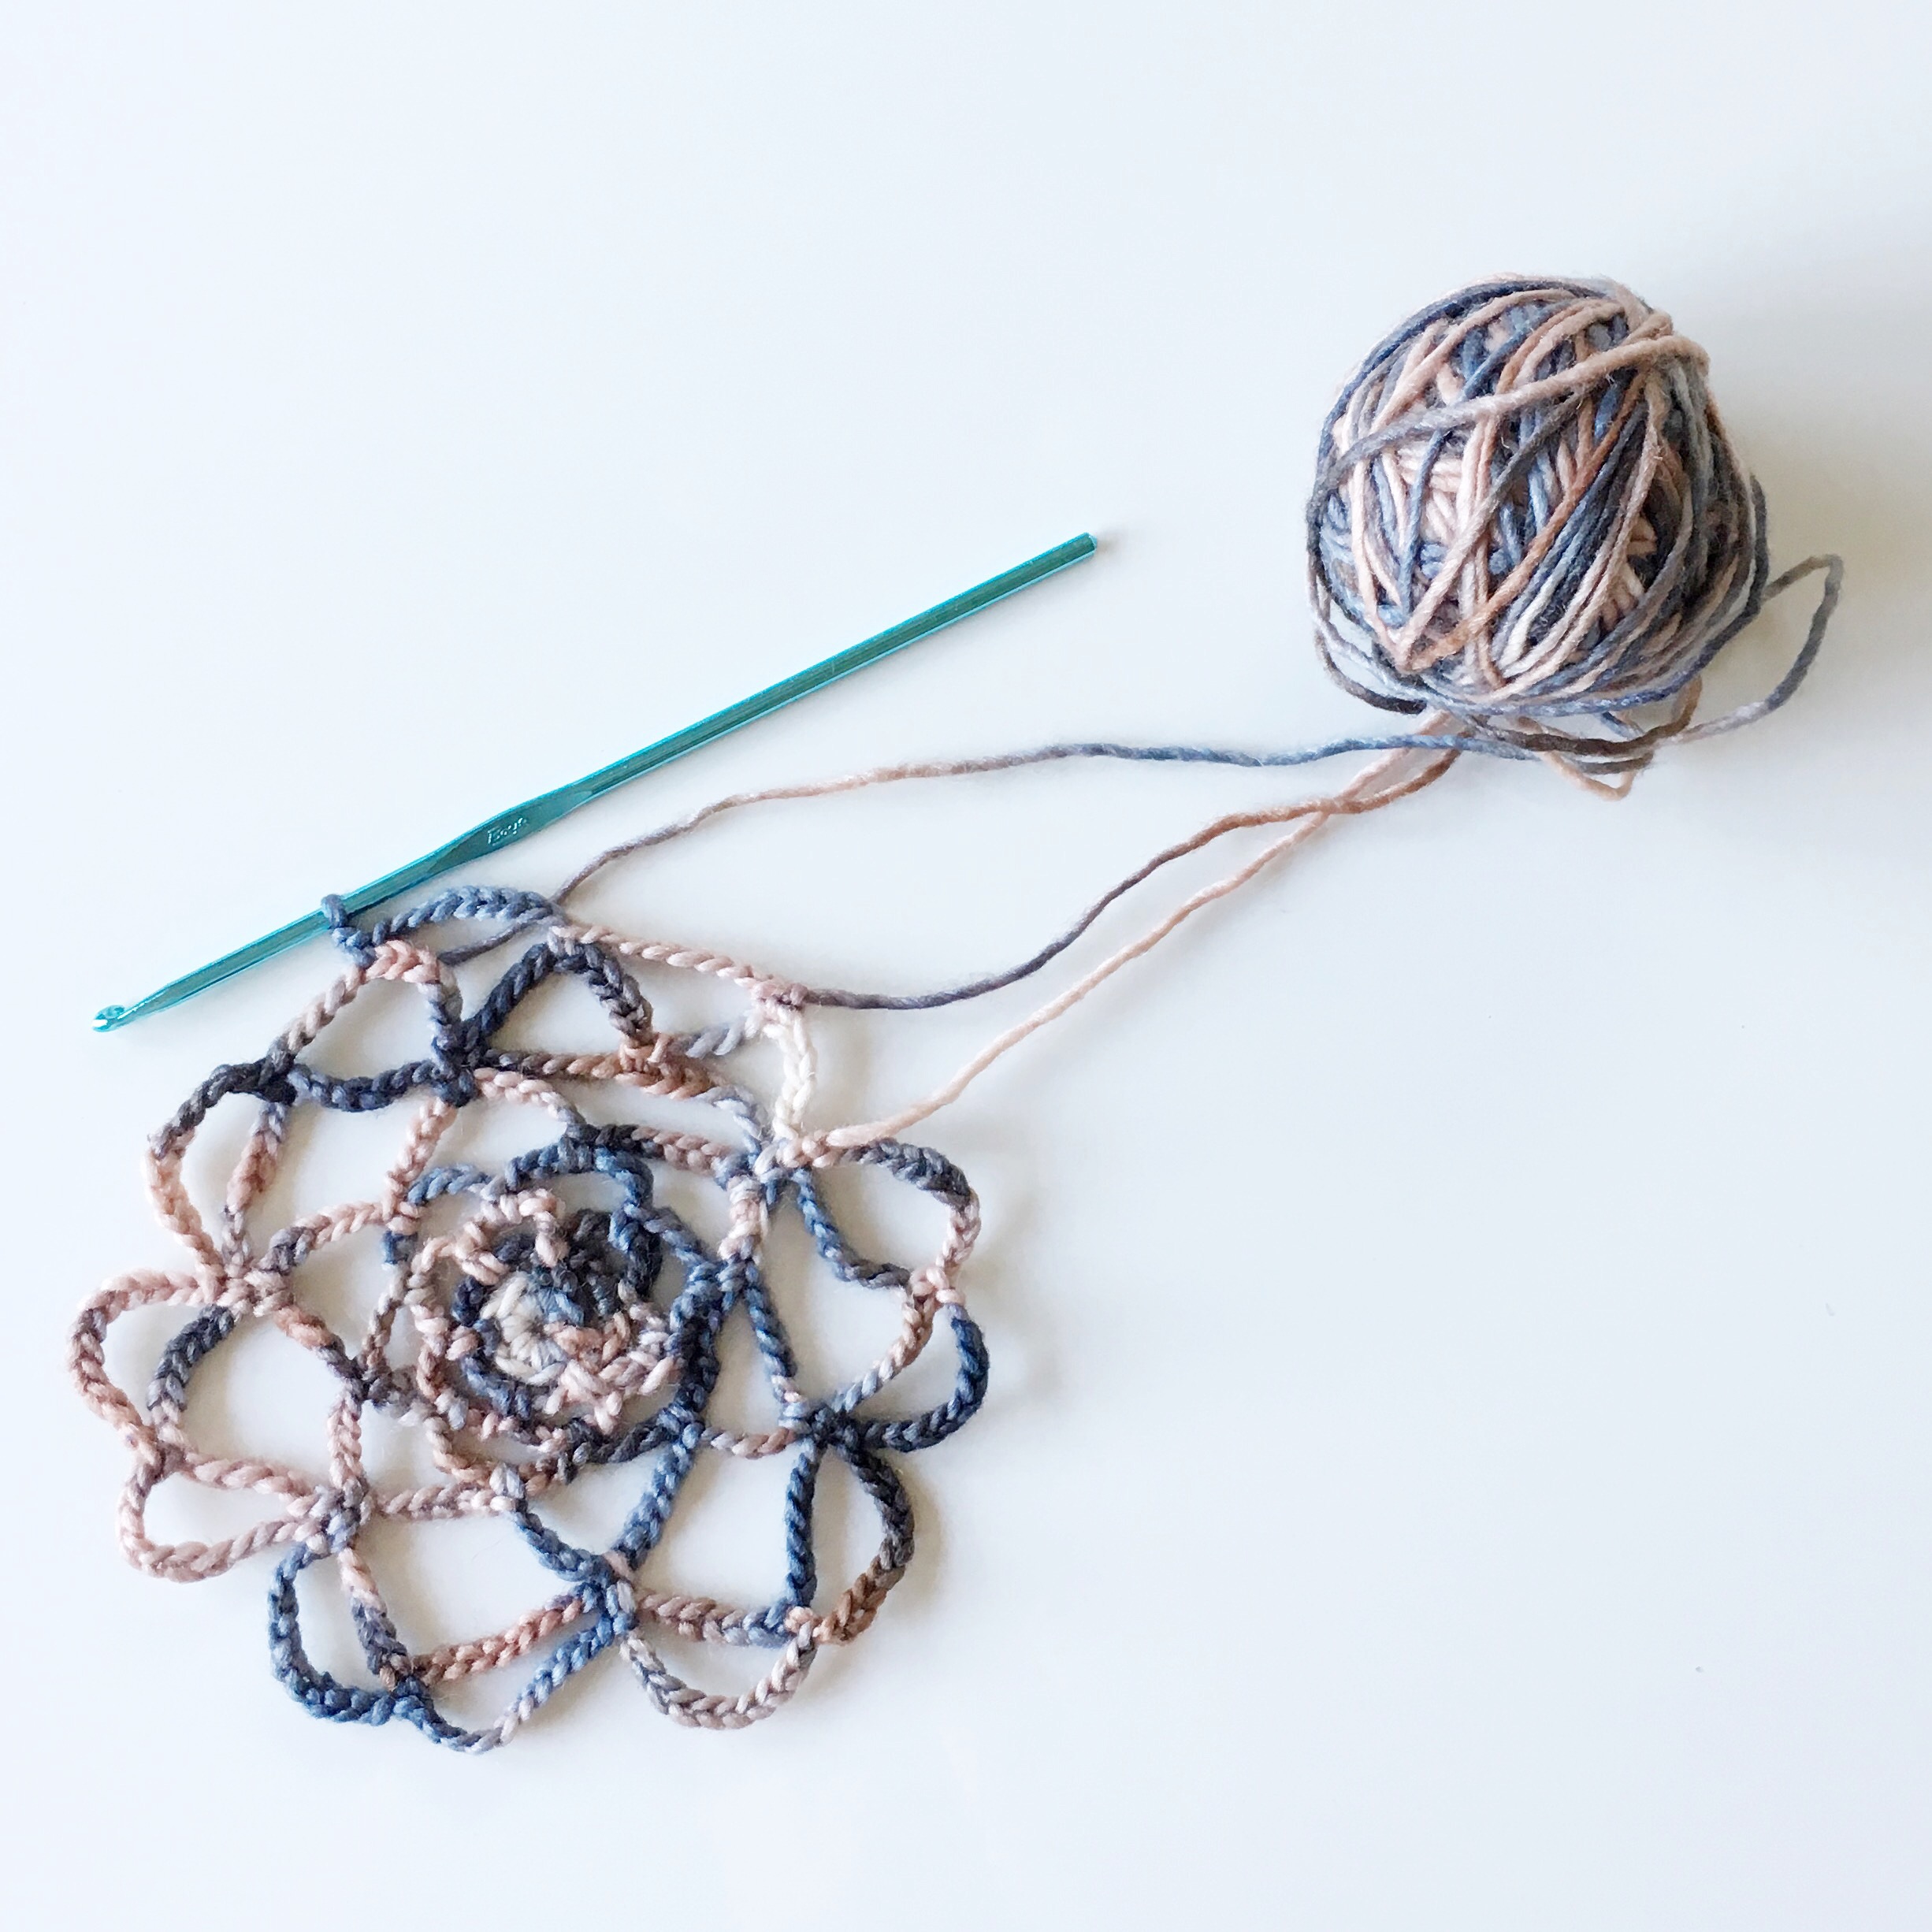
now bear with me, i don't really understand crochet patterns and have never written one, and there are certainly a million better doily patterns around (like here's one from the aforementioned blog post that's great) but i will try to explain my process as best i can. i started with a beginning chain of 4 stitches, joined in the round, and single-crocheted 6 stitches around the circle. marking my starting point with a bulb safety pin, i made a chain of 6 stitches and anchored it two circle stitches away, and repeated it twice more so there were 3 anchored chains around the inner circle. to start the next round, i anchored my yarn to the middle arch of the first loop with a single crochet stitch, and then increased the amount of chain stitches to 8, anchoring each in the middle of each prior 6-chain loop. as i went around the circle, i kept increasing the chain stitches by 2 and anchored them to the middle of the previous row. i just kind of kept going until the size of my lace stretched over the knee hole in my jeans.
it's important to note that you'll need to be wearing the jeans as you patch them, to ensure the patch and your stitches are properly placed and attached to withstand bending and stretching. i sat on the edge of my couch with my knee comfortably bent and attached the lace with some embroidery floss and a simple running stitch.
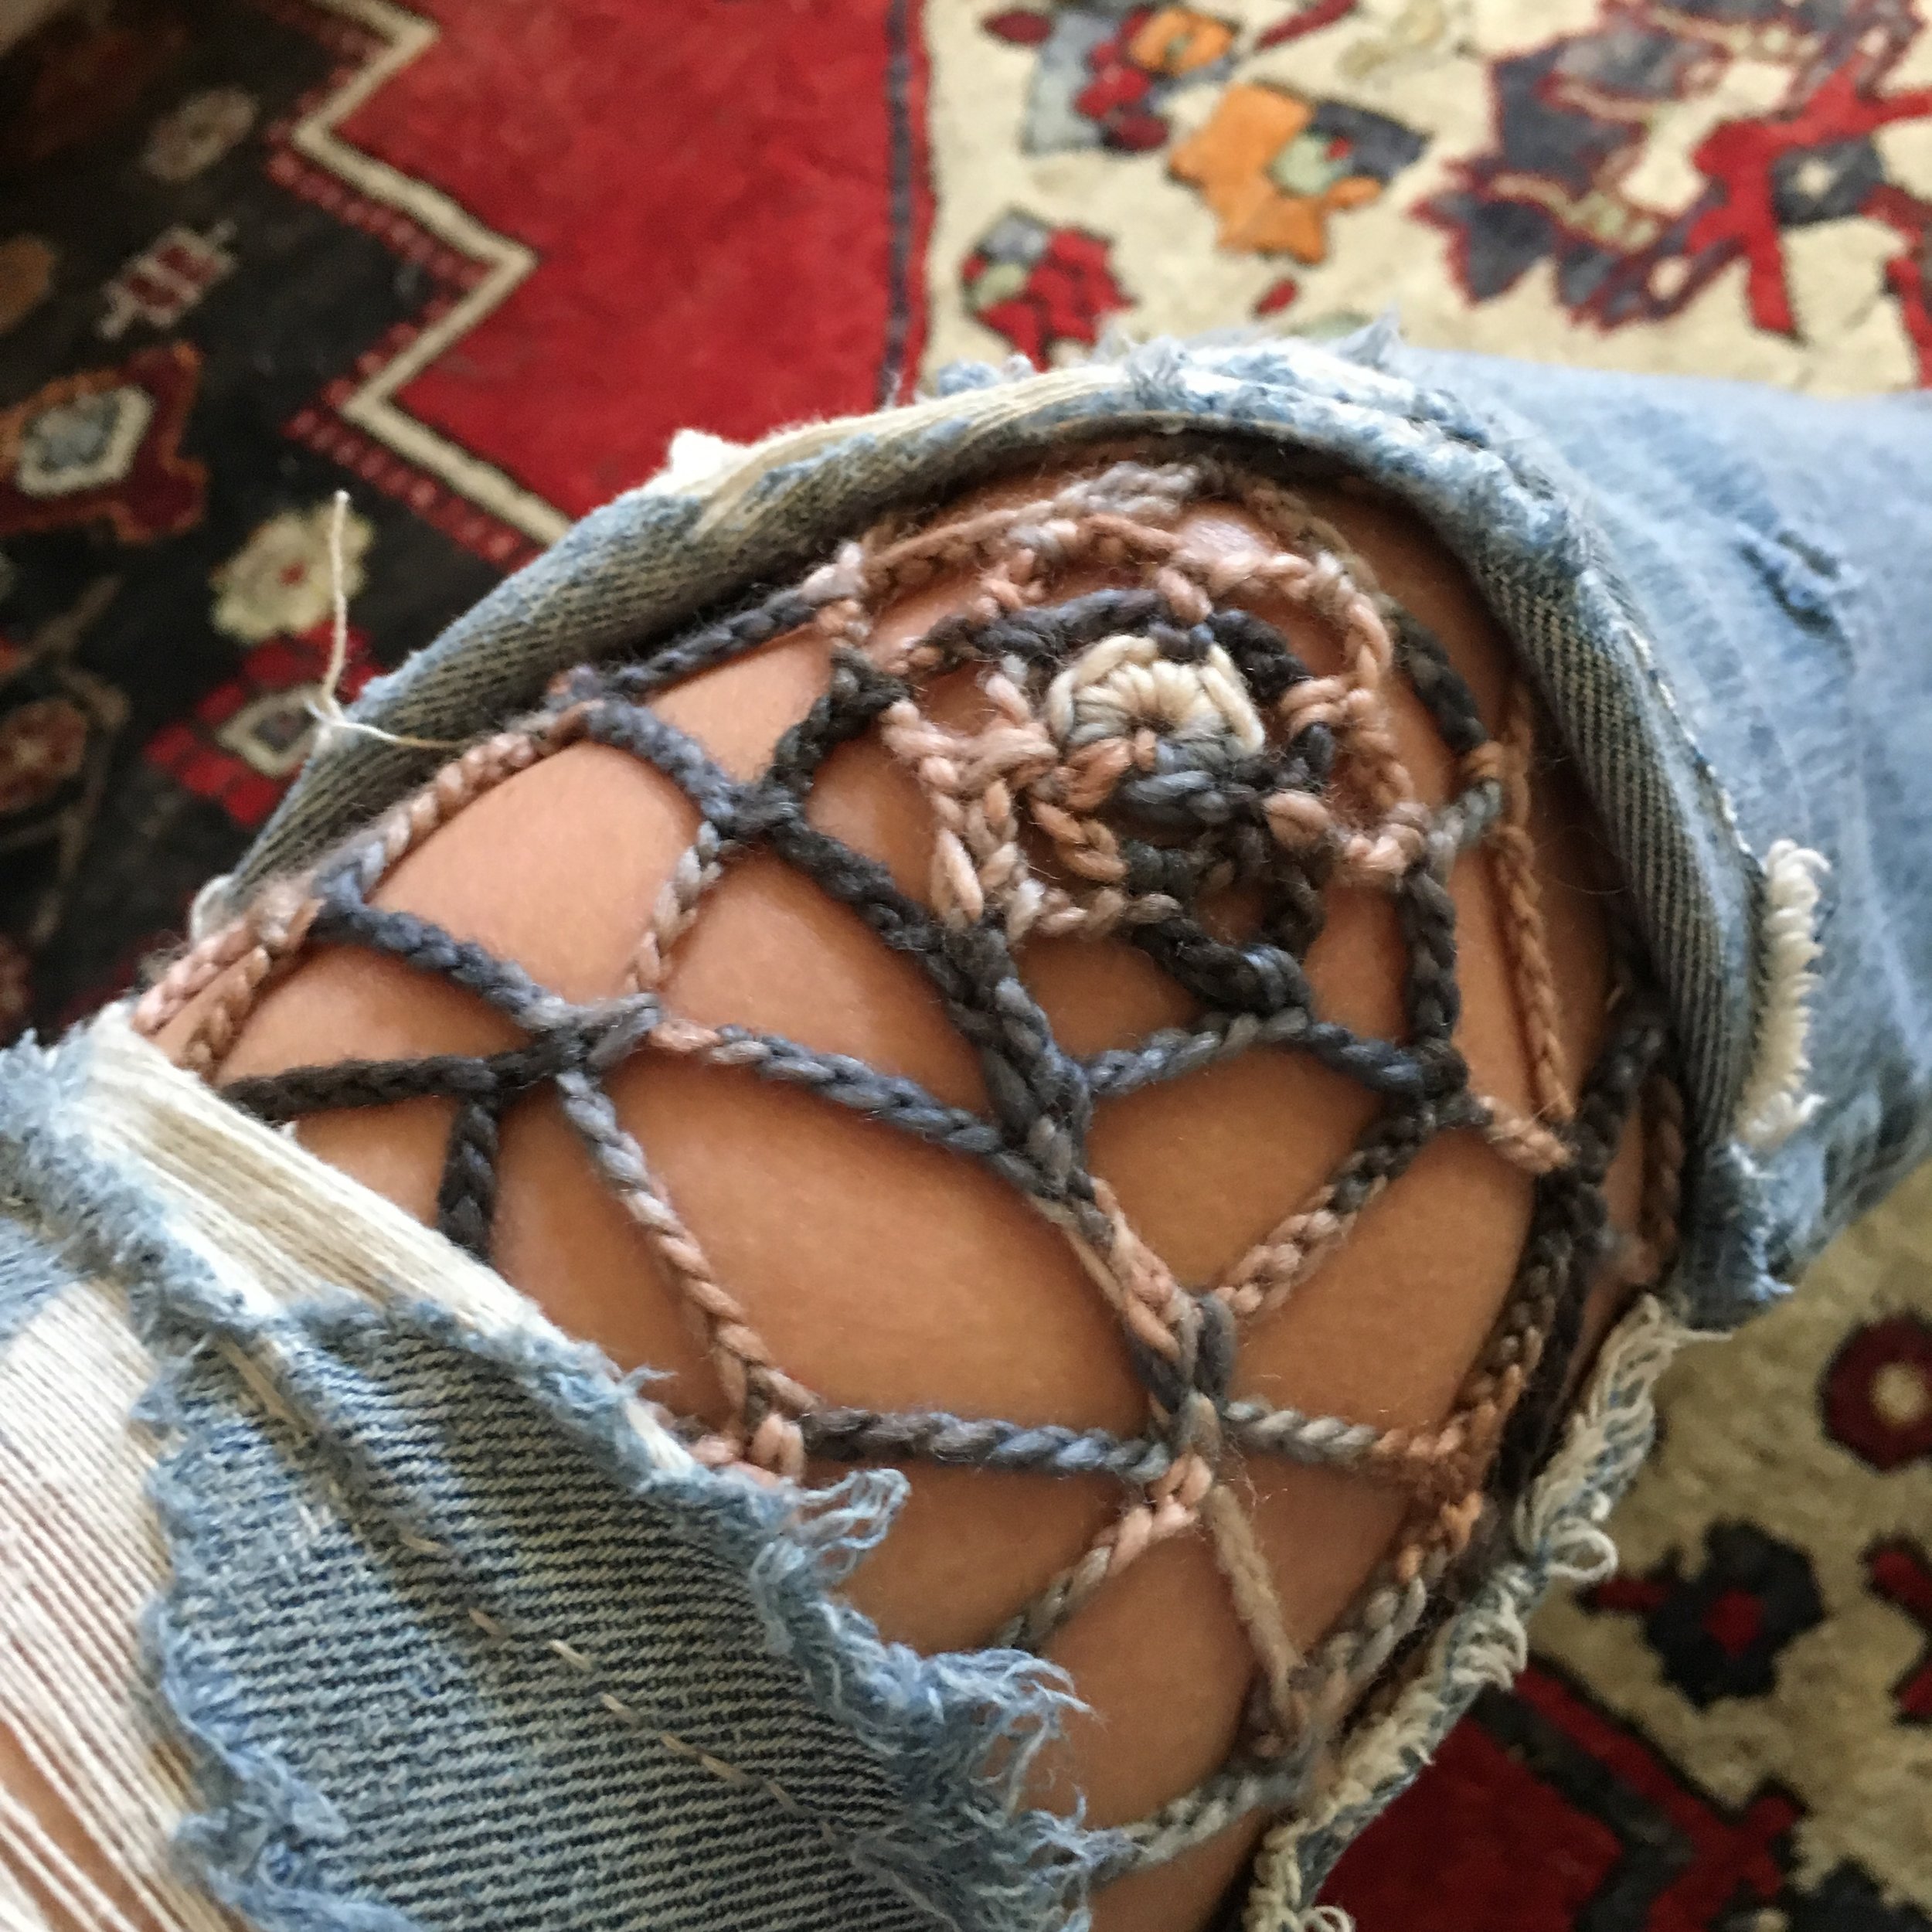
i love the way it turned out! the pretty, neutral colors of the variegated silk wool i chose blend in nicely with the faded jeans, but i love the unexpected lacy, fishnet-like look.

will you try patching your jeans with some crocheted lace?