Introducing Woven Straps: A Sexy Boatneck Tank Top with Woven I-cord Straps
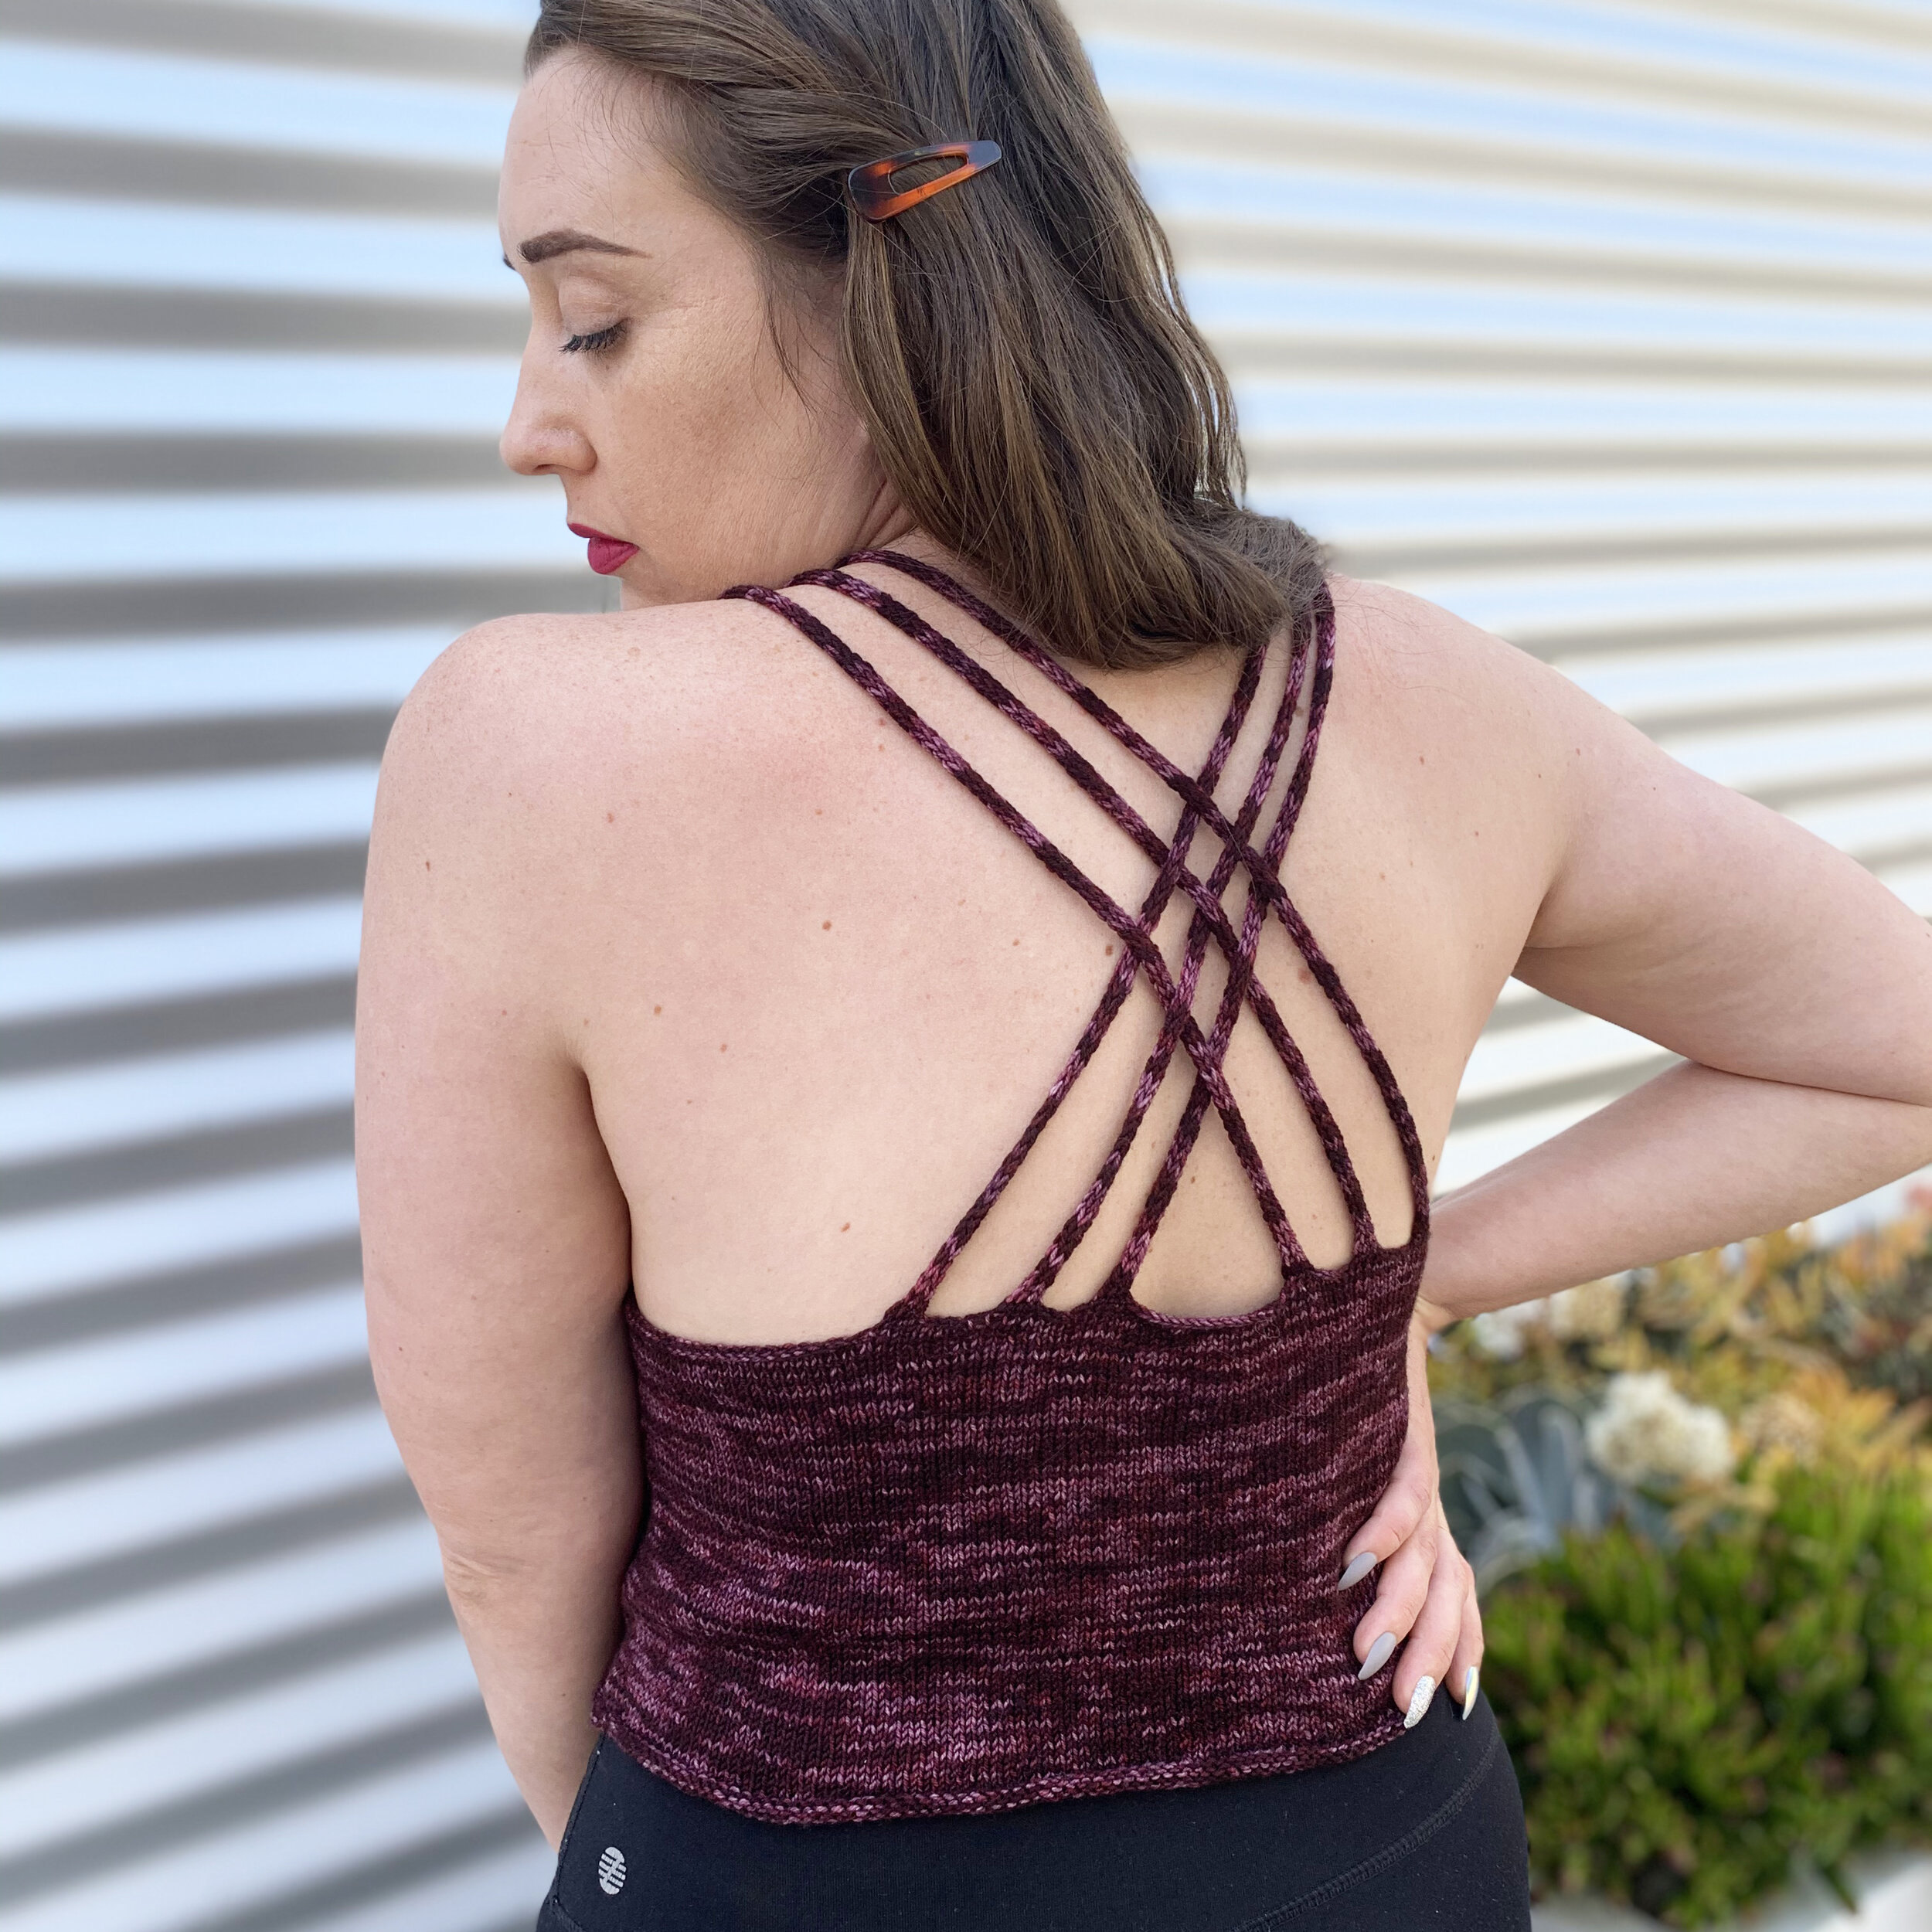
I am super excited to introduce my first garment pattern, the Woven Straps Tank! An ultra-cropped sleeveless top knit in fingering-weight yarn, Woven Straps features a sophisticated high boatneck and six interwoven i-cord straps creating a beautiful open diamond pattern across the back. This is an advanced beginner to intermediate-level pattern, and includes a detailed photo tutorial for weaving and attaching the straps.
The pattern is available for purchase on my website here and also on Ravelry here.
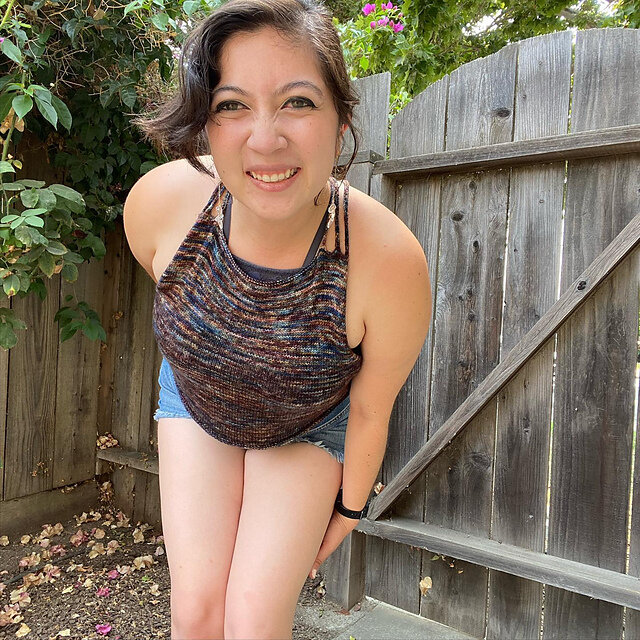
As a companion to the pattern, I wanted to highlight the work of my amazing tester group and create a permanent reference page for anyone looking for help selecting a size.
Woven Straps is meant to be worn with approximately -2 to 0” of negative ease. If you are between sizes (especially for sizes 5 and above) I recommend sizing down.
Tester Roundup:




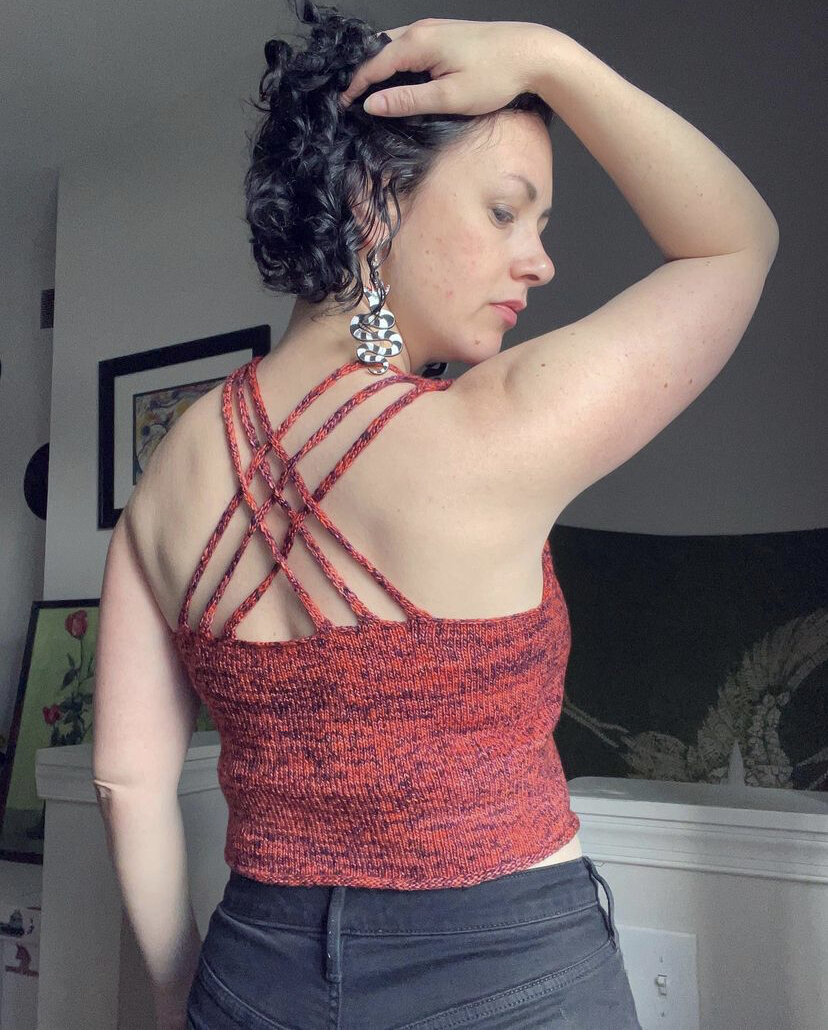
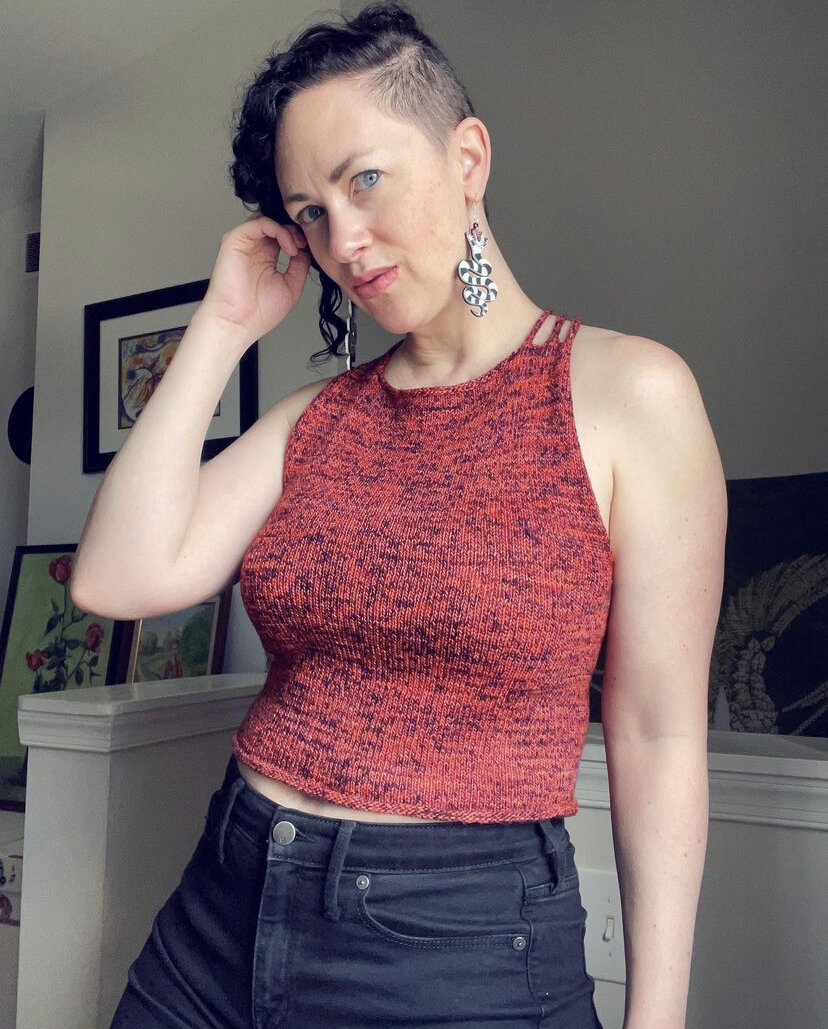

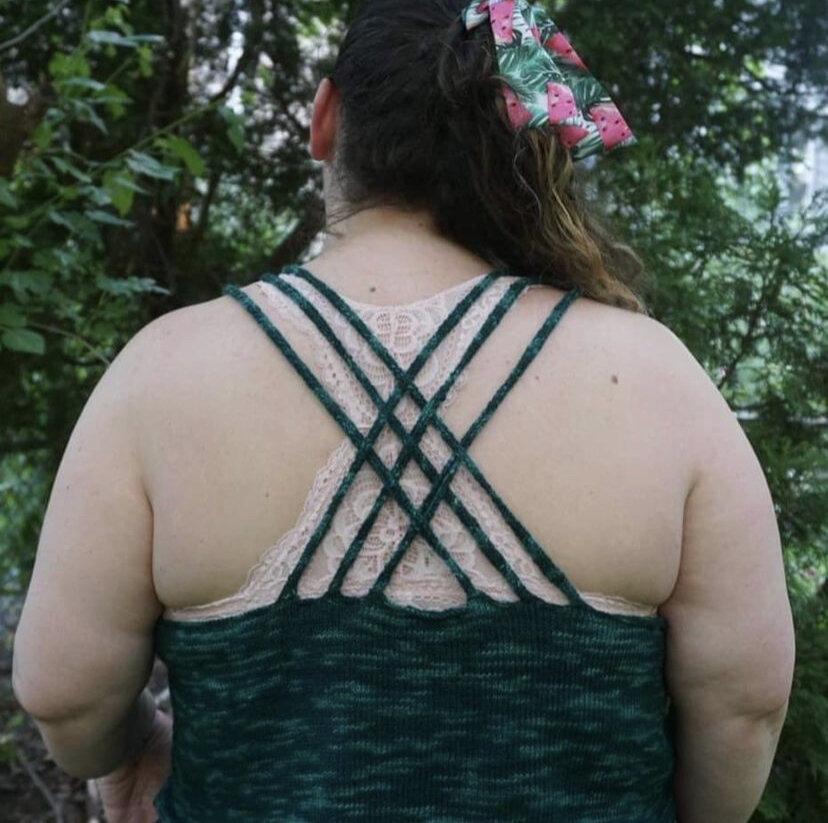


This fingering weight cropped tank is business in the front and a party in the back. The modest front panel features a high boatneck that gives way to six delicate cross-back straps that weave through each other.
I love to see what you make! Share your project on Instagram using hashtag #WovenStrapsTank and tag me @elisemade, or via email, to elisemade@gmail.com!
9/20/21: Size 8 and 10 are currently still in testing. I am offering this pattern for free to anyone who would like to knit either size. Please email me at elisemade@gmail.com if you are interested.
Sizing
1 (2, 3, 4, 5)(6, 7, 8, 9, 10)
Corresponding to bust measurement:
28-30 (32-34, 36-38, 40-42, 44-46)(48-50, 52-54, 56-58, 60-62, 62-64)”
71-76 (81-86, 91.5-96.5, 101.5-106.5, 111.5-117)(112-127, 132-137, 142-147, 152-158, 158-163) cm.
Bust measurement of finished garment:
28 (32, 36, 40, 44)(48, 52, 56, 60, 64)”
71 (81, 91, 101.5, 111.75)(122, 132, 142, 152.5, 162.5) cm
Tank is meant have -1 to 0” -2.5 to 0 cm of ease, and fit comfortably around your bust, so choose a size that corresponds with that measurement. If you are between sizes, I would recommend sizing up.
Yarn
Fingering weight wool blend.
Sample Yarns: KnitPicks Hawthorne
80% Fine Superwash Highland Wool, 20% Nylon
357 yards/100 grams (Sample color: Tonal Hand Painted in Astoria)
Malabrigo Sock
100% superwash merino
440 yards/100 grams (color: Velvet Grapes)
ApproximateYardage
275-375 (300-400, 400-450, 450-500, 500-600)(650-700, 700-725, 725-750 750-800, 800-850, 850-950)
Needles
US 3 (3.25 mm) circular needle (body, front, and straps. I would recommend a 32” for the body and a 16” for the straps)
US 2 (00 mm) circular or straight needle (for binding off back sts)
Gauge
on US 3 (3.25 mm), 24 stitches and 34 rows worked flat in stockinette = 4”
Tools
BOR stitch marker
Stitch holders or waste yarn
Tapestry needle for finishing
Key
B/O - Bind off
C/O - Cast on
K - Knit
K2T - Knit 2 stitches together; single right-leaning decrease
P - Purl
PM – Place marker
RS - Right side of fabric
SL1PW - slip one stitch knitwise with yarn in front
SSK - Slip 2 stitches knitwise, knit these 2 stitches together through back loops; single left-leaning decrease
ST/STS - Stitch/stitches
WS - Wrong side of fabric
Techniques
Knitting in the round, purling, simple decreases, working separate groups of live stitches at once, three needle bind off.
Construction
Starting from the bottom up, body is knit to desired length. Back is then bound off leaving live stitches on holders. Front is worked to high neck and stitches are bound off to create the neckline and beginning of the straps. Straps are then worked all together to length and woven through each other before connecting to held stitches at the back.
After purchase you will receive your PDF file via email. Please note the link to download your patten will expire 24 hours after purchase. Please contact me if you need any assistance downloading your file.
You can also purchase this pattern on Ravelry here.
If you need help choosing a size please check out my blog post here, which includes a roundup of my tester photos and their sizes.
DIY: The Perfect Potholder Pattern
Introducing: The Perfect Potholder
Maybe it’s just me, but I am always looking for ways to add knitting and knit items into my daily life. And when people think about knitted items for the home, the last thing I want them to think of is “Grandma’s house.” No shade to the grandmas out there, but I wonder a lot about whether non-knitters truly realize how cool knit items can be.
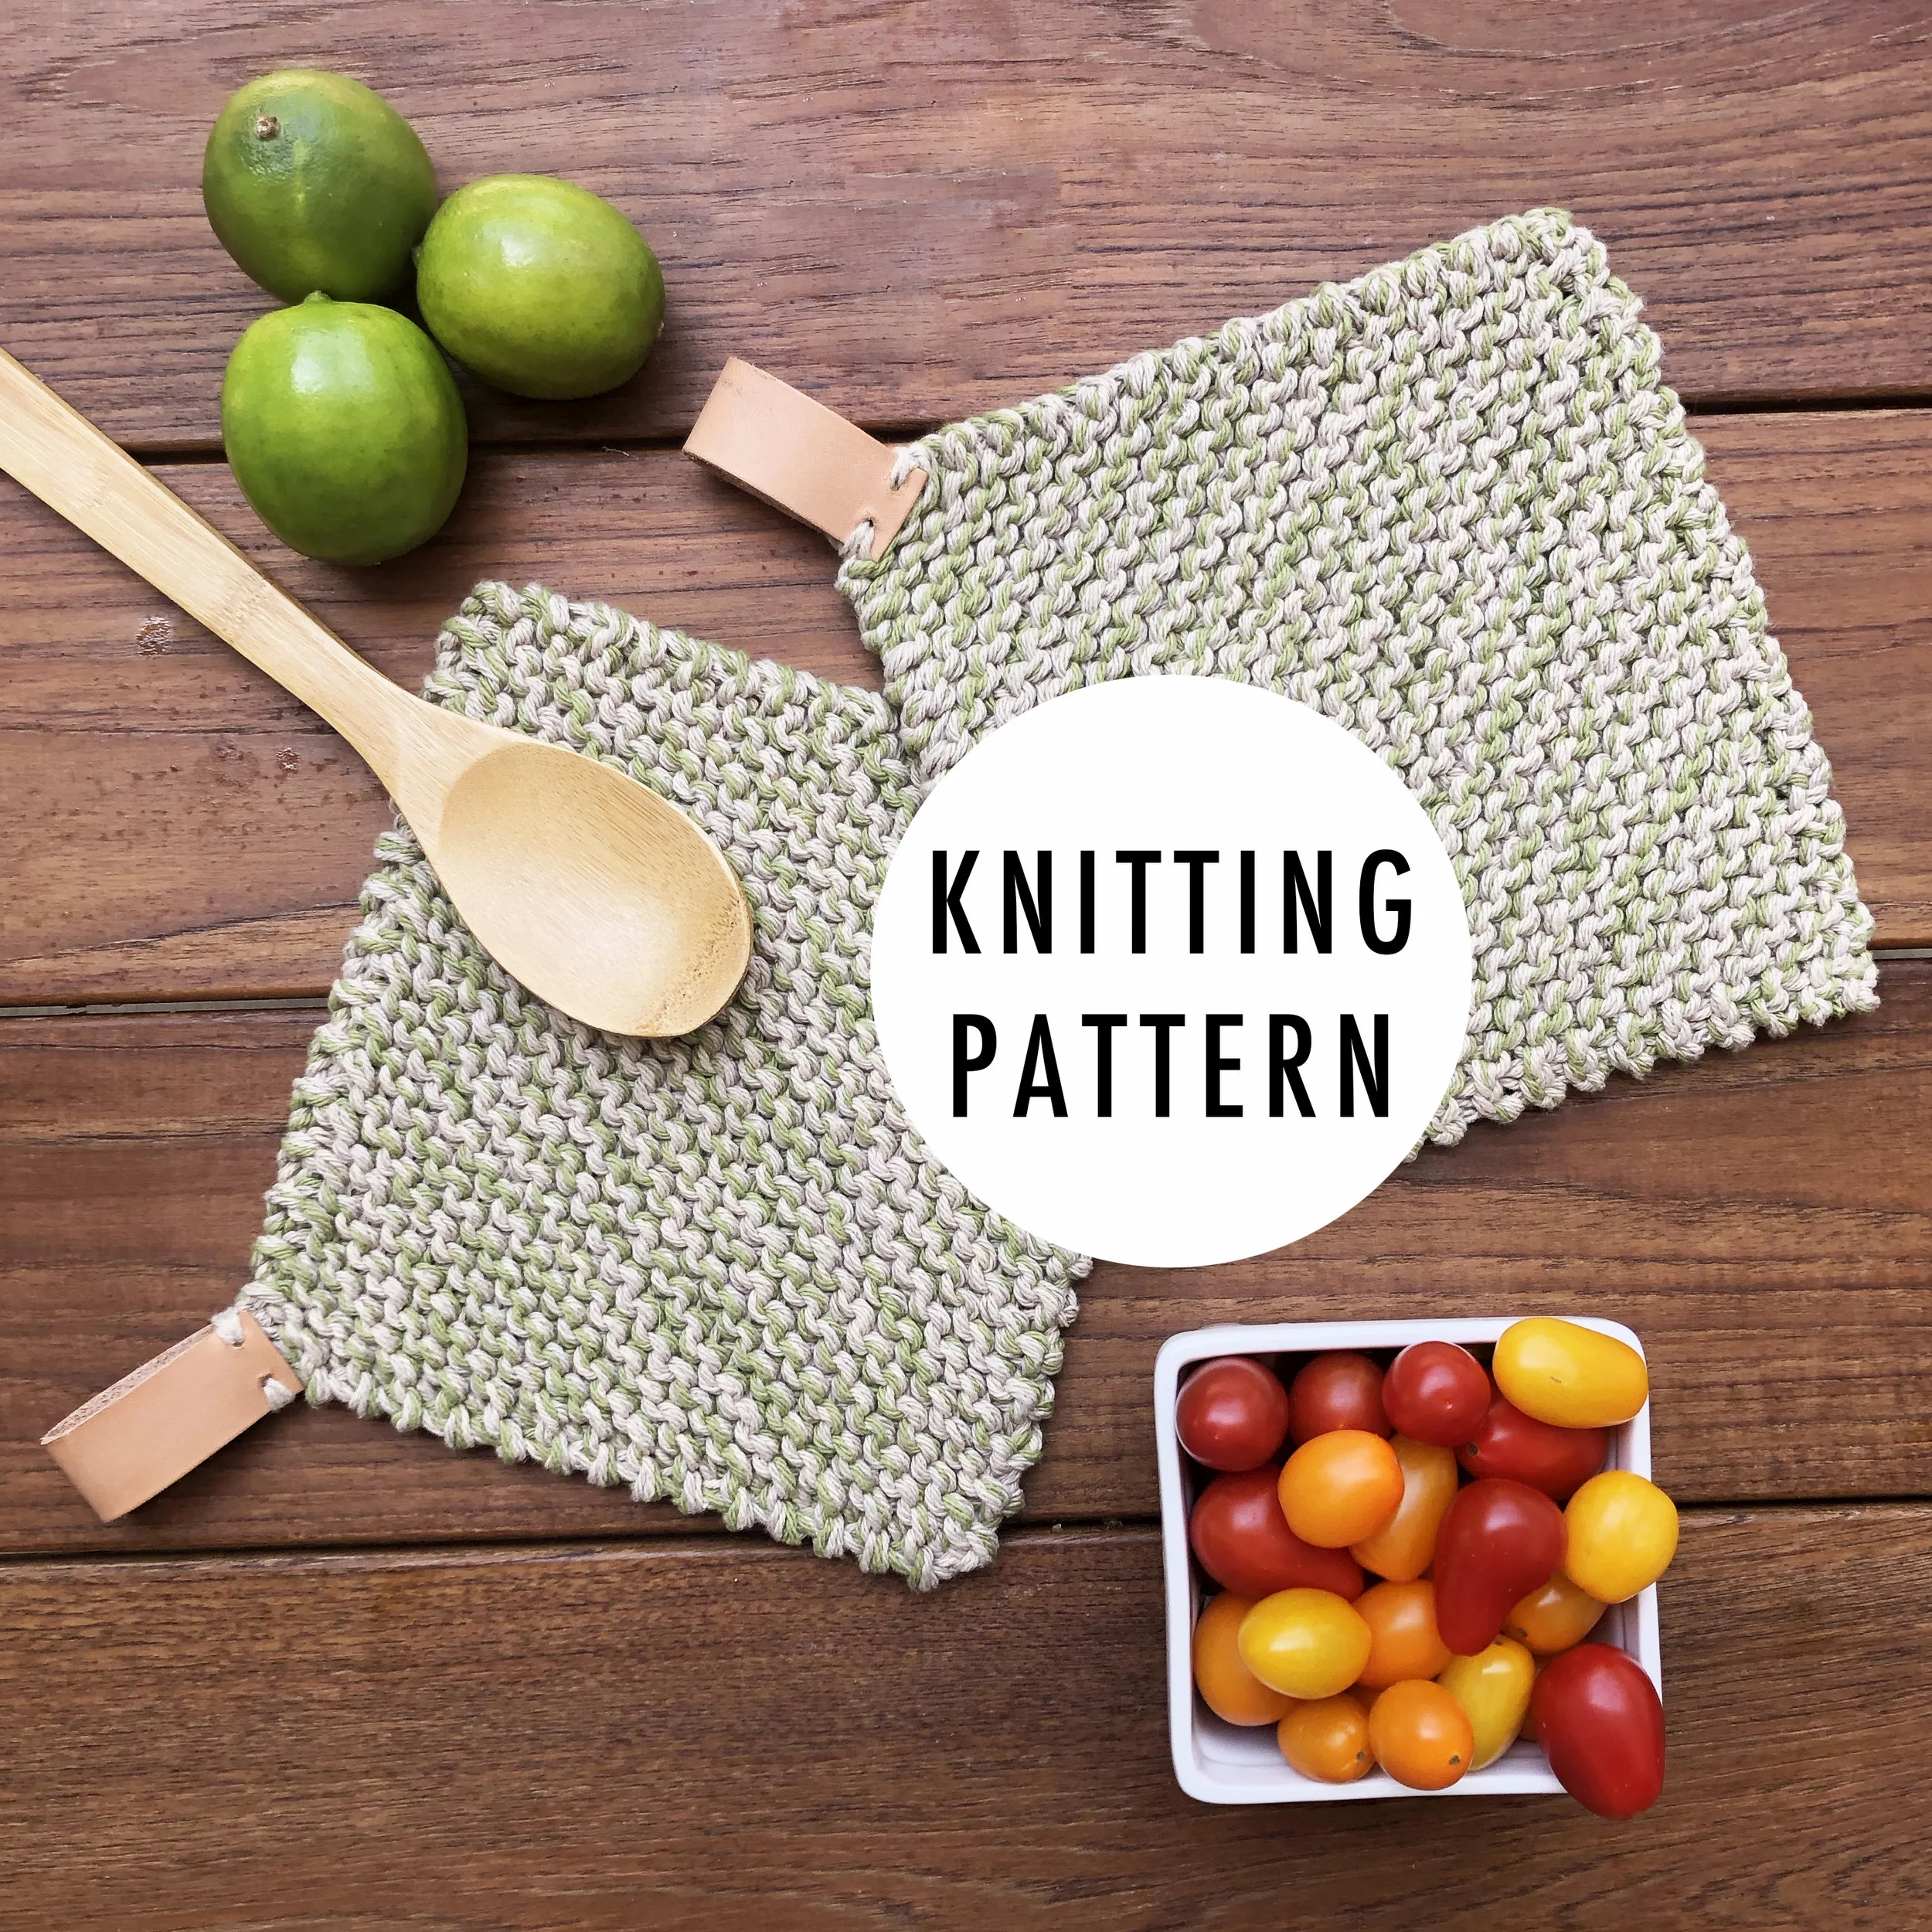
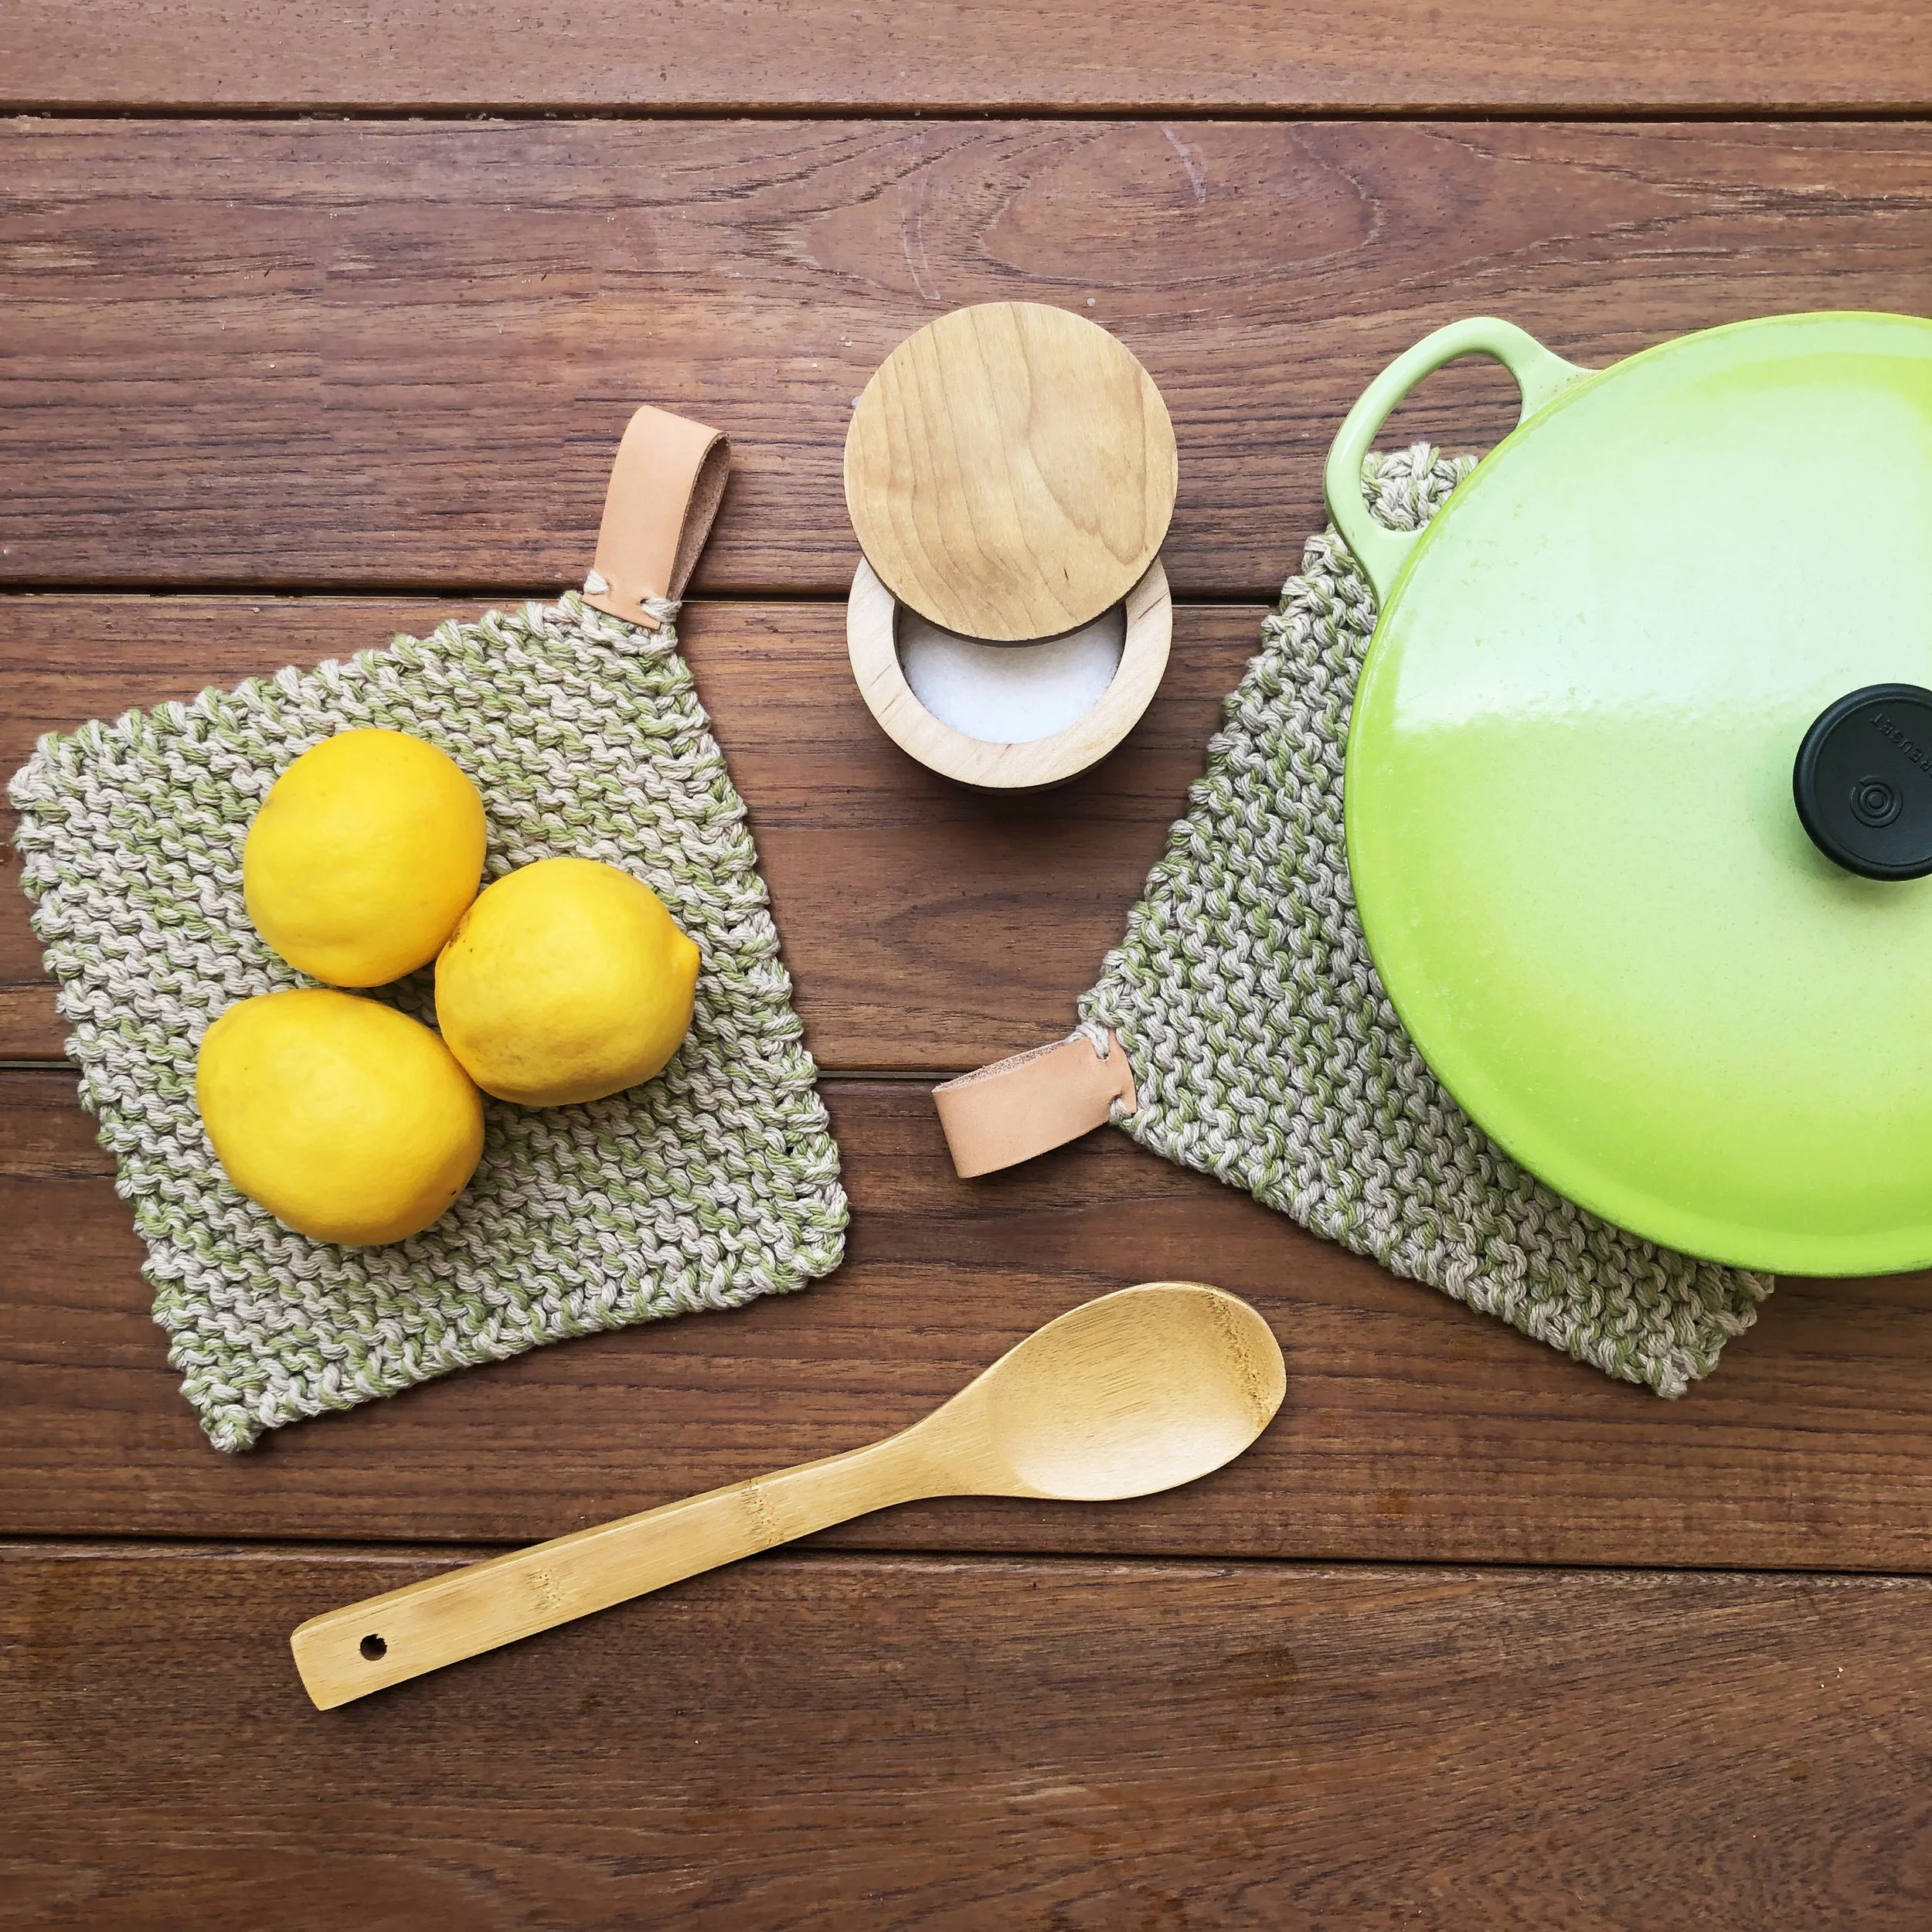
So back in 2017 when I designed a knit potholder for my own kitchen, I wanted to create something that looked really luxe and modern, like something you’d find in an upscale boutique. Some simple cotton yarn and a little leather later, I became obsessed. By combining 3 strands of worsted weight cotton and using smaller than usual needles, the resulting garter stitch fabric is thick, squishy, and incredibly durable and heat-resistant. I had never cut and sewn leather before, but figuring it out on my own was surprisingly easy.
I have had the pattern ready now for a few weeks, a bit afraid to release it because of it’s so simple. But the truth is, this is just an awesome potholder. And if you like to cook and/or entertain, you’ll use it all the time. It’s such a different look than what is widely available in stores, and just as effective in protecting hands and countertops. These potholders are so beautiful that they can go from the kitchen straight to the table under a hot serving dish, and are guaranteed to garner compliments from your dinner guests.
The best part is that it’s a lightning-fast knitting project that you can whip up in an hour or less, guaranteed. With two elegant finishing options to suit your tastes, you will want to make a set of these for everyone you know.

Leather loop finishing option
I-cord loop finishing option
get the pattern here

Worsted weight cotton held triple worked on small needles creates a dense and thick fabric that effectively shields hands and countertops from heat. Simple lines and finishing techniques elevate this simple knit into a luxe kitchen item perfect for cooks and entertainers. Pair with the Perfect Oven Mitt for the ultimate handmade kitchen set.
I love to see what you make! Share your project on Instagram and tag me @elisemade, or via email to elisemade@gmail.com
Finished Dimensions
8.5 x 8.5” (21.5 x 21.5 cm)
Yarn & Yardage
Category 4/worsted weight 100% cotton
3 balls with 35 yards each (approximately 105 yards total)
Recommended: Lily Sugar’n’Cream
Loops and Threads Classic Cotton
Note: This pattern is made by holding 3 separate strands of cotton yarn together. You will need 3 separate balls with at least 34 yards each to complete this pattern. I recommend using 2 strands of the same color and 1 strand in a contrast color, but the possibilities are endless!
Needles
Size US 8 (5mm) needles
Gauge
15 sts and 15 rows of garter stitch worked flat in 4”/10cm
Tools
Tapestry needle for finishing
Additional tools to make leather loop:
Soft Leather
1/8” Leather Punch
Hammer
Ruler
Sharp scissors or Exacto knife
Key
BO – bind off
CO – cast on
K - knit
KF&B - knit into the front and back of stitch
(1 stitch increased)
K2T - knit two stitches together
(1 stitch decreased)
ST/STS – stitch/stitches
Construction
Potholder is worked with three strands of worsted weight cotton at a tight gauge to create a thick, heatproof fabric. Starting at one corner, increases are worked to the center of the potholder. Decreases are then worked down to the final corner. Potholder is finished with either an i-cord loop or an applied leather strap.

Yarn and Color Combinations
I like to make my potholders using Lily Sugar’N’Cream cotton yarn. I love this yarn for a few reasons: it’s stocked at every Michaels and JoAnn’s, comes in a huge variety of colors, and costs around $2-4 a skein. It’s 100% cotton, and it’s a hard-working yet soft yarn that washes and wears incredibly well for the price.
I also love Bernat Handicrafter DeLux cotton yarn. It is slightly nicer than the Lily Sugar’N’Cream and available in a larger skein, but it’s only available in a very limited color palette, a little harder to find (JoAnn’s is your best bet), and is also more expensive. That being said, there is a gorgeous golden mustard yellow and olive green that you should not be sleeping on.
Since the pattern calls for using three different skeins of cotton together to create a bulky weight yarn, the color combination options for this pattern are seemingly limitless. That being said, this project would look stunning in a solid color!
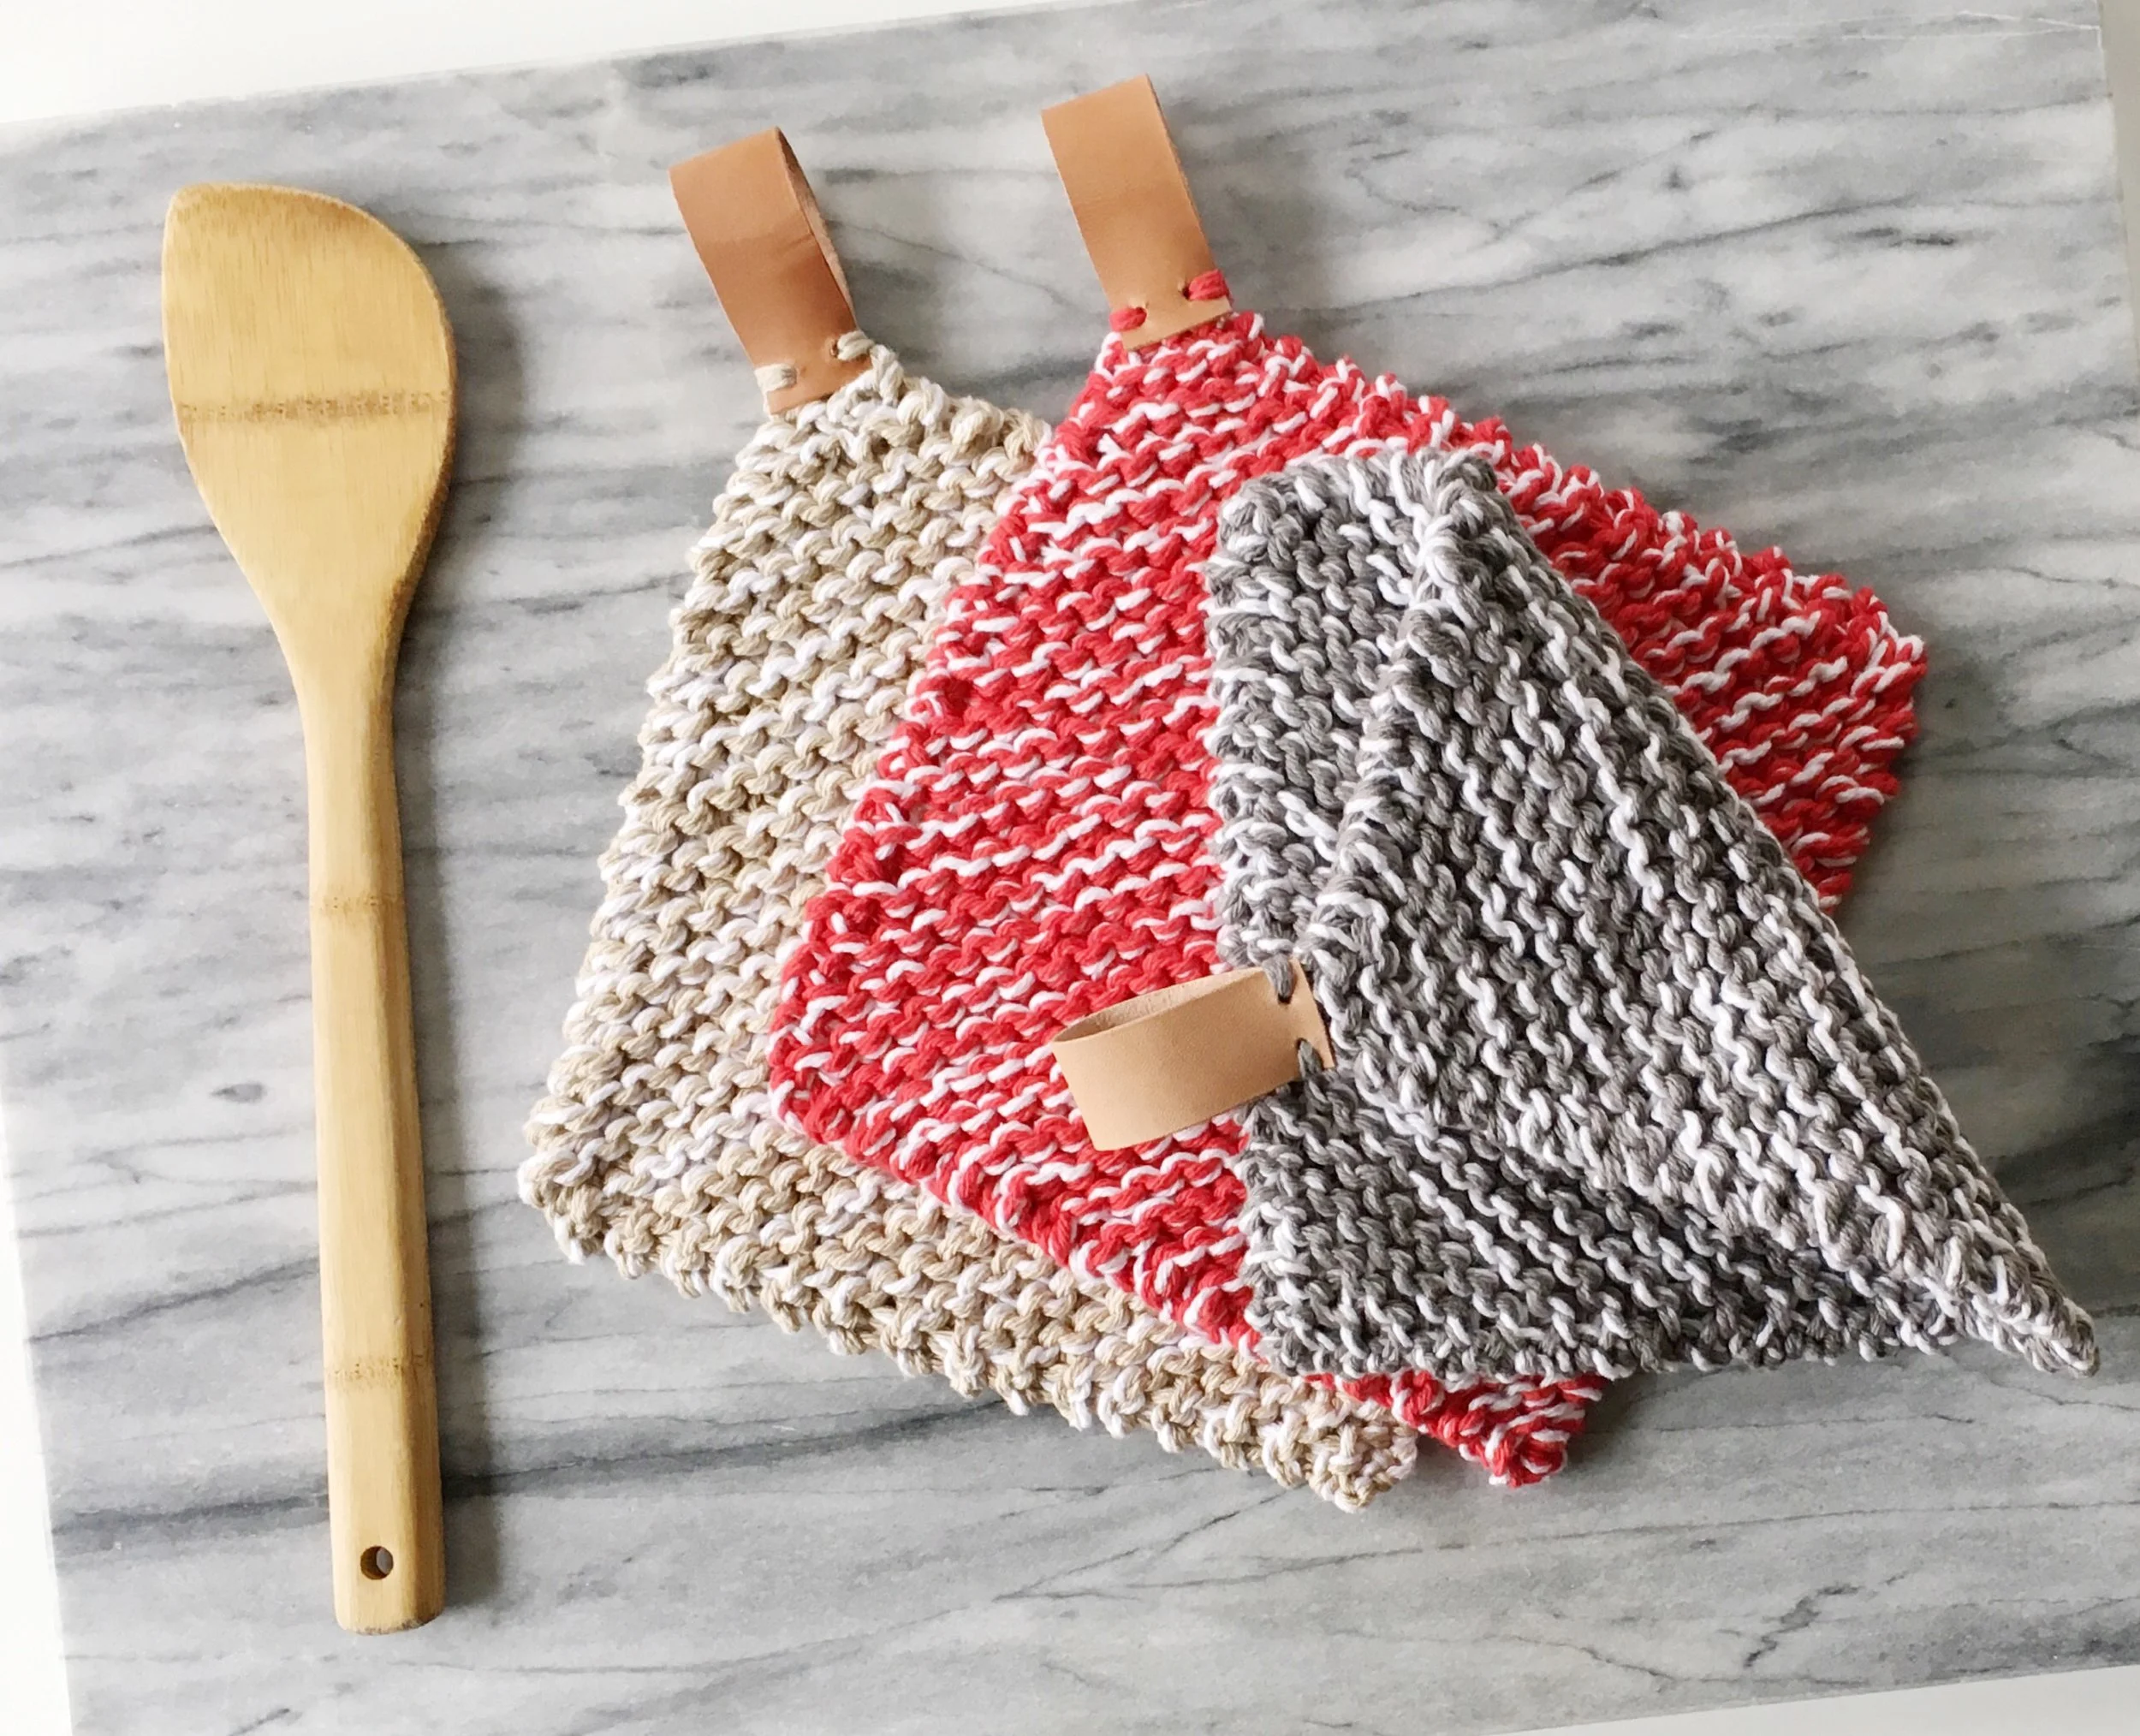
When I first designed this potholder, I made a set of samples using two strands of a contrast color and one strand of white, creating a cool modern marl:
For the pattern samples, I wanted to make a super contemporary version with the leather loop (one I will eventually claim for my own kitchen) and try a different approach to the i-cord version.
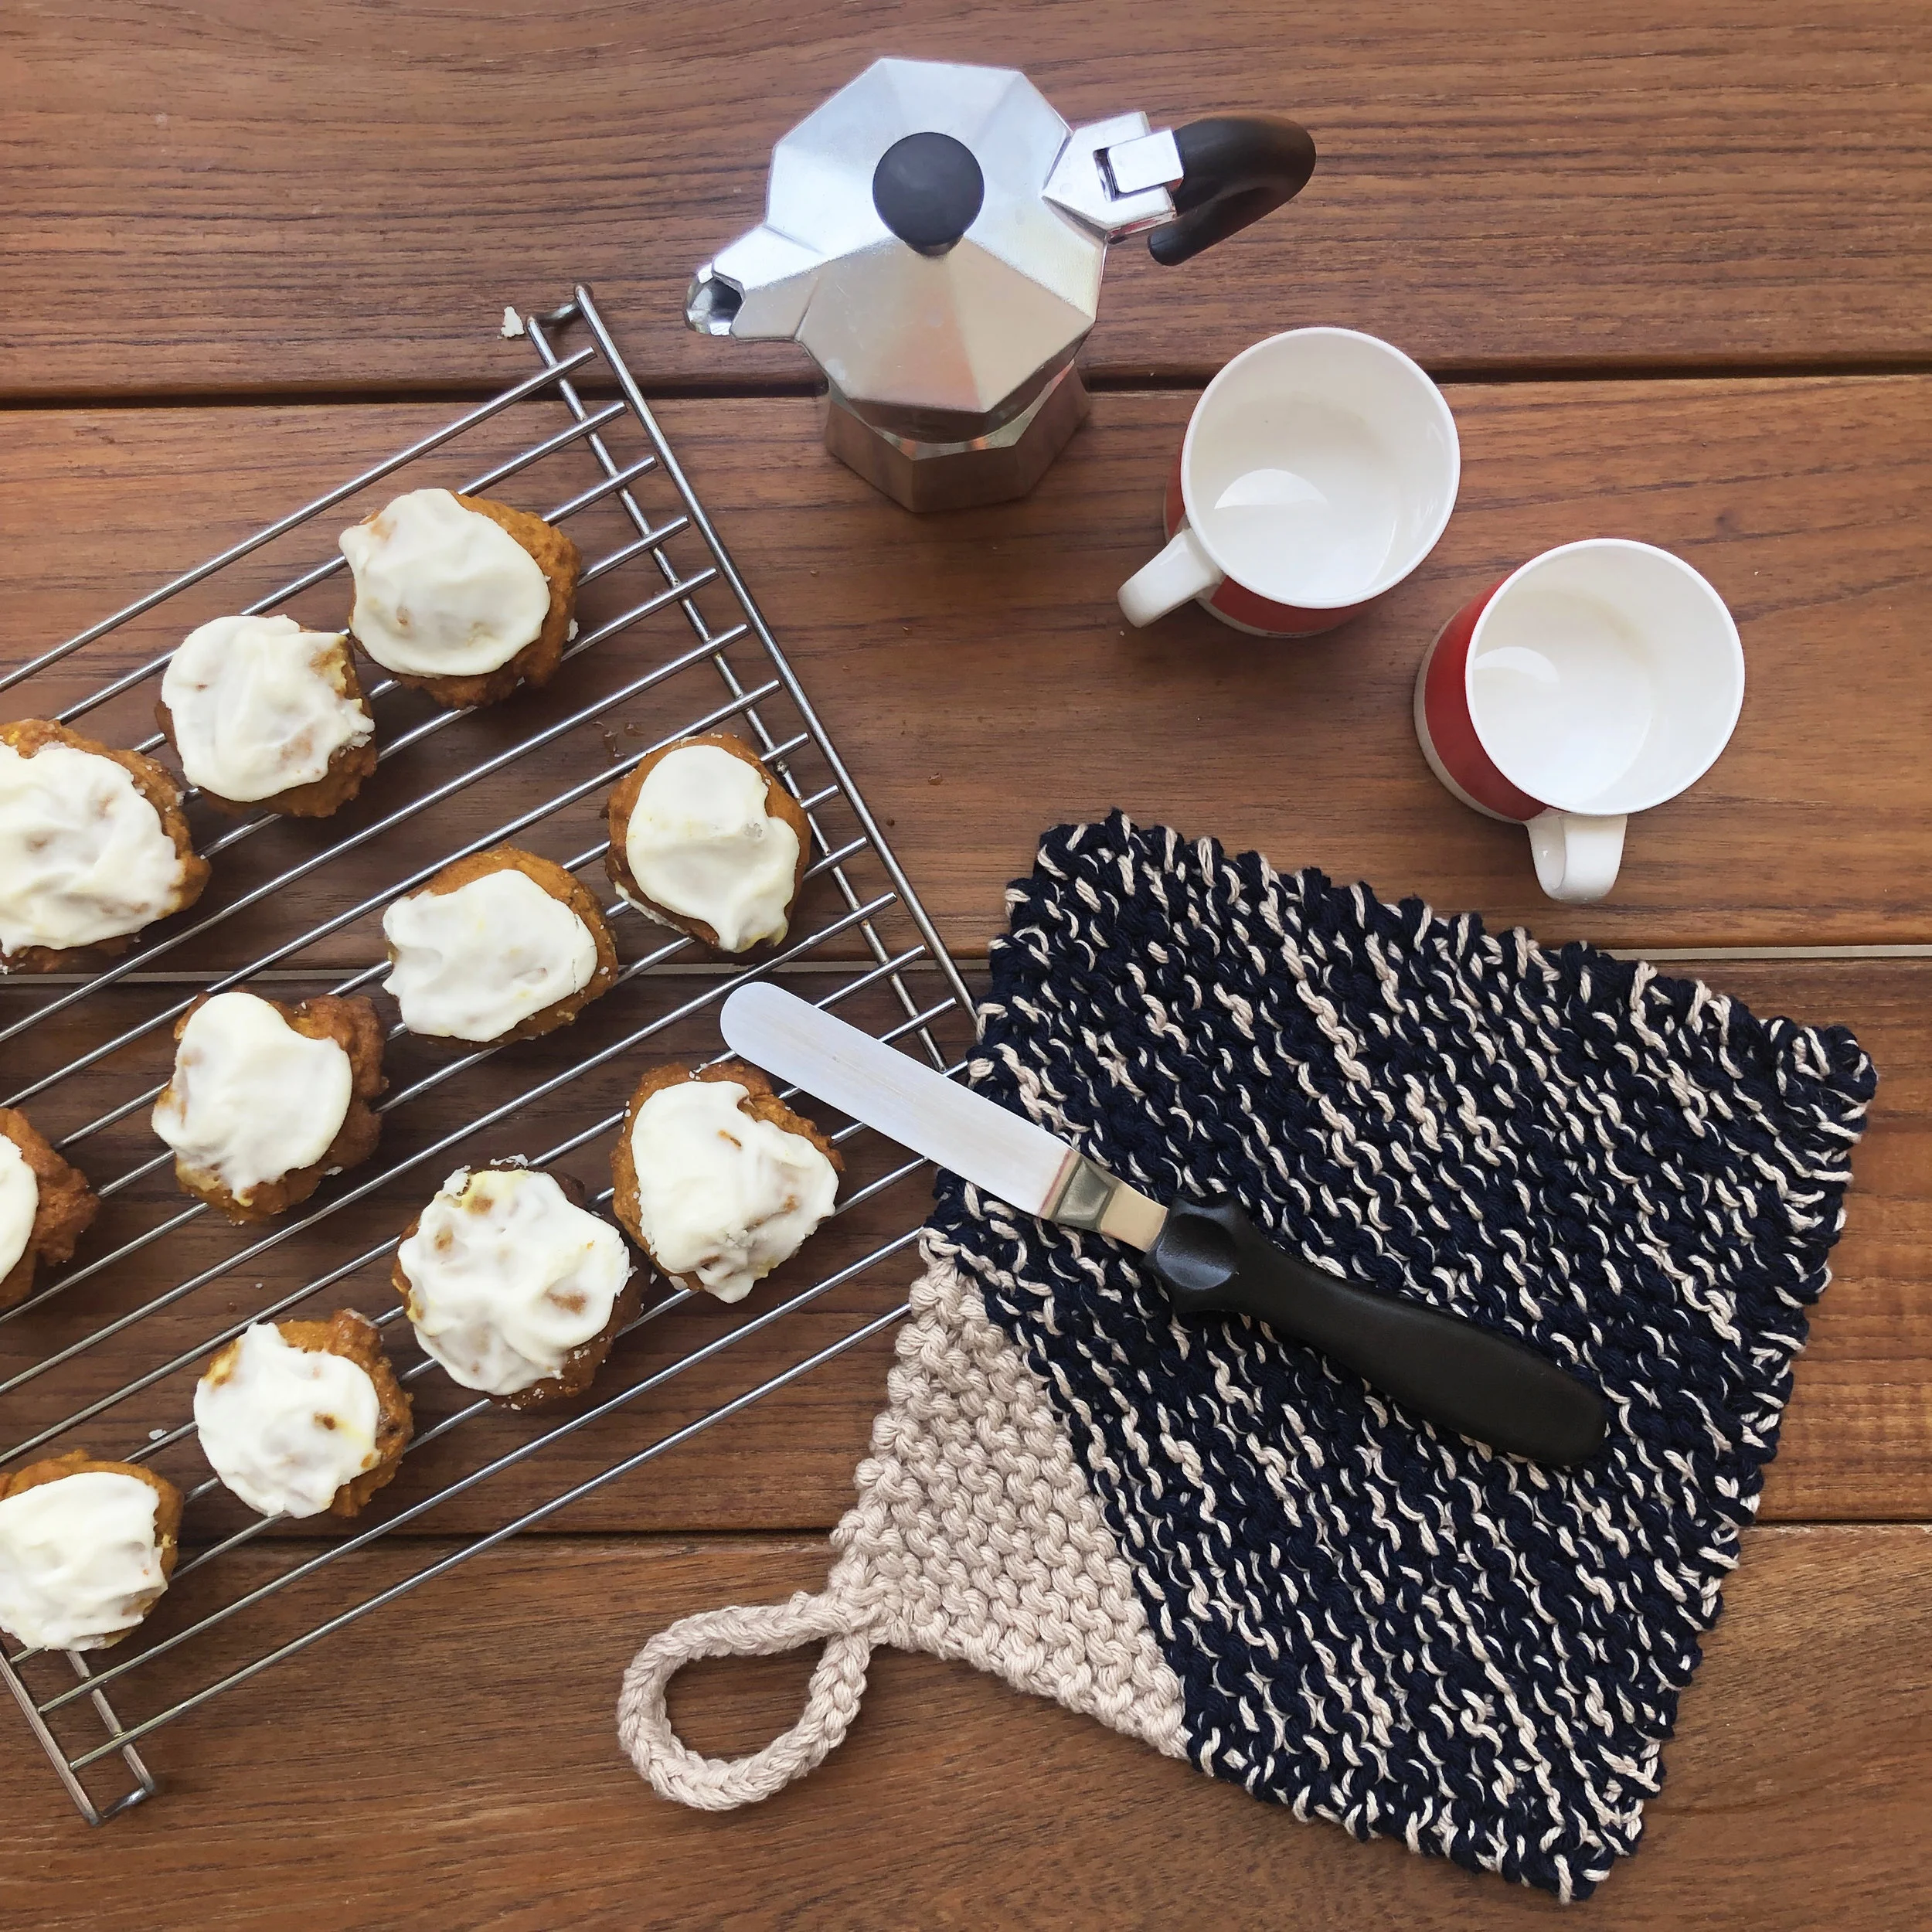
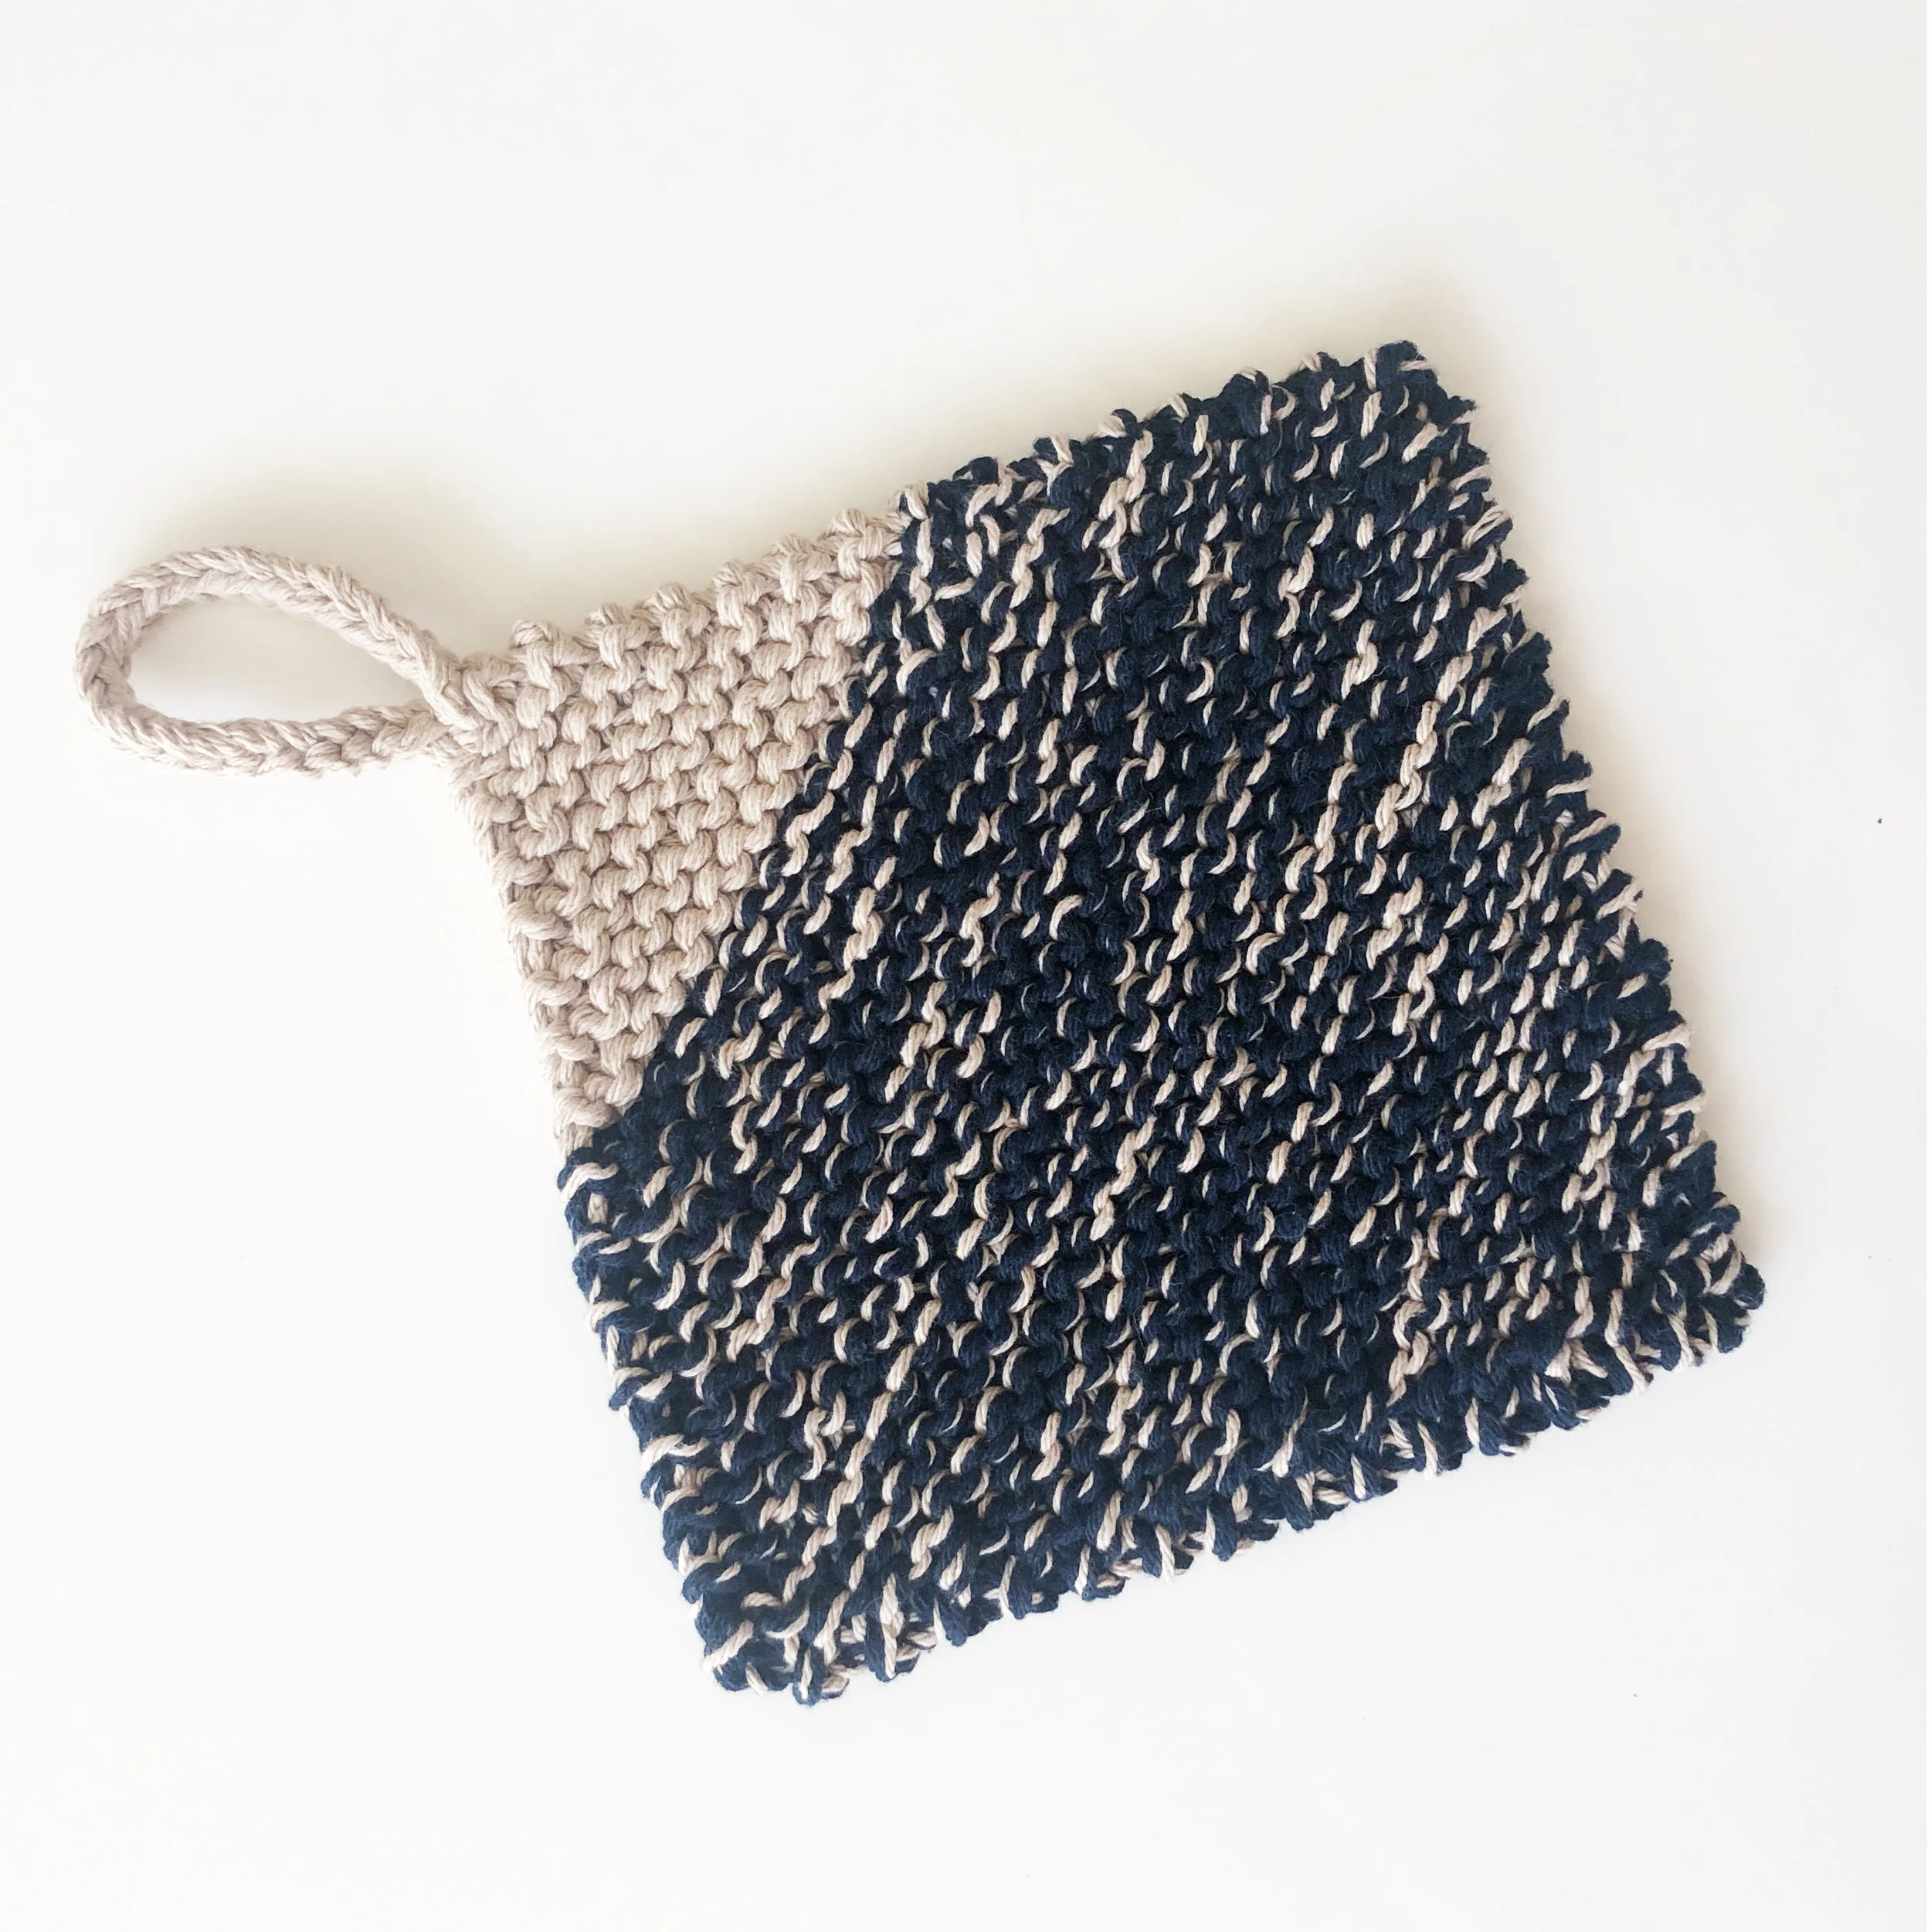
For the i-cord version, I used two strands of “Bright Navy” and one strand of “Jute,” transitioning to using all three strands of Jute at the final corner and for the finishing cord.
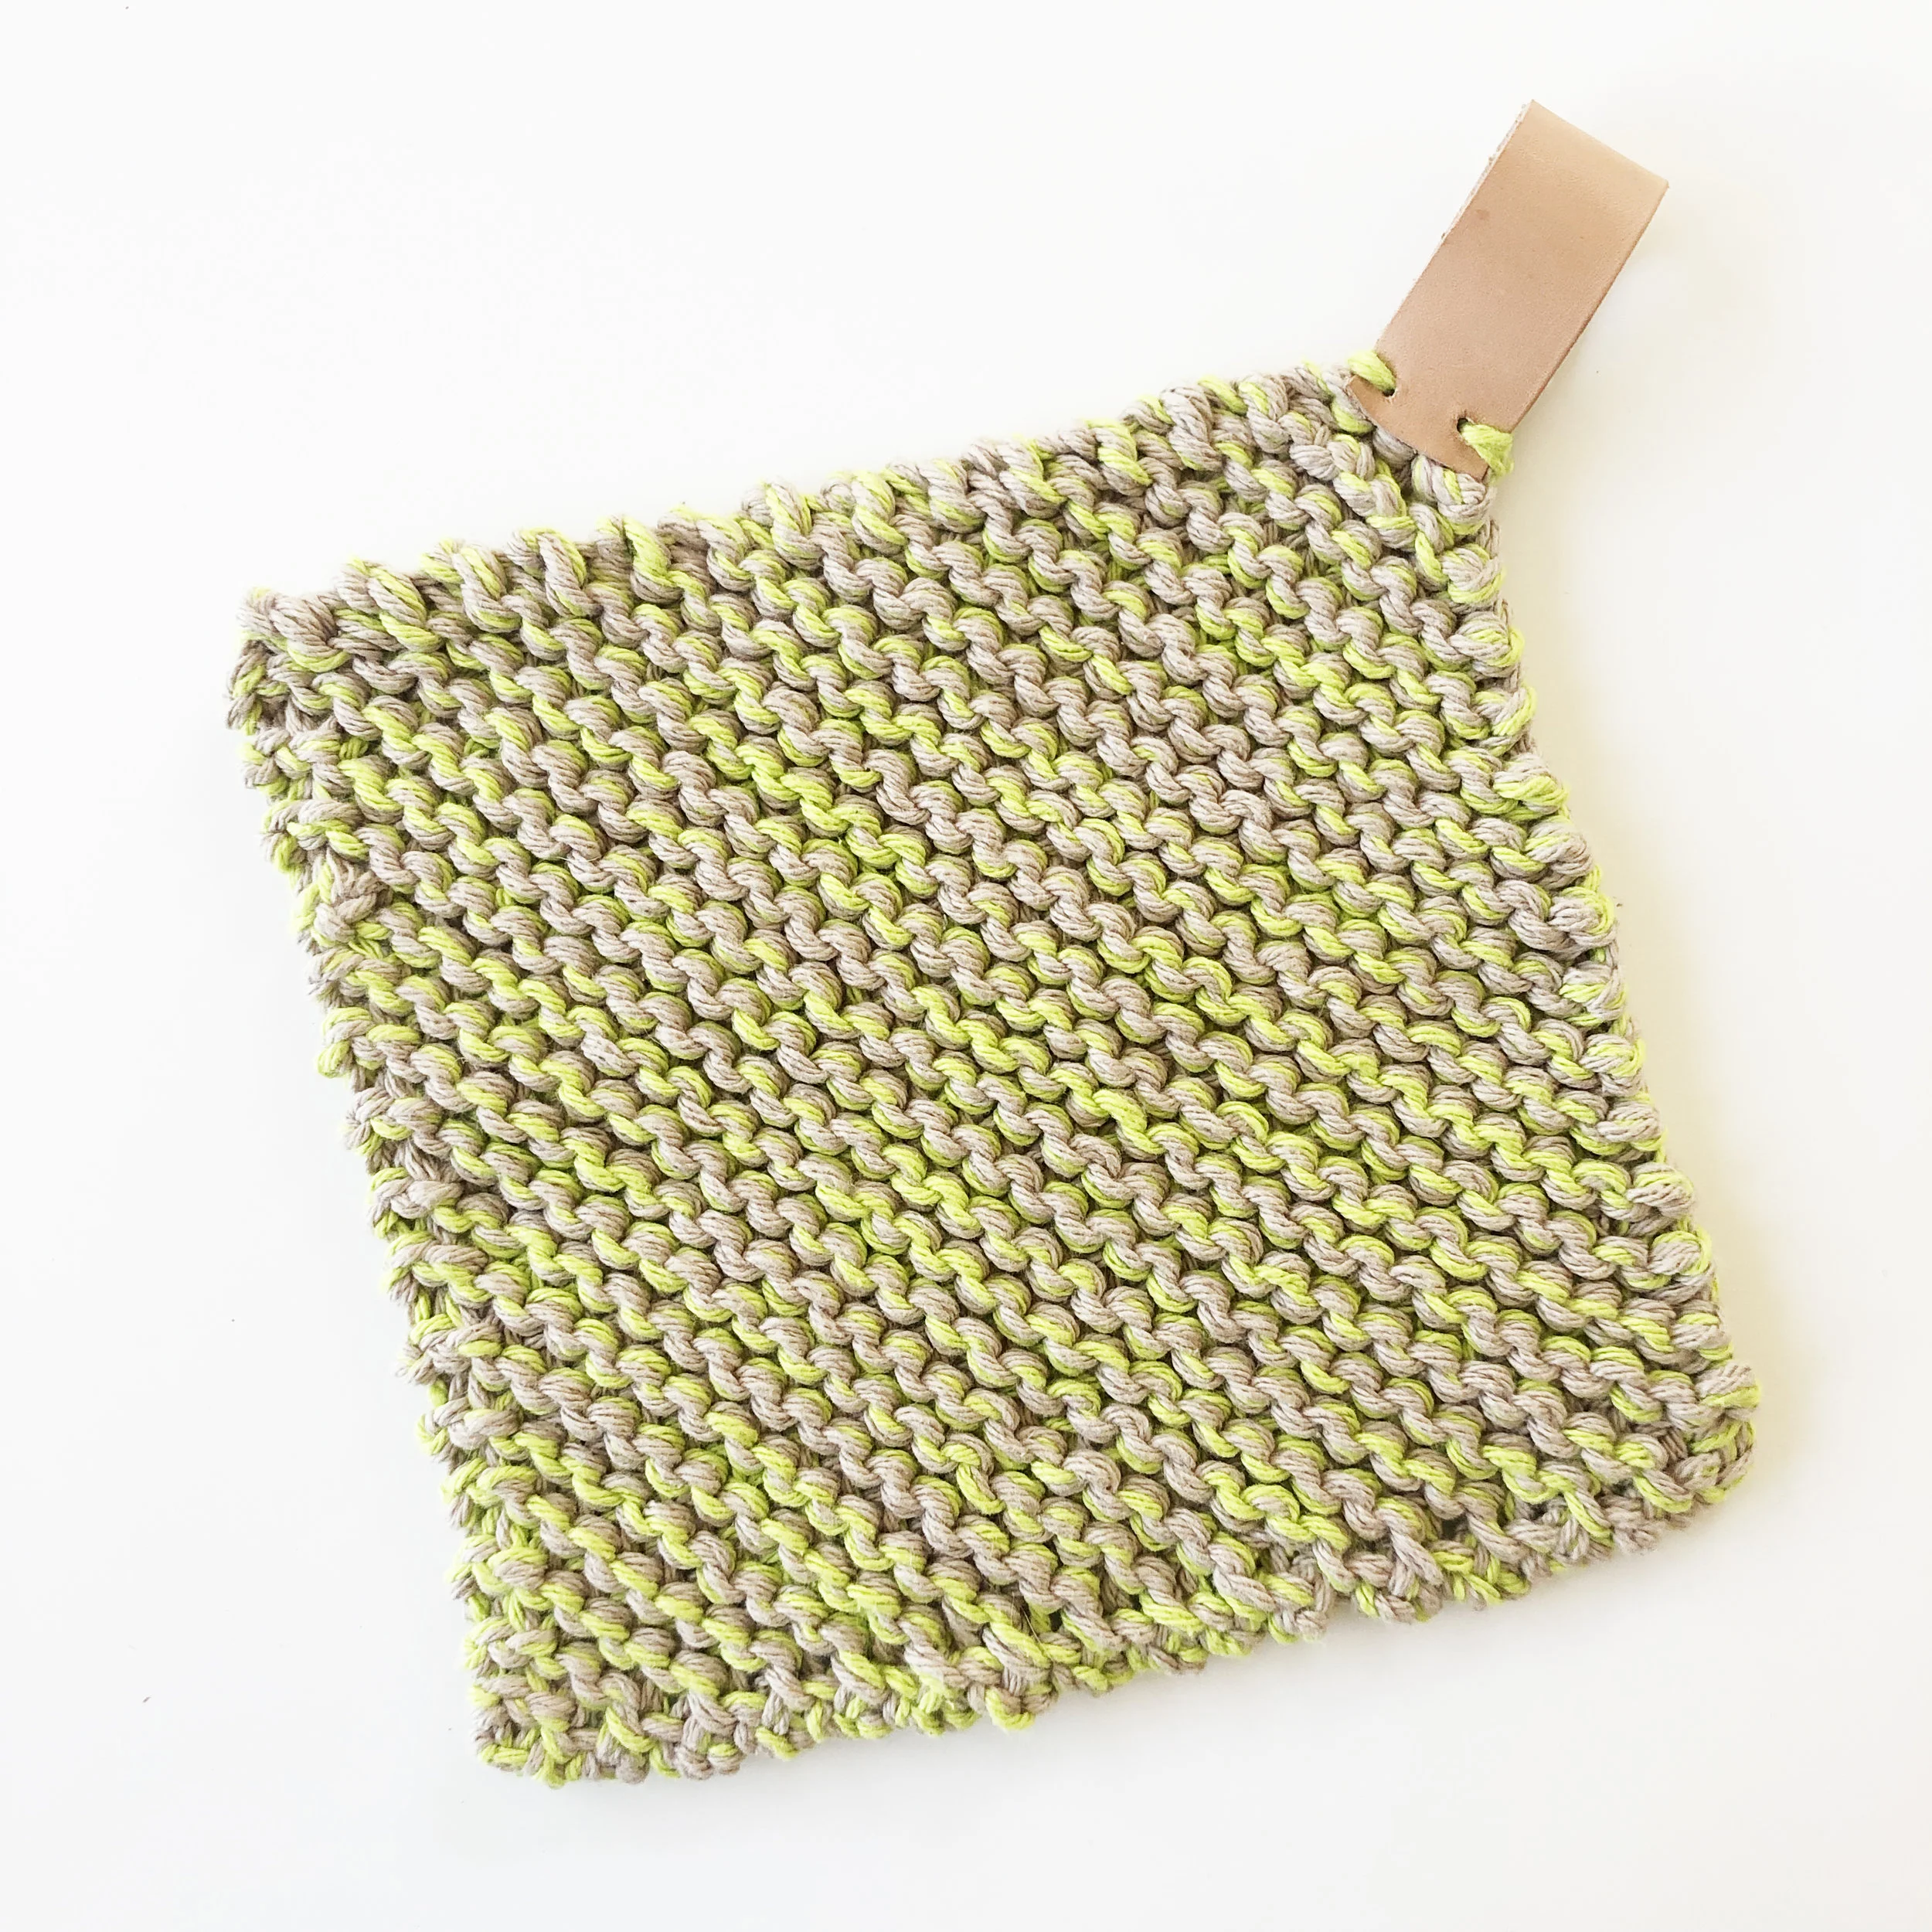
For the leather loop sample, and to match my kitchen color theme, I used two strands of Lily Sugar’n’Cream in “Jute” and one strand in “Hot Green.”
Basically, you can use whatever and however many colors you like to create the potholder of your dreams. I can’t wait to see what you put together!
LEATHER LOOP: MATERIALS LIST AND RESOURCES
While the leather loop and necessary tools can seem intimidating, I promise that materials are available and affordable, and the technique is as simple as banging a hammer. Here’s what you’ll need to make the leather loop:
1/8” hollow leather punch
Soft leather
Now, what the heck are these things and where do you find them?
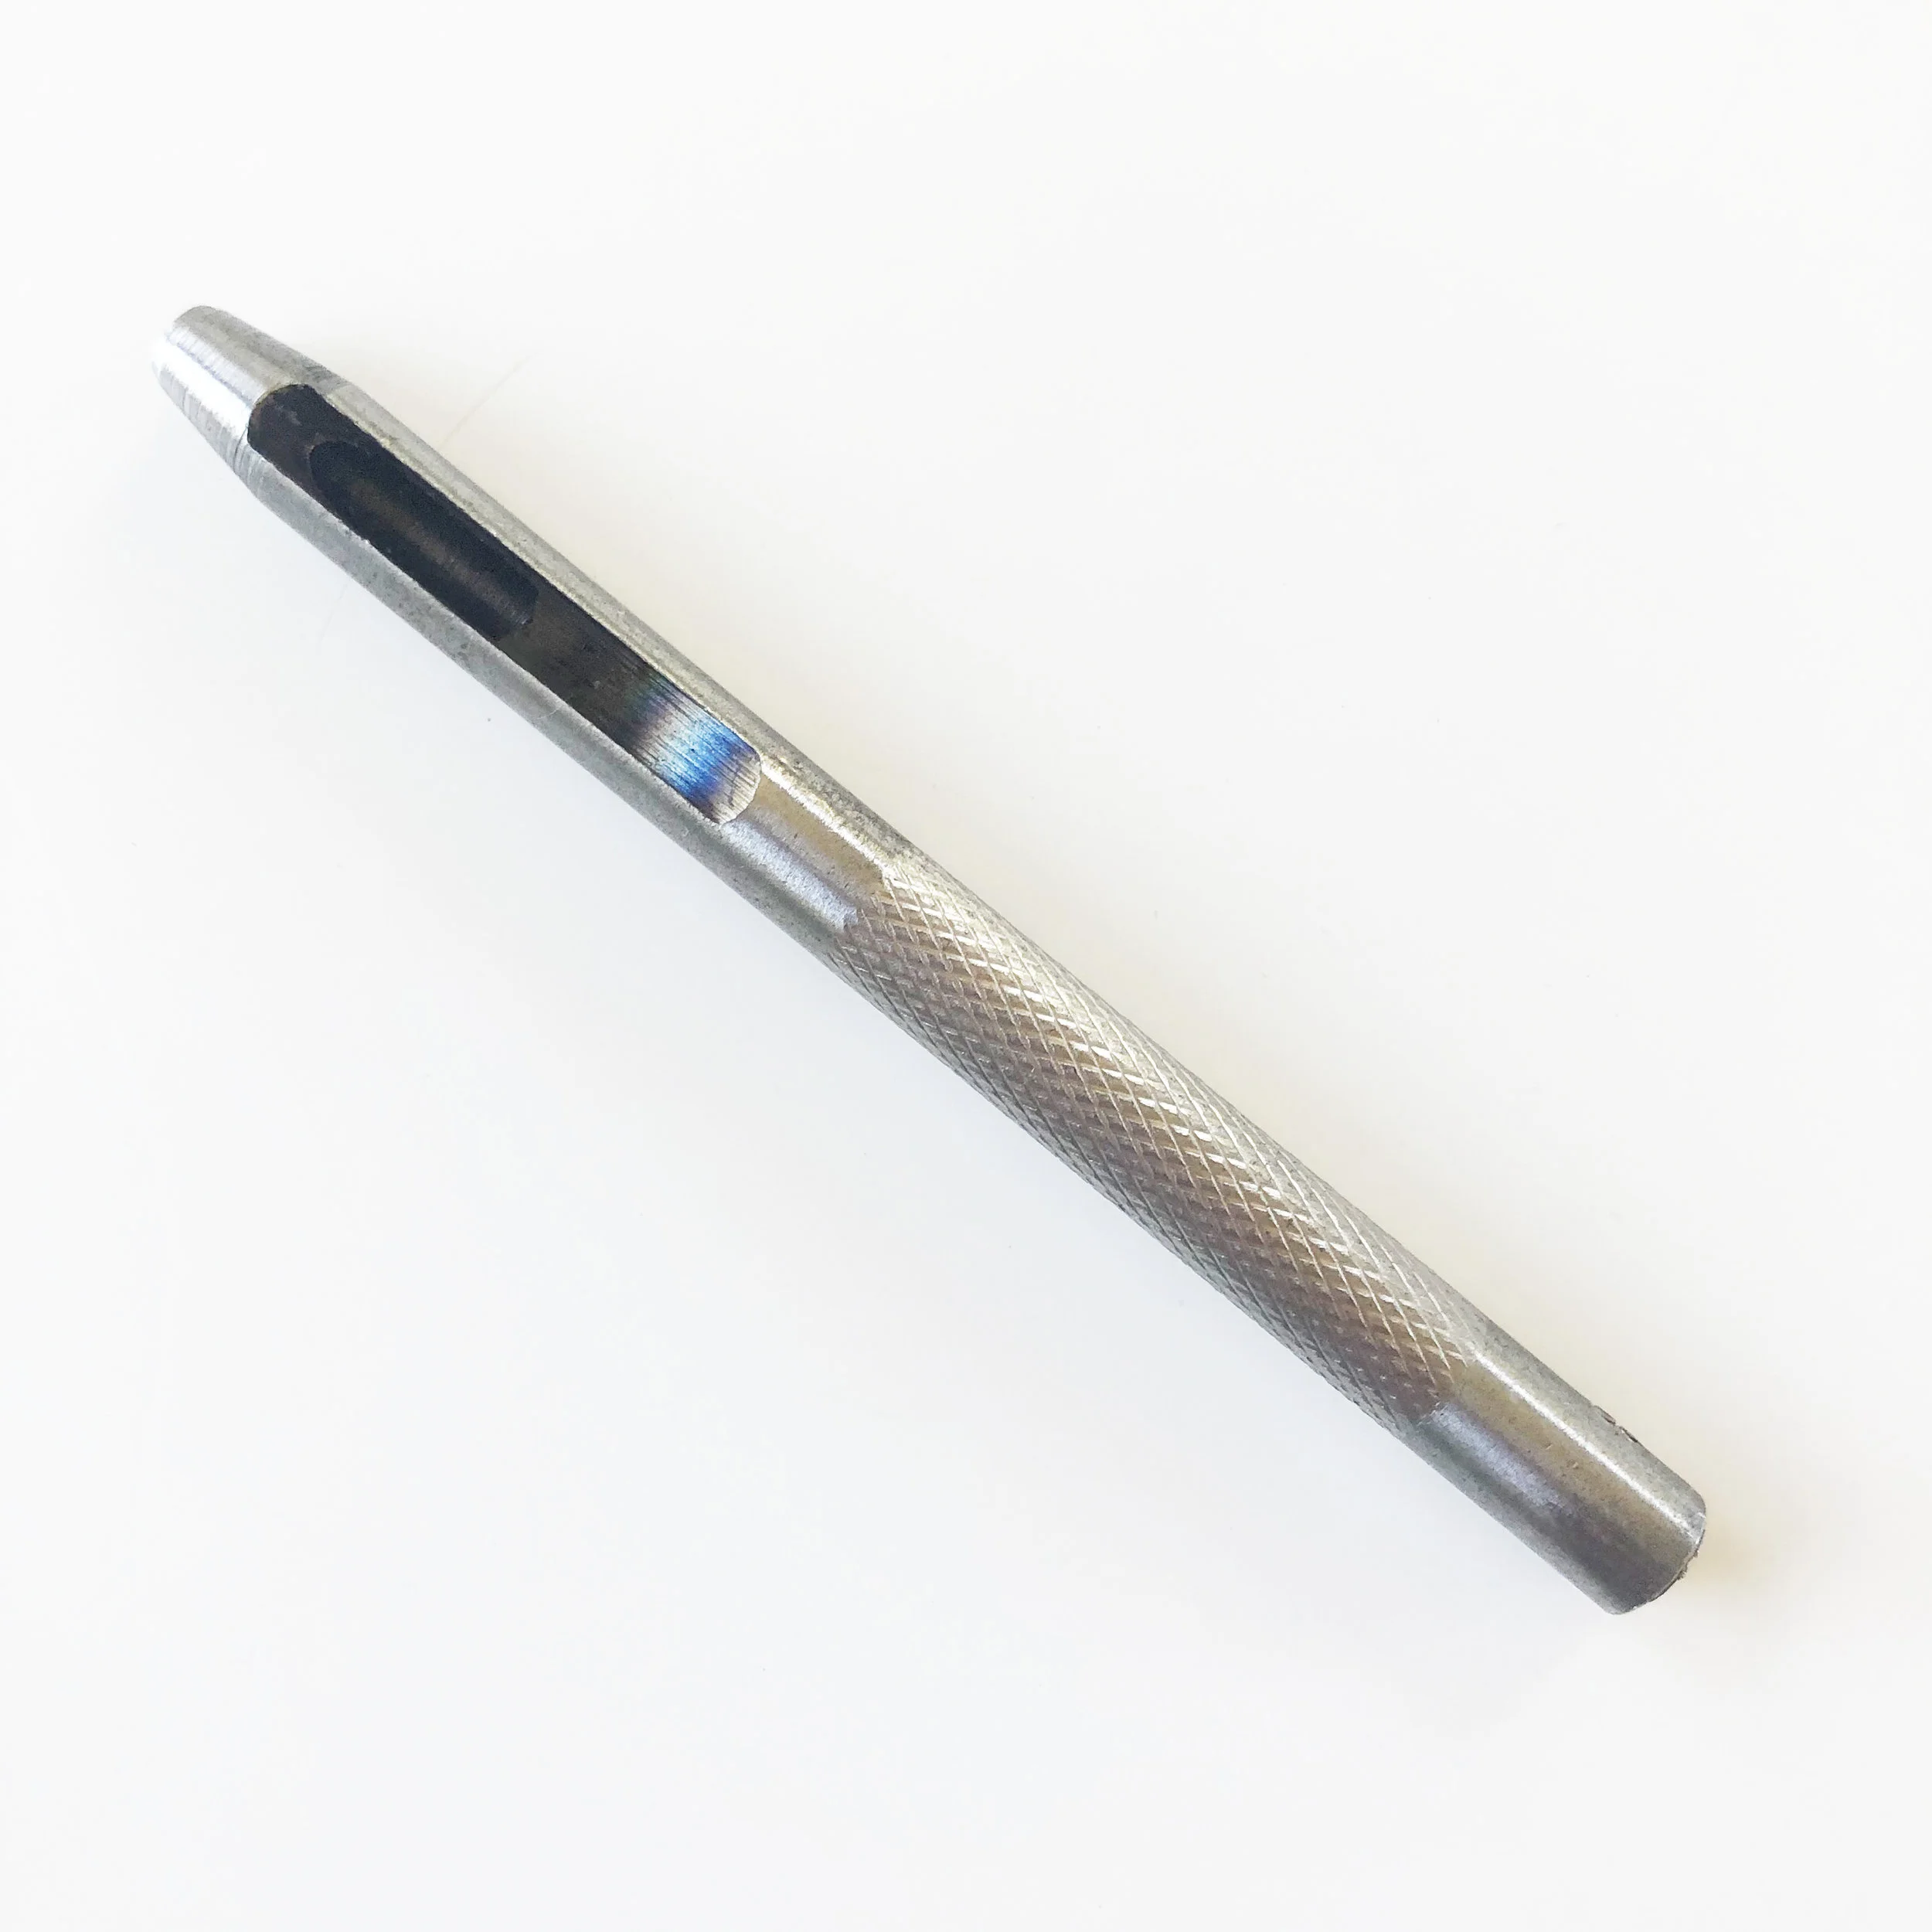
For starters, a hollow leather punch is a short metal rod with a hole on one tapered end. When you place the tapered end over a hard material and strike the opposite end with a hammer, it punches a perfect hole. They come in various diameters depending on how large of a hole you want to punch, and typically come in sets of different sizes. In this case, you will need a punch with a 1/8” diameter.
(There are also leather punches that look like scissors or pliers with a large spoked wheel instead of blades. These are called revolving punches, and while I recommend the hollow punch because it’s what I’ve worked with, as long as you can find one in a 1/8” diameter, I see no reason why they wouldn’t work for this project.)
Finding a leather punch is pretty much as simple as going down to your local hardware store, or your nearest Home Depot. I’ve even seen some sets at Michaels (check them out here).
They are also widely available on Amazon. Here are some sets that I think look pretty awesome (I particularly recommend the one that comes with the cutting mat):


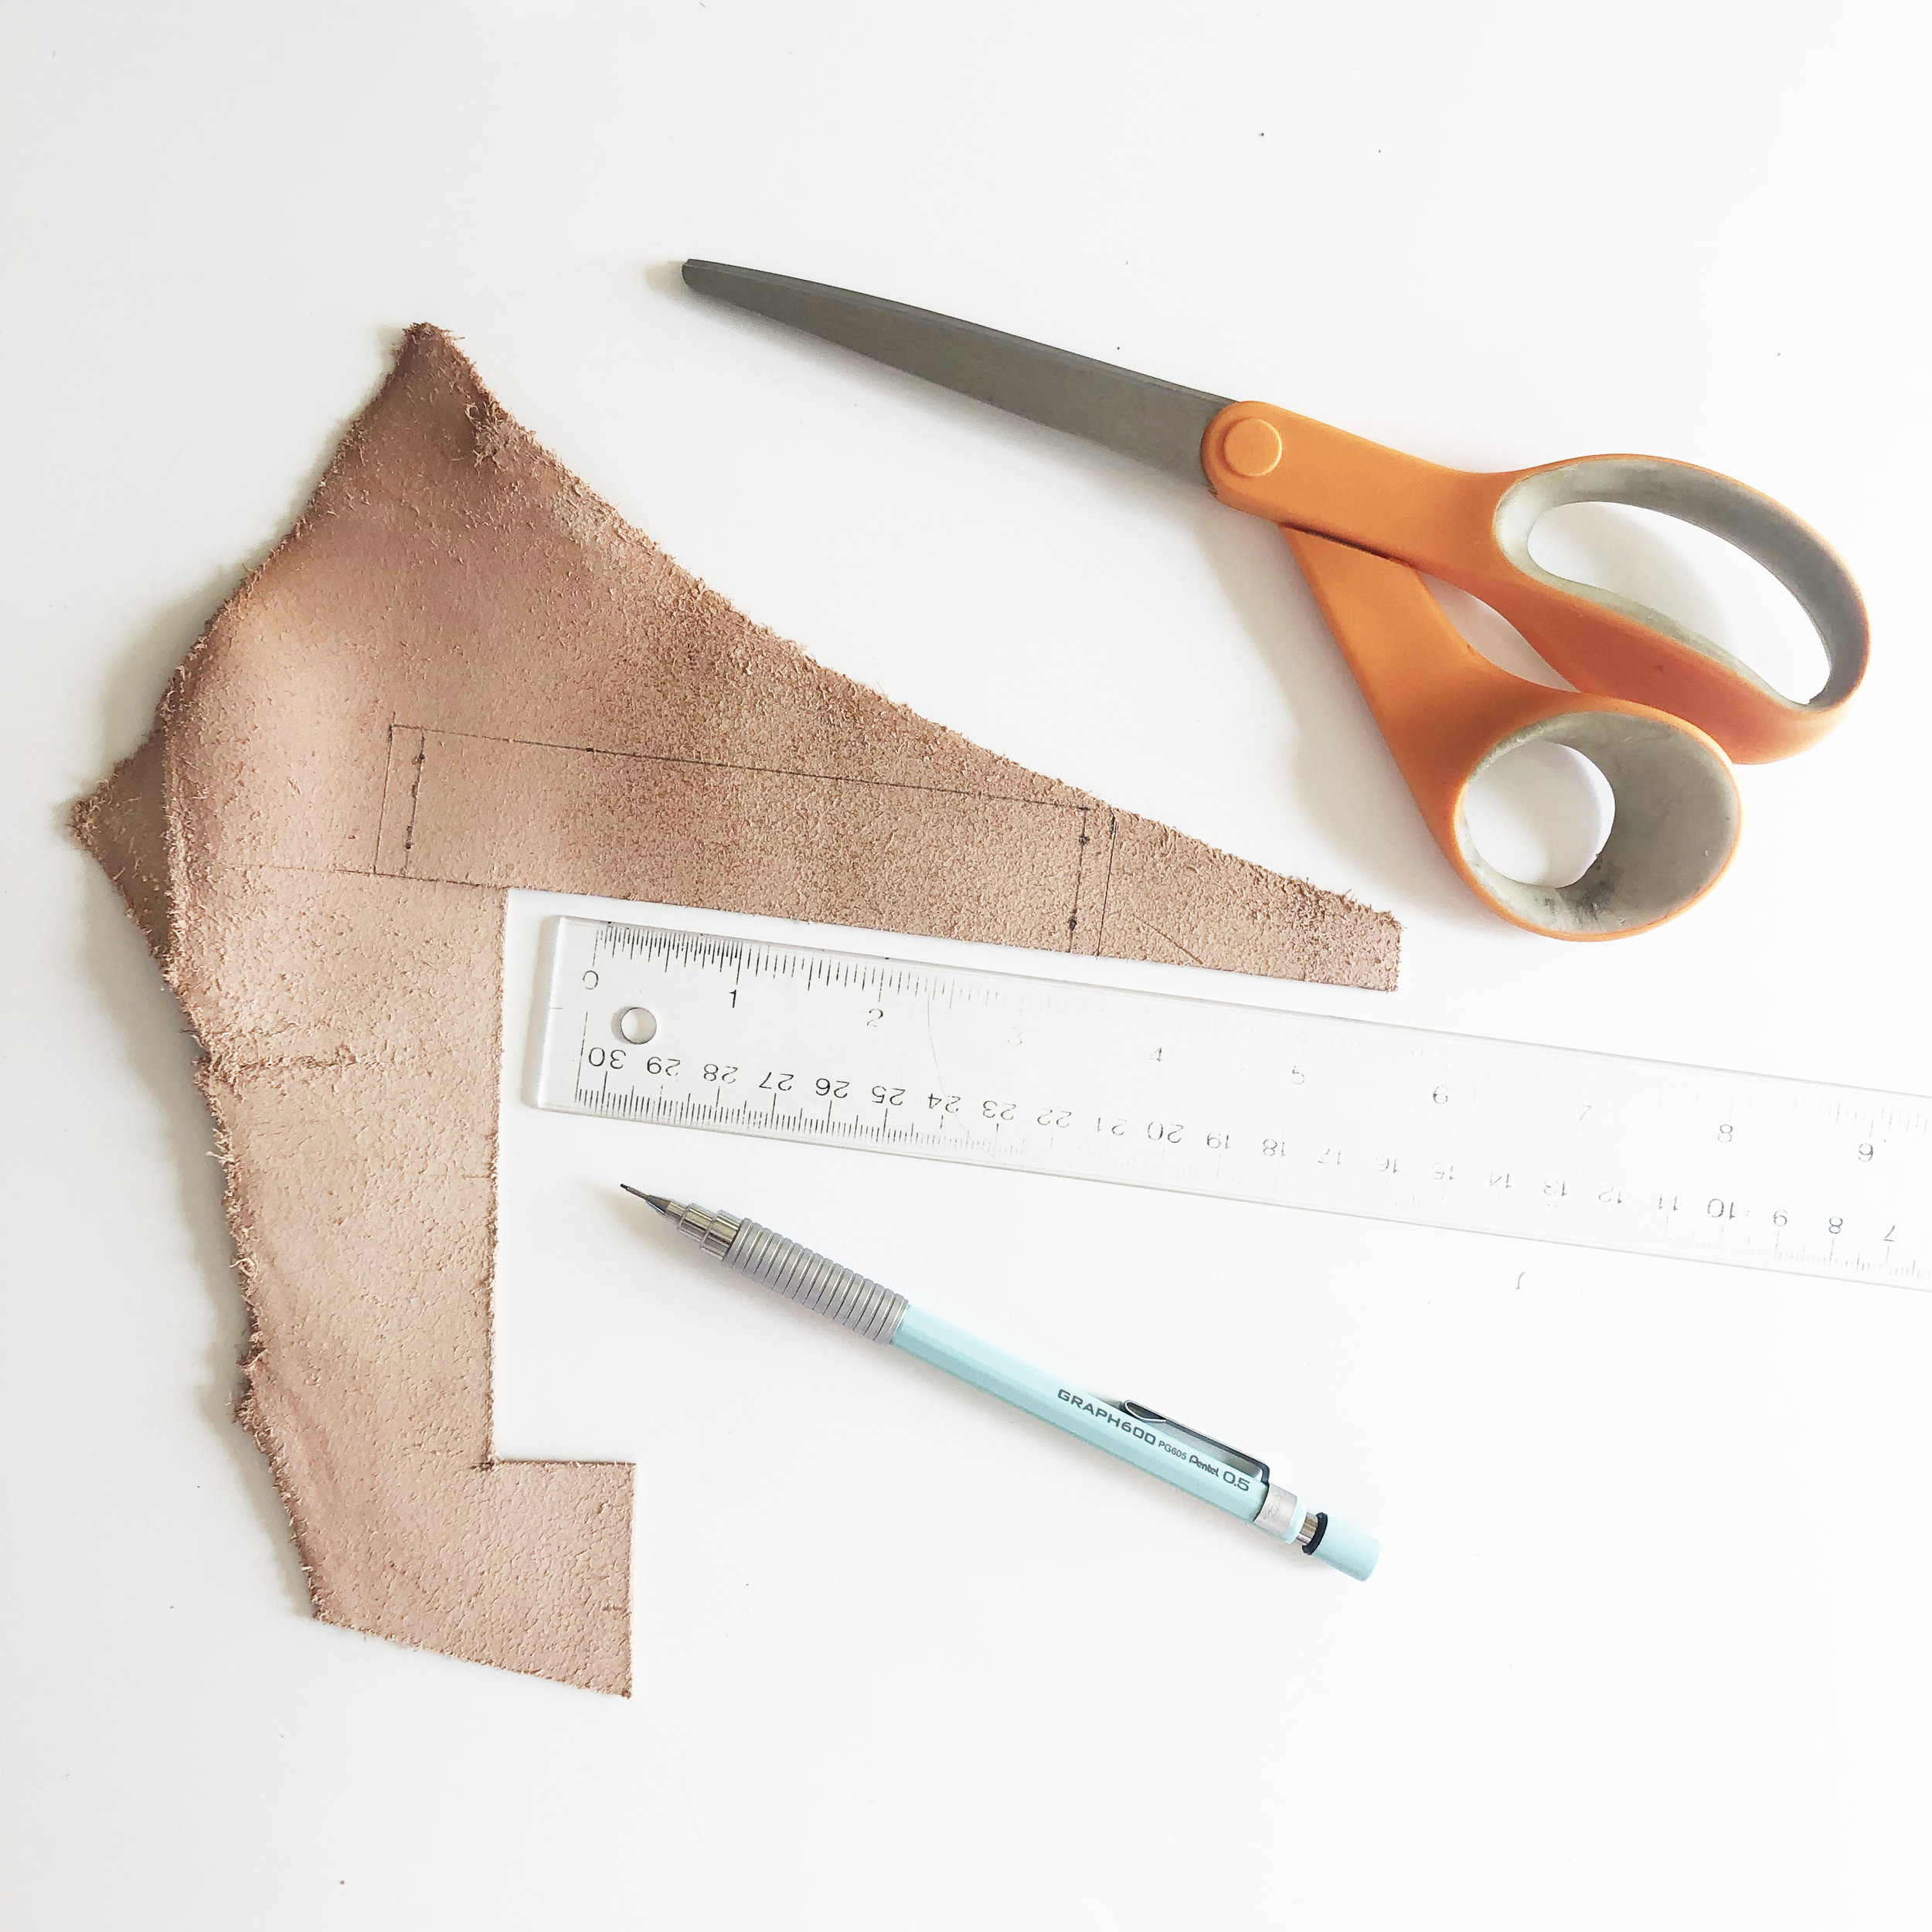
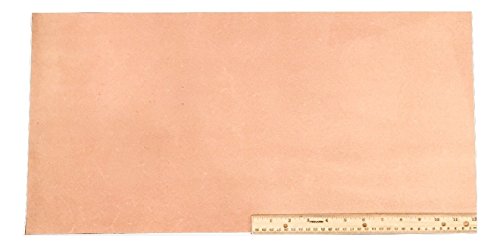
Now, soft leather. There are lots of different options! I have definitely seen decent faux leather trim at Michaels, and you can buy faux leather by the sheet and the yard at JoAnn’s. When I made my original samples I found a really amazing bulk lot of real leather sheets for a really great price on Etsy. My first recommendation would be that you support a fellow small business owner on Etsy, especially because there are so many great options at really, really great price points. Look around for scraps that are billed as “soft” but appear like they have a bit of structure (not too thin and flimsy). The leather I use is approximately 1/16” thick.
Click here to search for tan leather scraps on Etsy
(Note: you are N O T restricted to tan leather. I encourage everyone to go for the gold and put together something that really speaks to you!)
You can also find bulk leather on Amazon, because of course you can! Here are some options that I found that look great:

I-CORD LOOP FINISHING

If leather isn’t your thing and/or you don’t want to bother with extra materials, the pattern includes instructions on how to finish your potholder with a thick loop of i-cord. It’s super quick, easy, and looks amazing!
If you have never knit i-cord before, check out my simple video tutorial here:

Pattern Details
Yarn:
3 x balls of worsted weight 100% cotton yarn, with at least approximately 34 yards (approximately 102 yards total)
Recommended: Lily Sugar’n’Cream, Bernat Handicrafter DeLux
Yardage Notes:
This pattern is made by using 3 separate strands of cotton yarn together. You will need 3 separate balls with at least 34 yards each to complete this pattern.
Needles:
Size US 8 (5mm) needles
Two (2) size US 8 (5mm) double-pointed needles (for optional i-cord loop finish)
Tools:
Tapestry needle for finishing
Additional Tools to make leather loop:
Soft Leather
1/8” leather punch
Hammer
Ruler
Sharp scissors
Gauge:
15 stitches x 15 rows in garter = 4”
Finished Dimensions:
Measures approximately 8.5 x 8.5”
Key:
K - Knit
KF&B - Knit into the front and back of stitch (1 stitch increased)
K2T - Knit two stitches together (1 stitch decreased)
Get your copy of the Perfect Potholder pattern here !
Worsted weight cotton held triple worked on small needles creates a dense and thick fabric that effectively shields hands and countertops from heat. Simple lines and finishing techniques elevate this simple knit into a luxe kitchen item perfect for cooks and entertainers. Pair with the Perfect Oven Mitt for the ultimate handmade kitchen set.
I love to see what you make! Share your project on Instagram and tag me @elisemade, or via email to elisemade@gmail.com
Finished Dimensions
8.5 x 8.5” (21.5 x 21.5 cm)
Yarn & Yardage
Category 4/worsted weight 100% cotton
3 balls with 35 yards each (approximately 105 yards total)
Recommended: Lily Sugar’n’Cream
Loops and Threads Classic Cotton
Note: This pattern is made by holding 3 separate strands of cotton yarn together. You will need 3 separate balls with at least 34 yards each to complete this pattern. I recommend using 2 strands of the same color and 1 strand in a contrast color, but the possibilities are endless!
Needles
Size US 8 (5mm) needles
Gauge
15 sts and 15 rows of garter stitch worked flat in 4”/10cm
Tools
Tapestry needle for finishing
Additional tools to make leather loop:
Soft Leather
1/8” Leather Punch
Hammer
Ruler
Sharp scissors or Exacto knife
Key
BO – bind off
CO – cast on
K - knit
KF&B - knit into the front and back of stitch
(1 stitch increased)
K2T - knit two stitches together
(1 stitch decreased)
ST/STS – stitch/stitches
Construction
Potholder is worked with three strands of worsted weight cotton at a tight gauge to create a thick, heatproof fabric. Starting at one corner, increases are worked to the center of the potholder. Decreases are then worked down to the final corner. Potholder is finished with either an i-cord loop or an applied leather strap.

DIY: Free Knit I-Cord Workout Headband Pattern
i love to knit i-cord! it is fun and fast, and can be used in so many different applications from borders and edges to embellishment. many years ago i designed a simple headband by attaching an elastic hair tie to the ends of a section of i-cord, and the best workout headband was born!
i’m a big fan of those skinny elastic workout headbands, and i particularly love this i-cord version. it’s soft and stretchy, and the knit texture of cotton yarn stays put in your hair without pulling.

the best part is this project is lightning fast: you can make one from start to finish in around 40 minutes or less! i have one in just about every color. they also make great gifts!
this pattern is set up as a step-by-step photo tutorial to walk you through the entire process. i also put together a little video showing how to make a 3-stitch i-cord in case you’ve never made it before!
this tutorial is also available as a FREE pdf download!

This is a free downloadable PDF knitting pattern for the I-Cord Workout Headband.
**PLEASE NOTE: this is a free PDF pattern. Skip the billing field at checkout to receive the free download and confirmation.
Inspired by those cute elastic workout headbands, this knit version employs stretchy and comfortable i-cord and snag-free, metal-free elastic hair ties to create a super cute and functional hair accessory.
Absolutely essential for working out or whenever you need to hold back your hair, this i-cord headband stays in place and won’t cause headaches or hurt your ears. Use any worsted weight/category 4 100% cotton to make them easily machine washable with your workout gear!
This is a SUPER QUICK and SUPER EASY pattern yielding a headband you will wear, wash, and re-wear all the time. Grab some yarn and whip up this project in around 40 minutes or less!
This pattern includes a step-by-step photo tutorial to walk you through the entire process.
For a video tutorial on how to work a 3-stitch i-cord, check out my video tutorial here:
https://www.youtube.com/watch?v=kKamKP6ZVYw&t=21s
Purchase my recommended metal-free hair ties on Amazon here:
Yarn:
5-6 yards of any worsted weight / category 4 100% cotton
Needles:
2 x size US 6 (4mm) double-pointed needles
A 16” or shorter circular needle will also work perfectly fine!
Tools:
snag-free elastic hair ties
measuring Tape
scissors
tapestry needle for finishing
Gauge:
4 rows of i-cord = 1”
Finished Dimensions:
Approximately 17.5” unstretched
One size fits most - directions are included in the pattern on how to customize the size
For more information, see:https://www.elisemade.com/blog/i-cord-workout-headband
here’s what you’ll need to make your own:


Materials
yarn: approximately 6 yards of a worsted weight/category 4 cotton yarn
recommended: Lily sugar’n’cream
needles: size US 6 (4.0 mm)
I recommend using two (2) double-pointed needles, but a short circular needle will work perfectly fine!
tools: metal-free elastic hair ties (click here to purchase), tapestry needle, scissors, measuring tape
gauge: 4 rows of i-cord = 1”
finished dimensions: approximately 17.5” unstretched
customization notes: the length of your finished i-cord should be approximately 5-6” smaller than your head circumference
part 1: make the i-cord
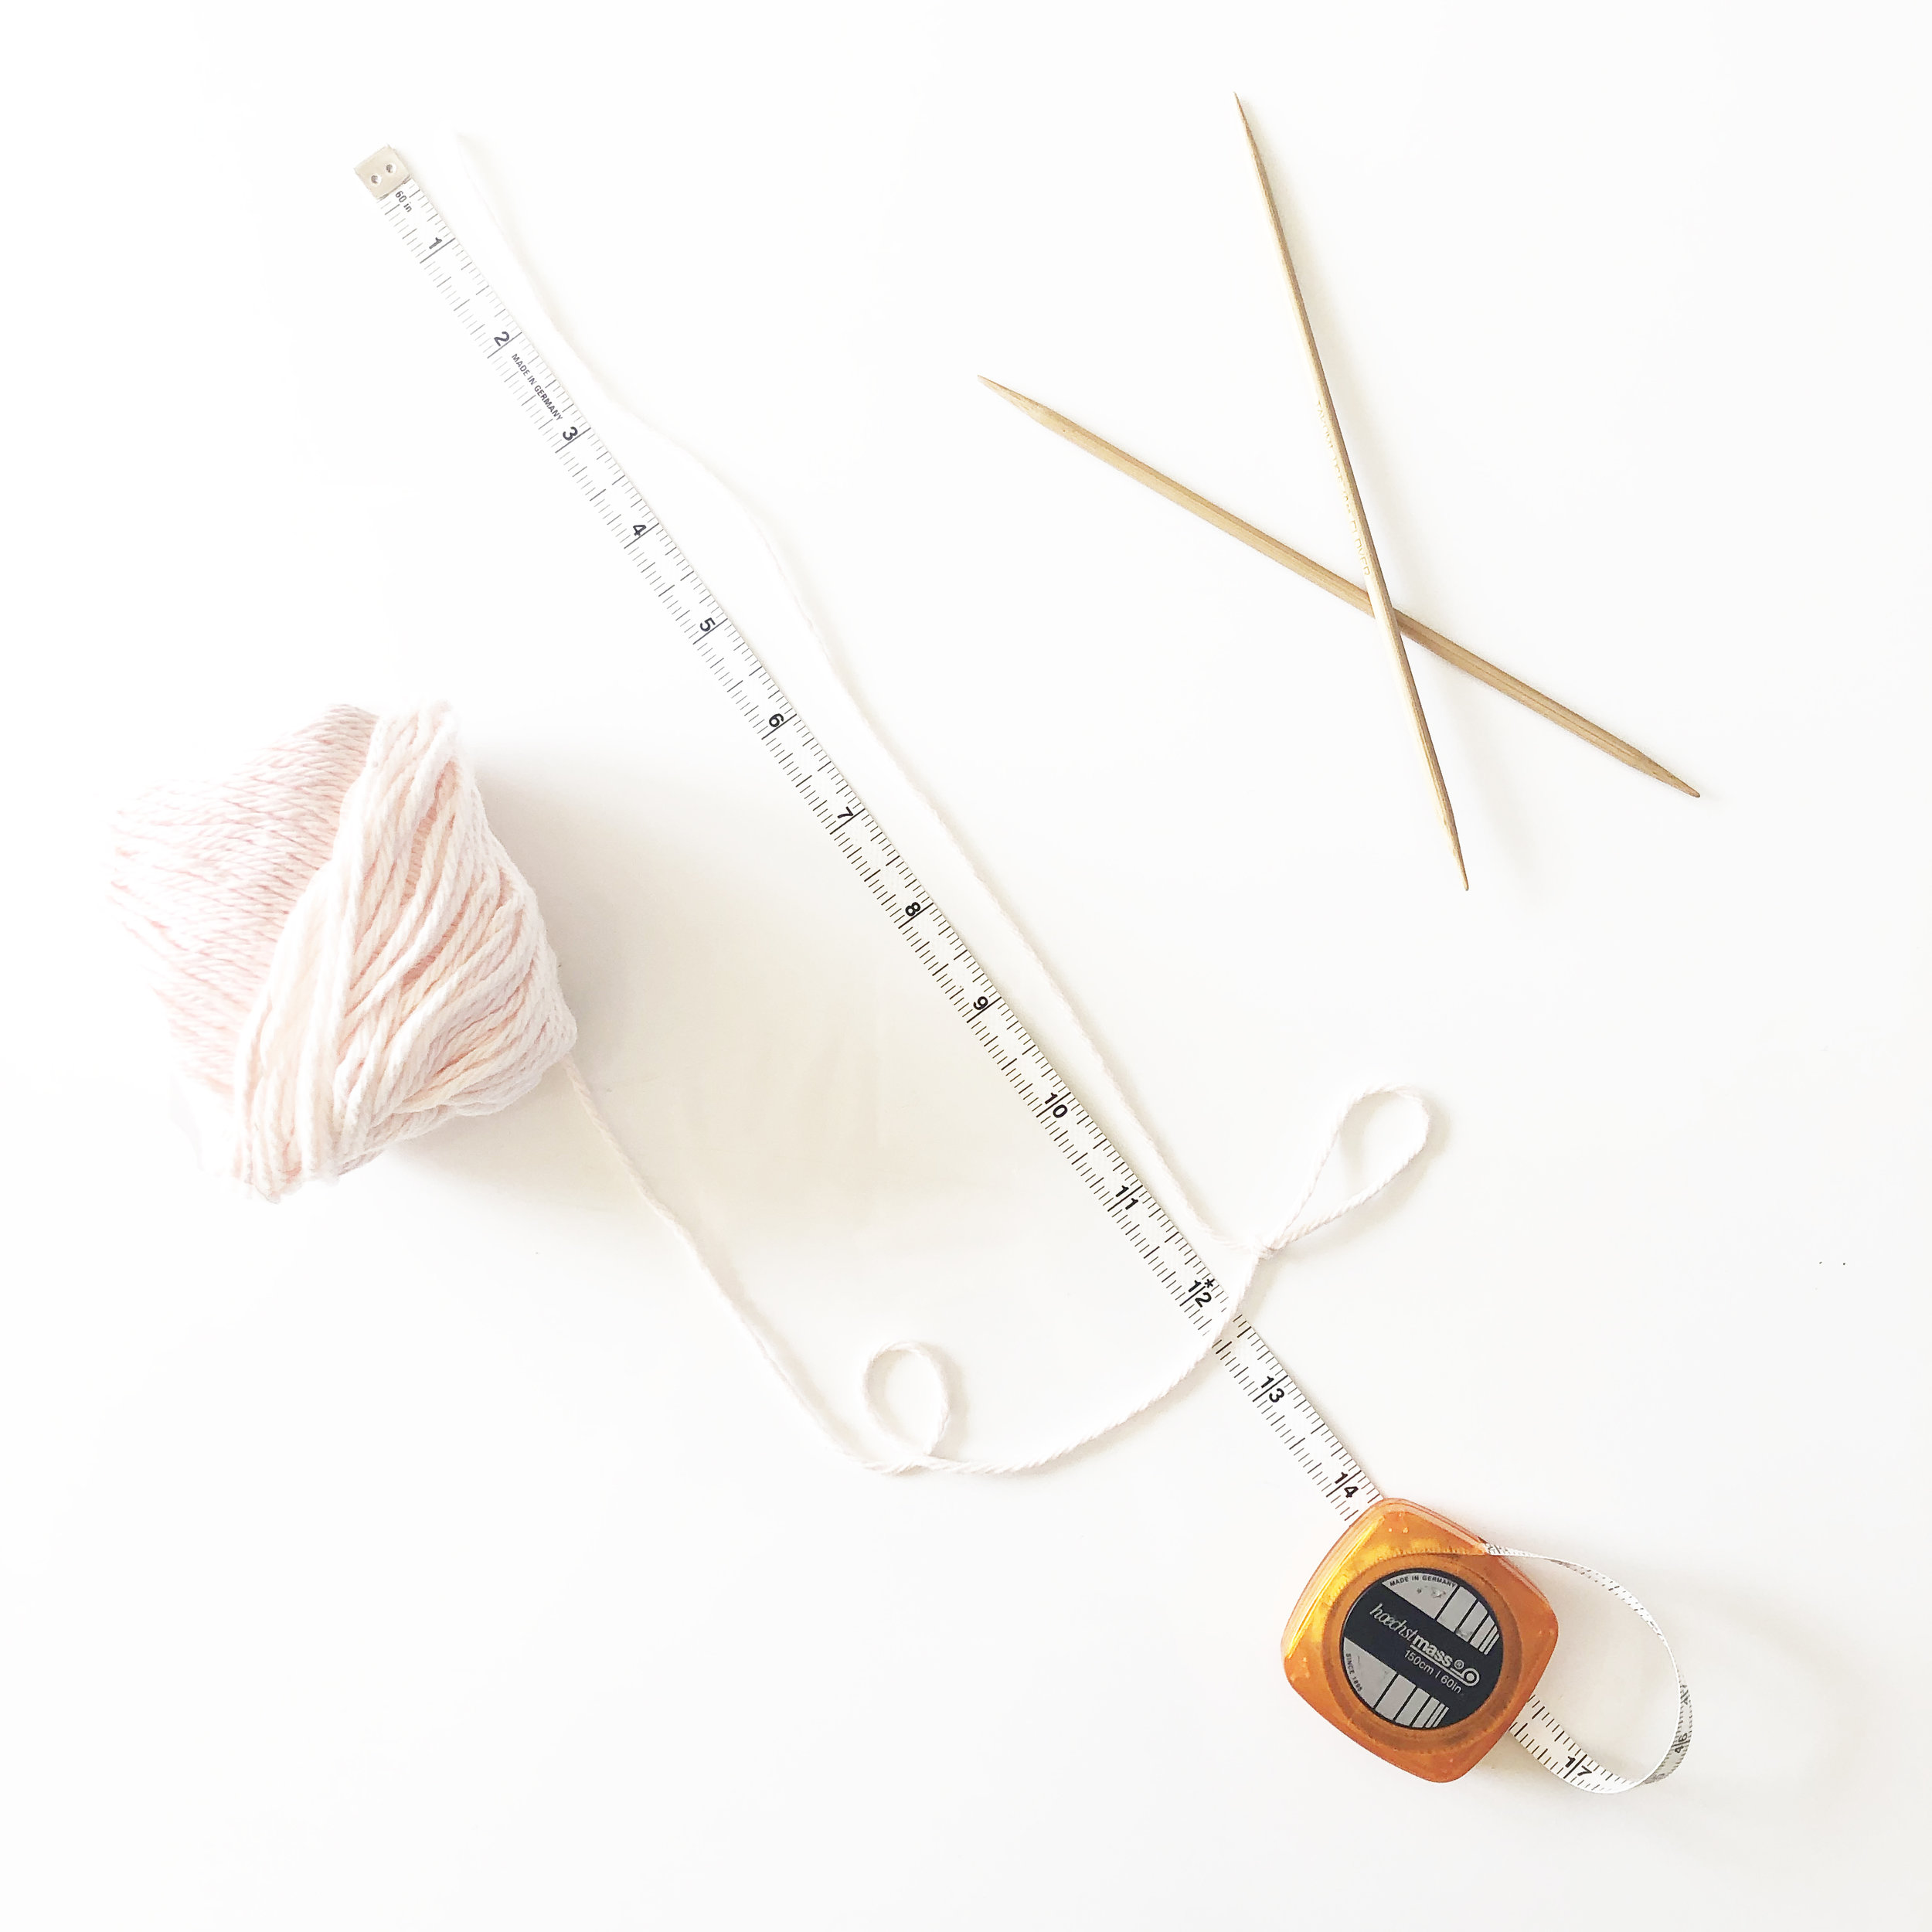
step 1: measure out a 12” length of yarn. cast on three stitches.
you should have a remaining tail measuring approximately 10”.

step 2: knit all stitches across the row.
note: the working yarn is attached to the first of the 3 stitches (the first stitch on the left-hand side).

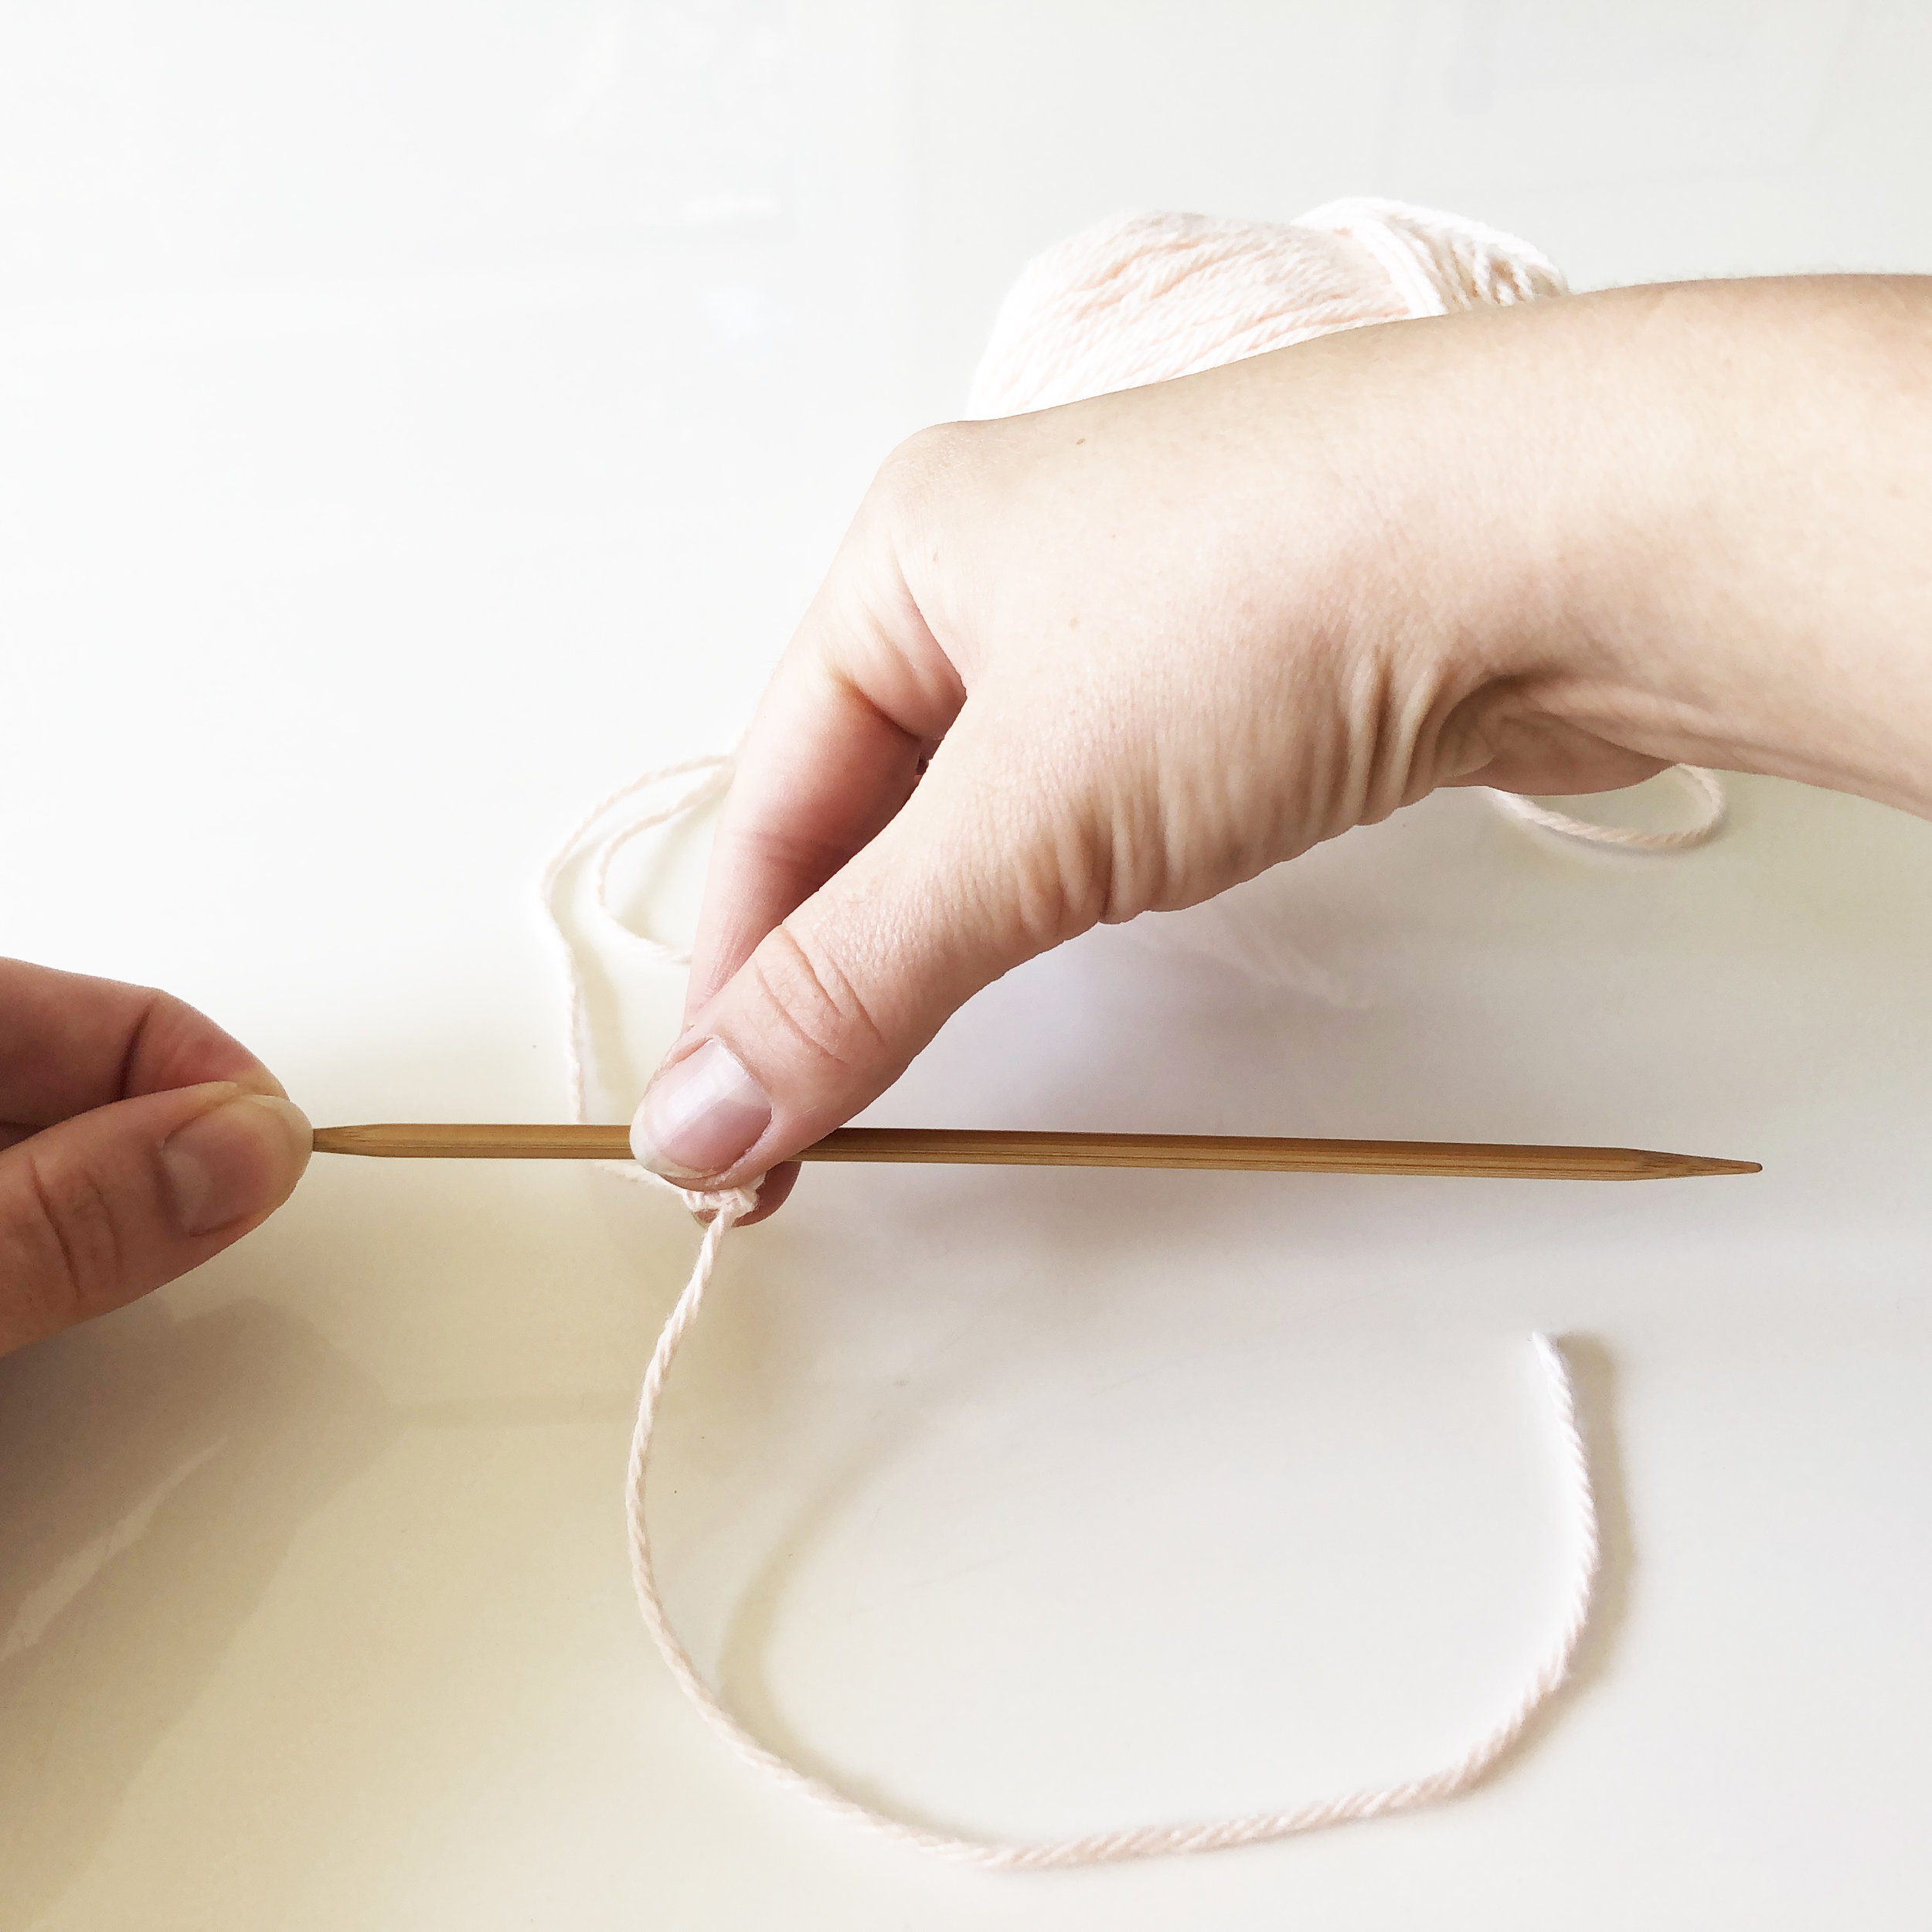

step 3: without turning your work, slide stitches to the other side of the needle, from the left-hand side to the right-hand side.
note: the working yarn is now attached to the back of the last of the 3 stitches (the stitch the furthest to the left).

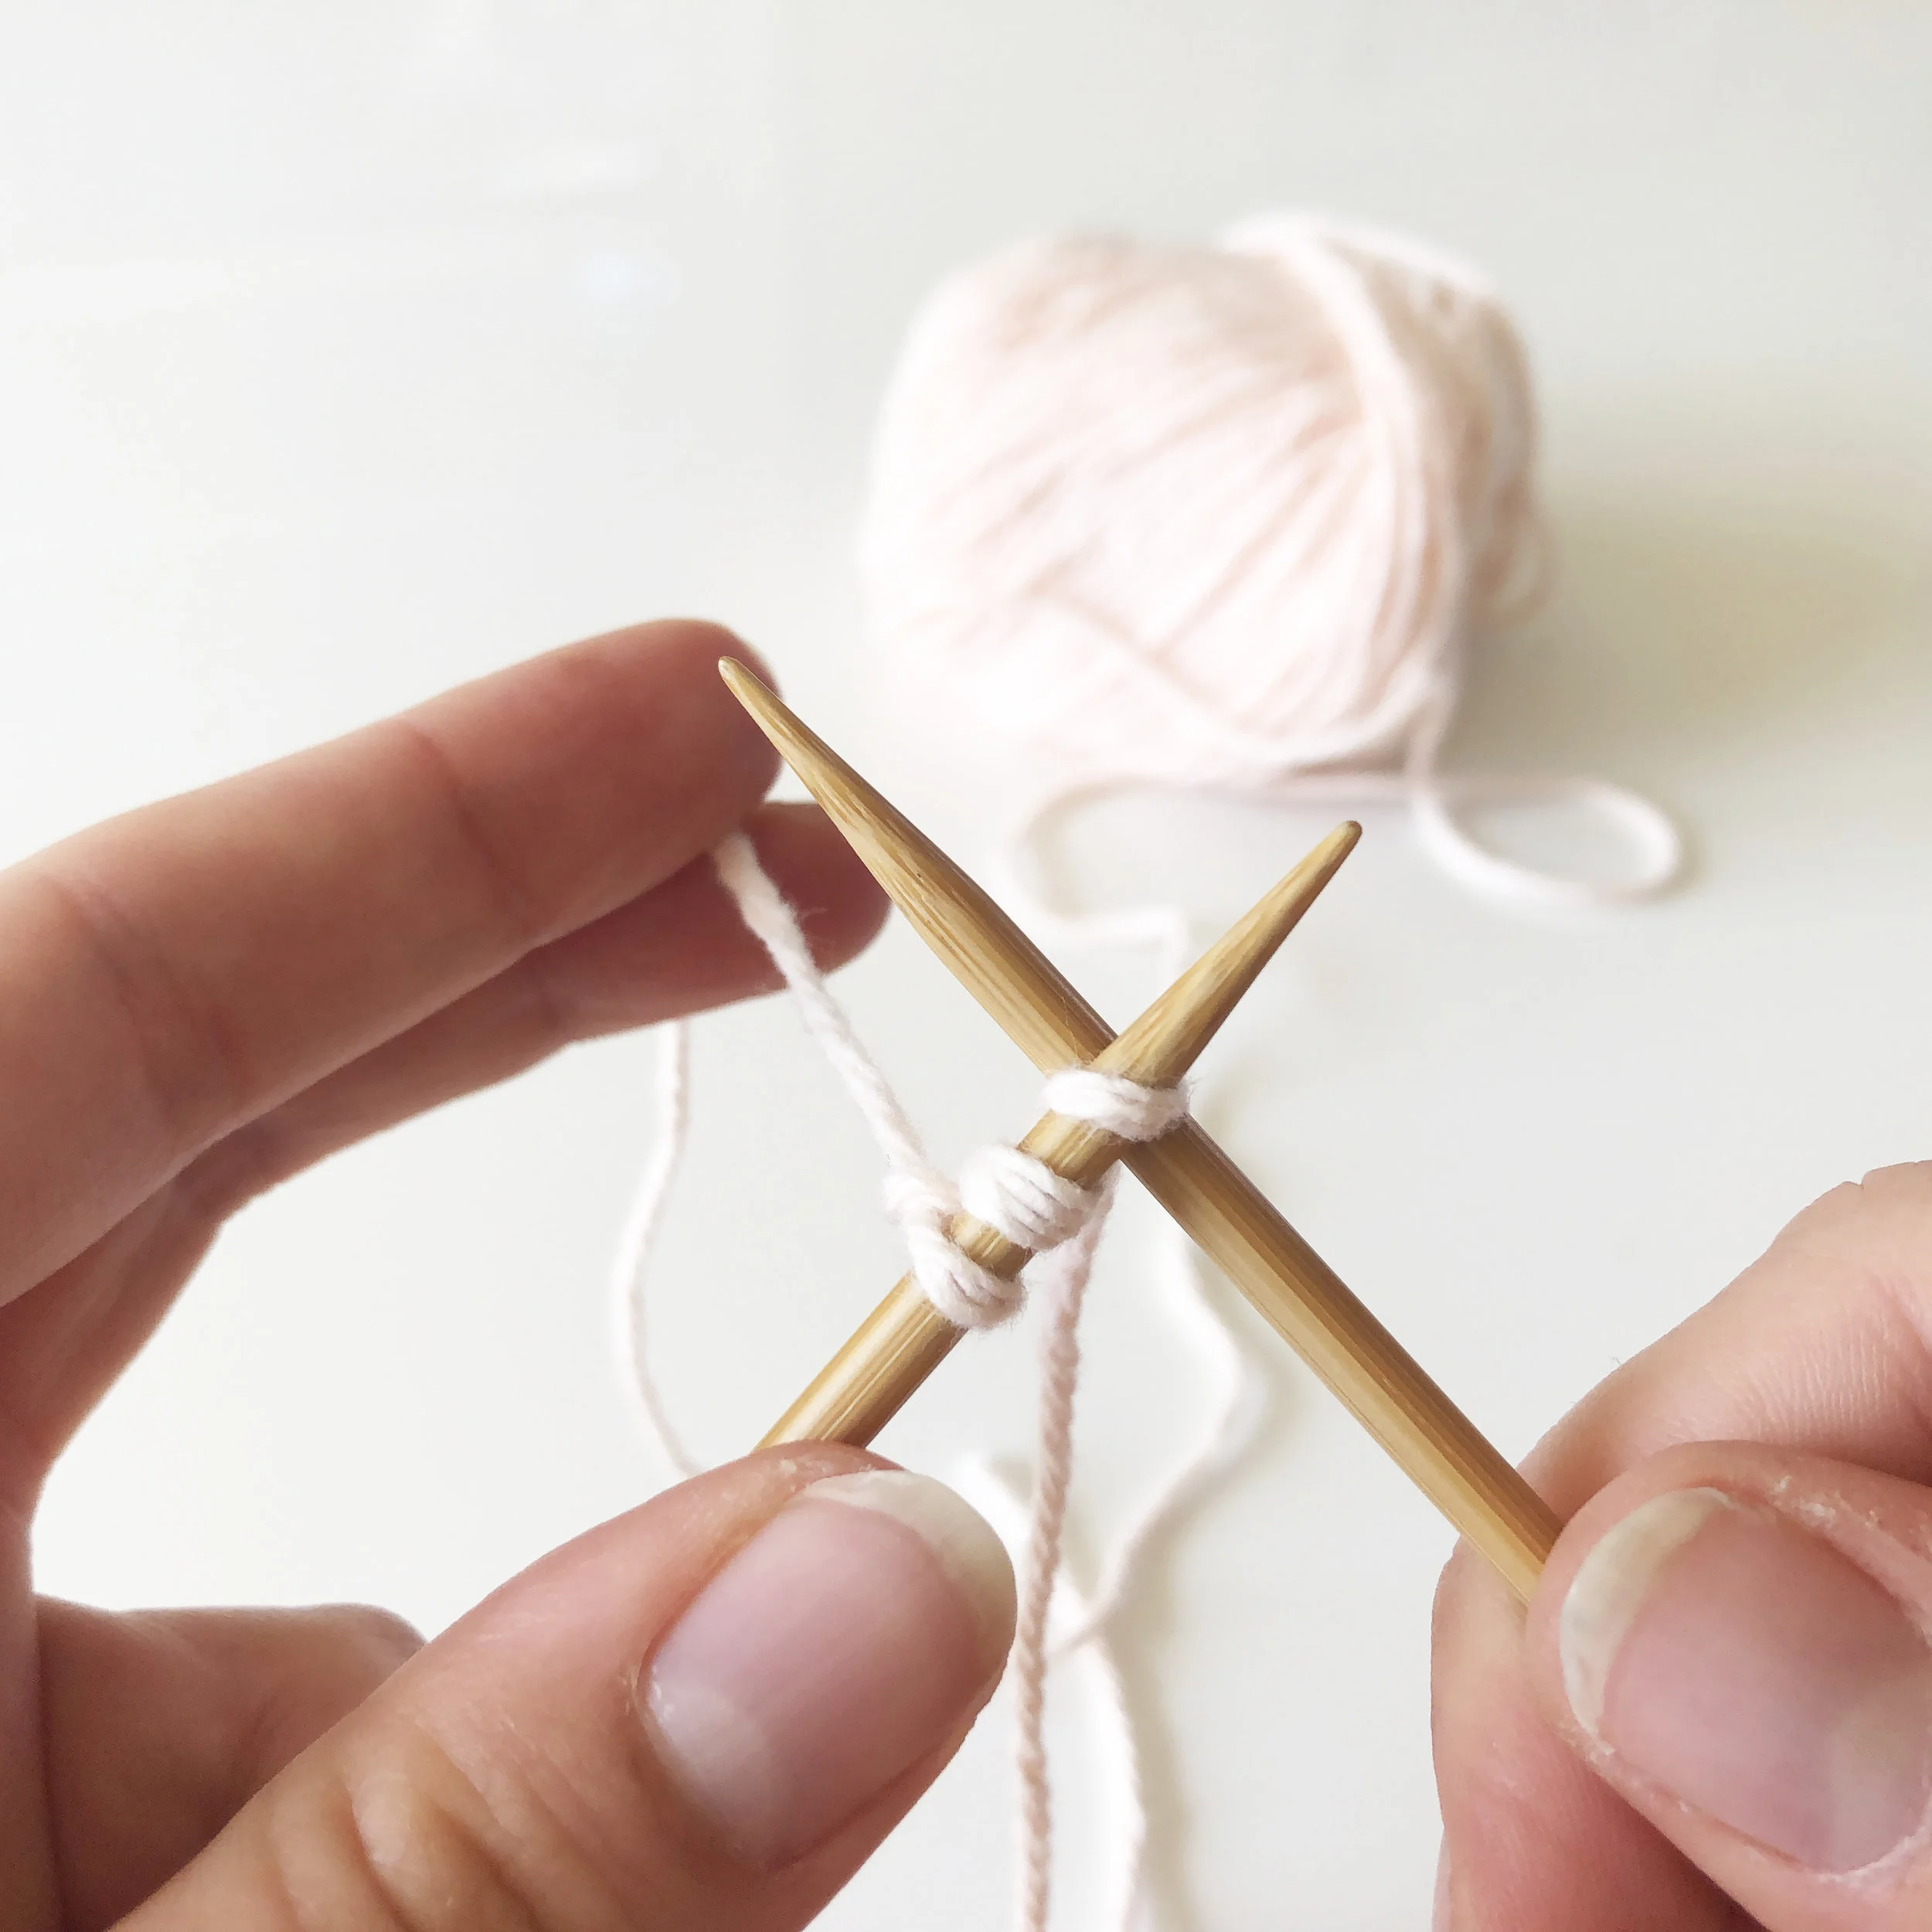
step 4: insert your needle into the now-first stitch (the right-most stitch) and pull the working yarn around. Knit into the stitch and across the row as normal.
watch the tutorial video:
repeat steps 3 and 4 until your i-cord measures approximately 15” (or approximately 5-6” smaller than your total head circumference).
bind off as normal. Break yarn leaving an approximate 10” tail.
part 2: attach the elastic hair tie

1. gather supplies
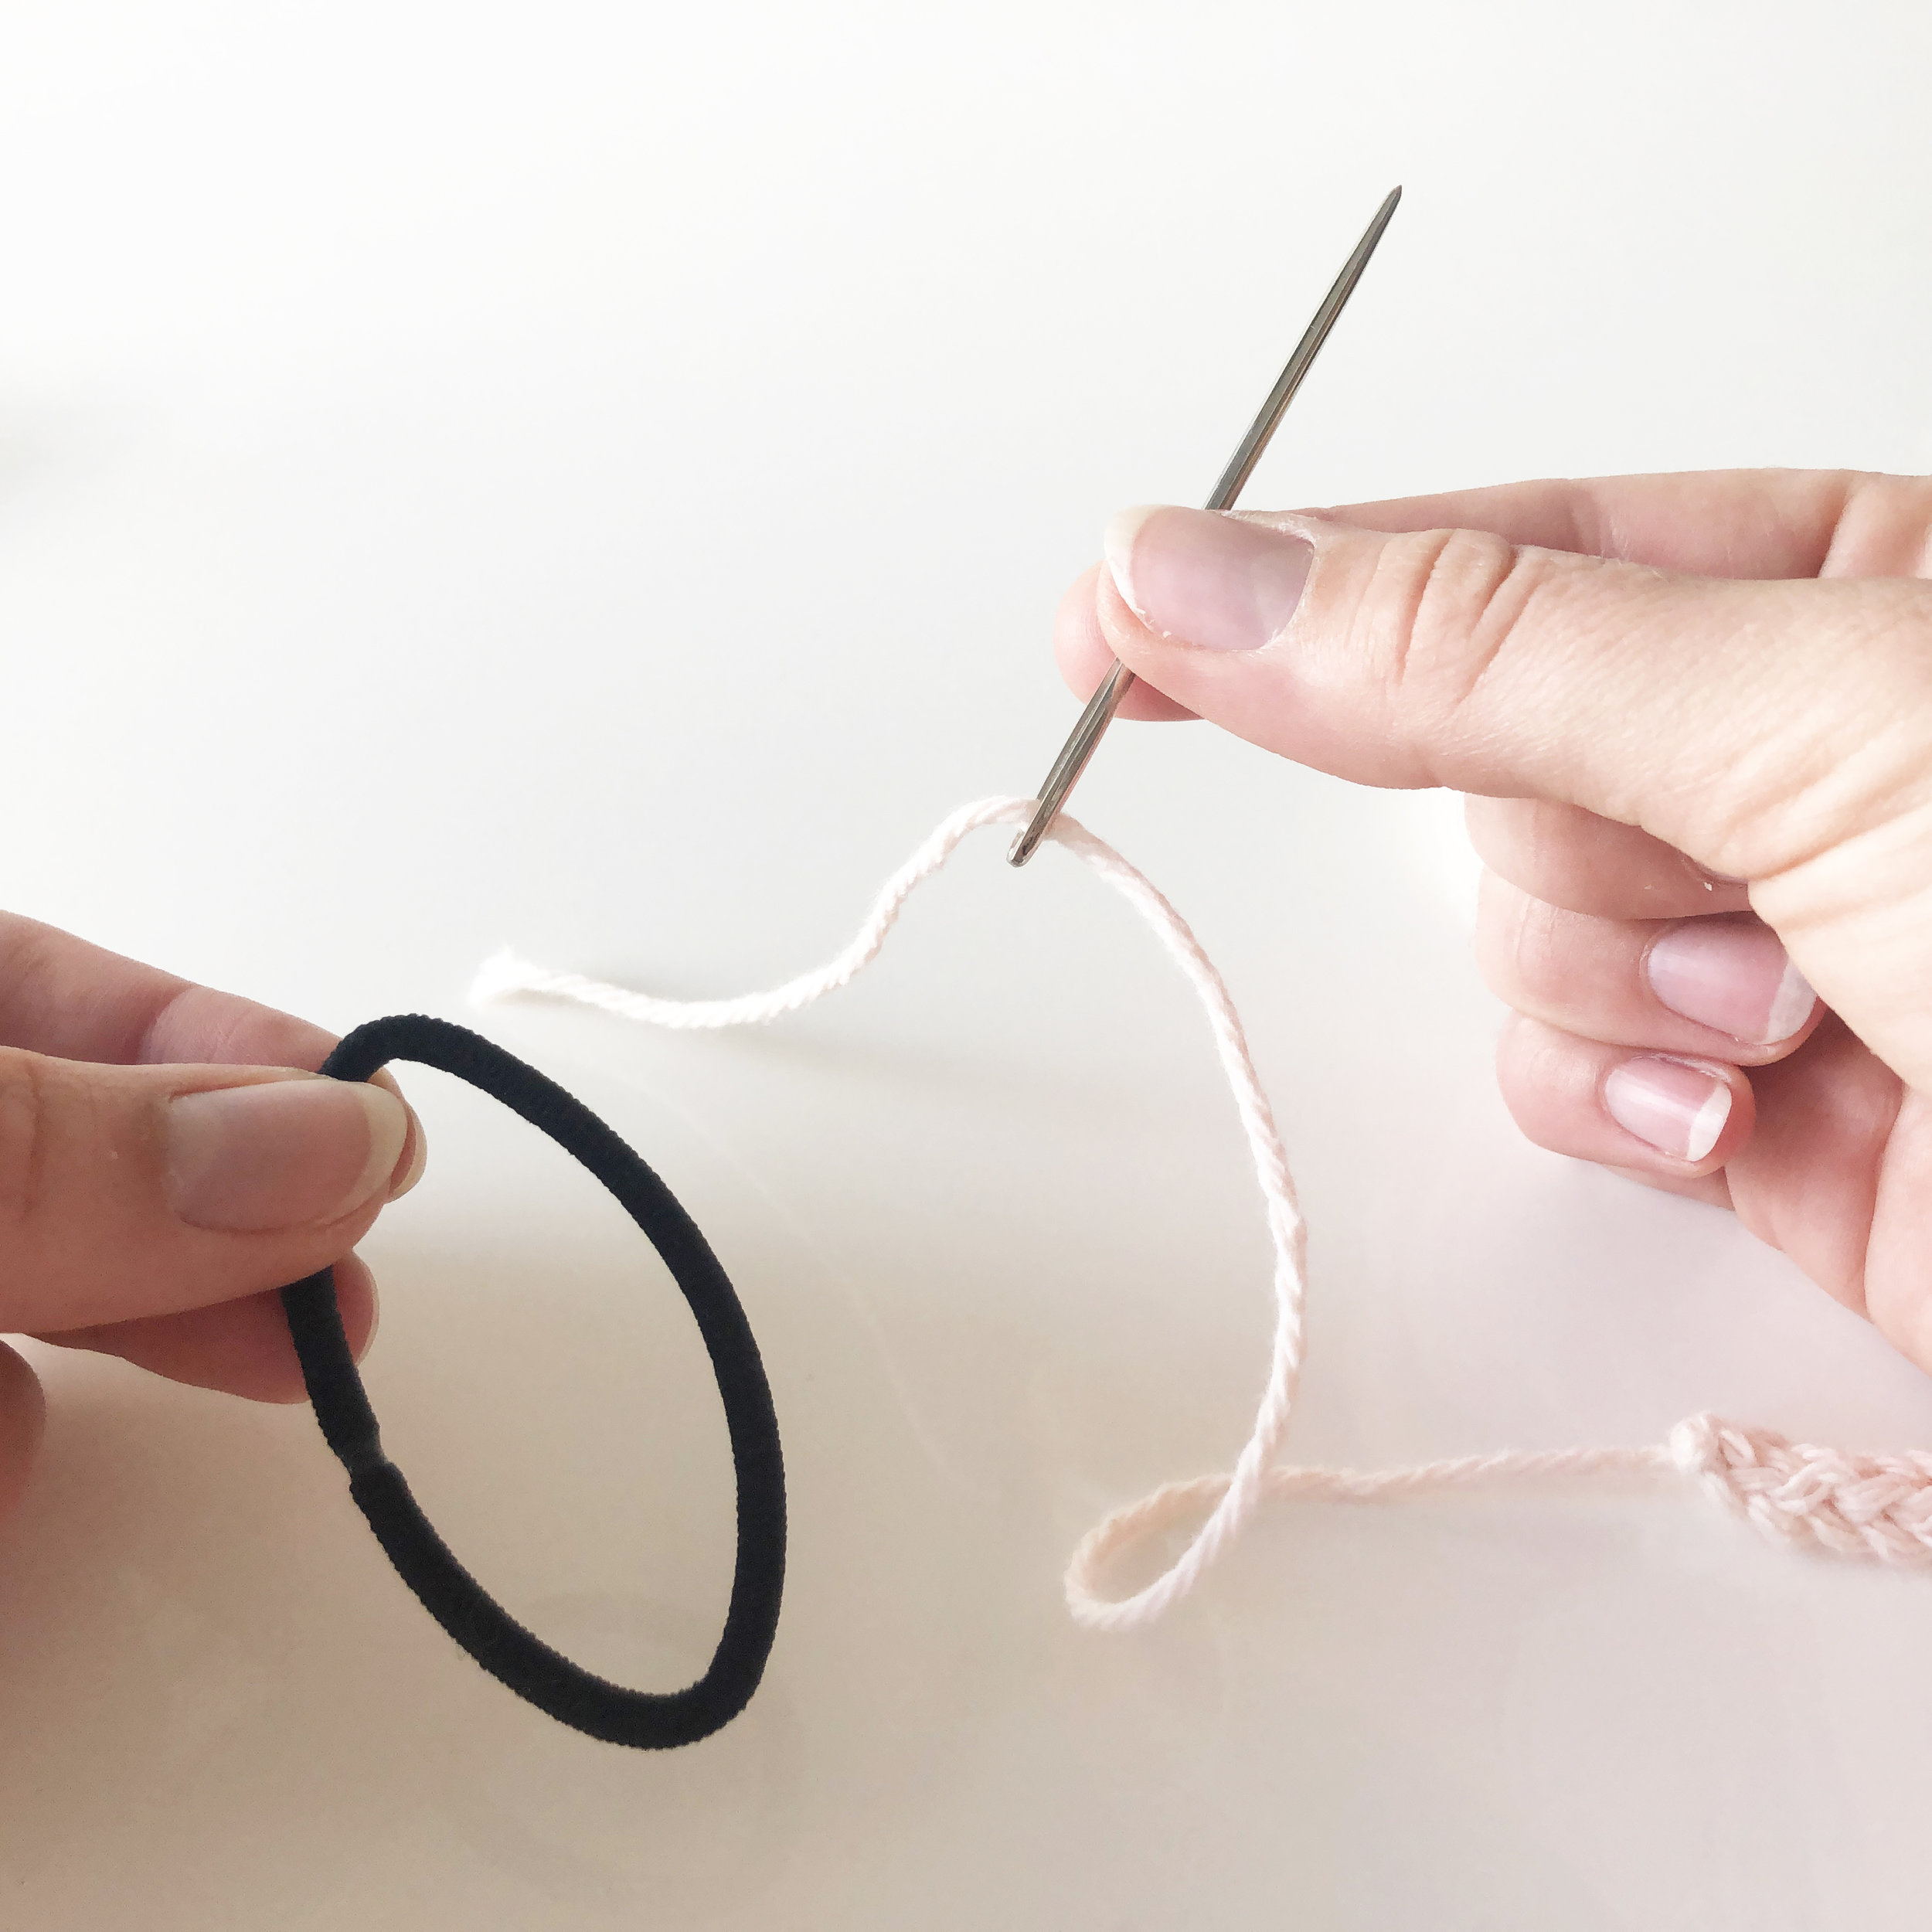
2. thread tapestry needle

3. run needle through elastic

4. pull tight to base of i-cord

5. insert needle into bound off stitches of i-cord

6. pull needle through and pull tight to elastic

7. repeat 3-4 times until i-cord is tightly secured

8. to finish, insert needle into base of i-cord

9. guide needle up 1-2” through the middle of the i-cord
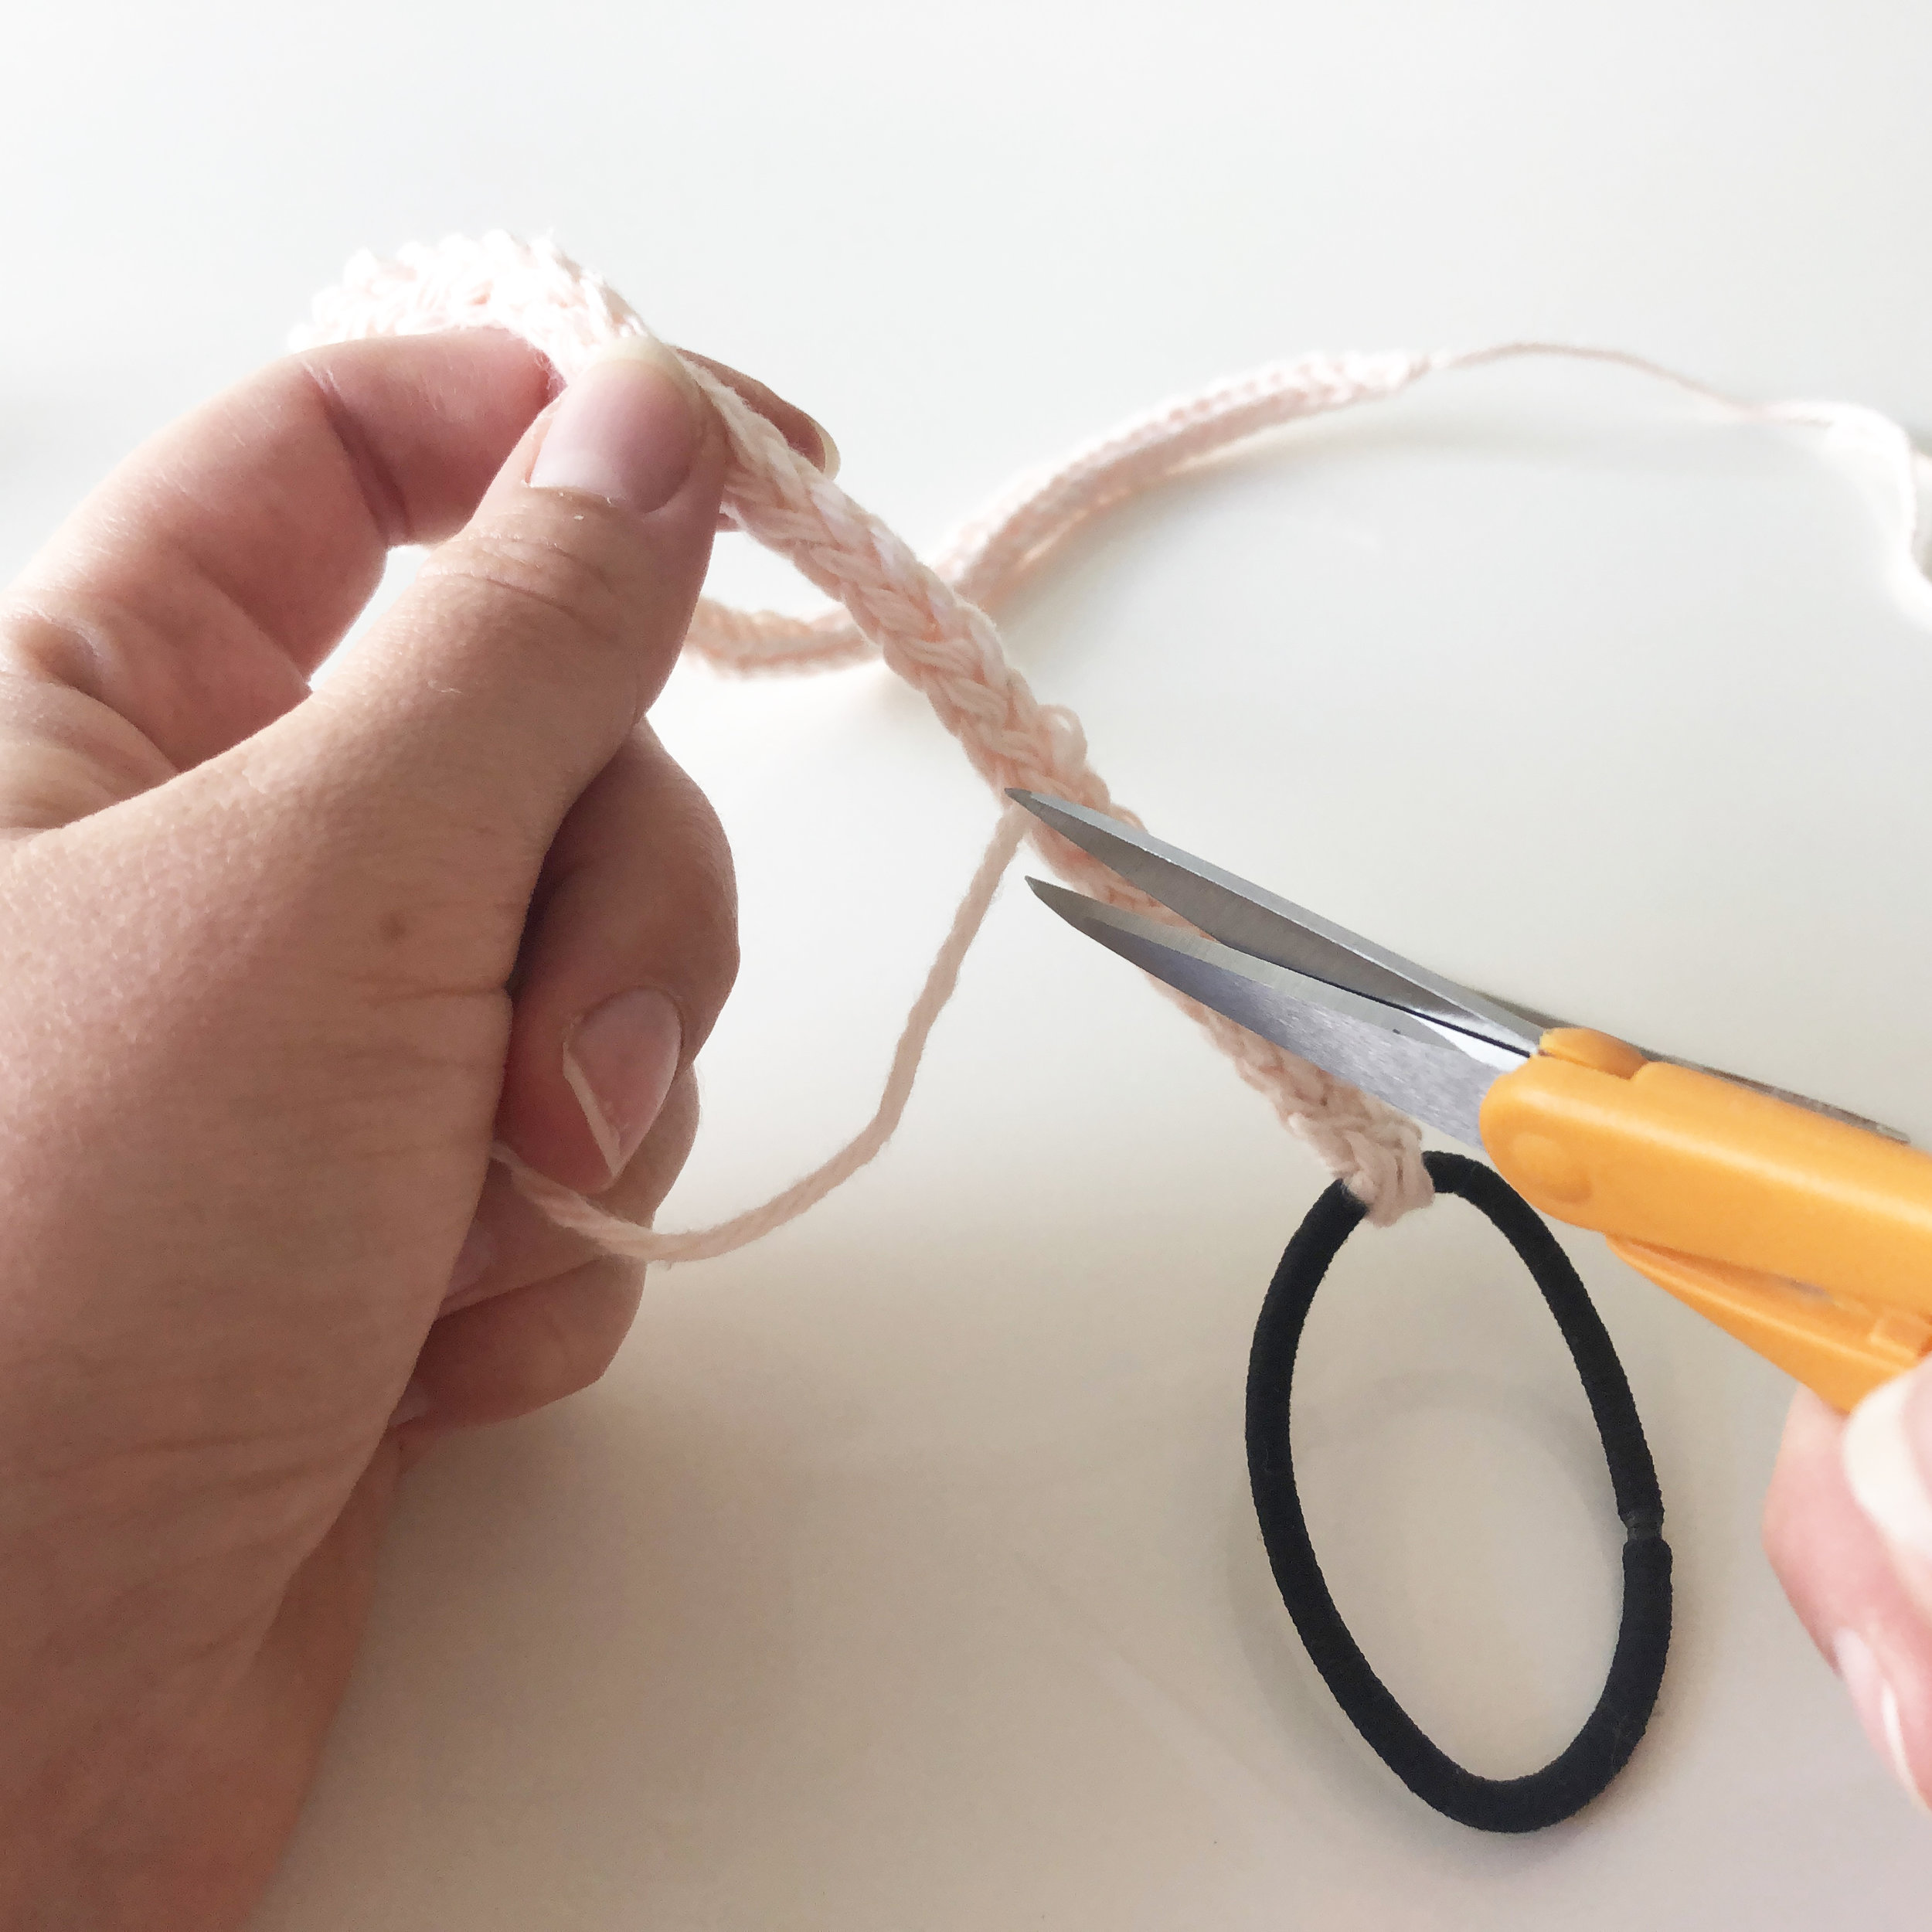
10. pull yarn through and trim

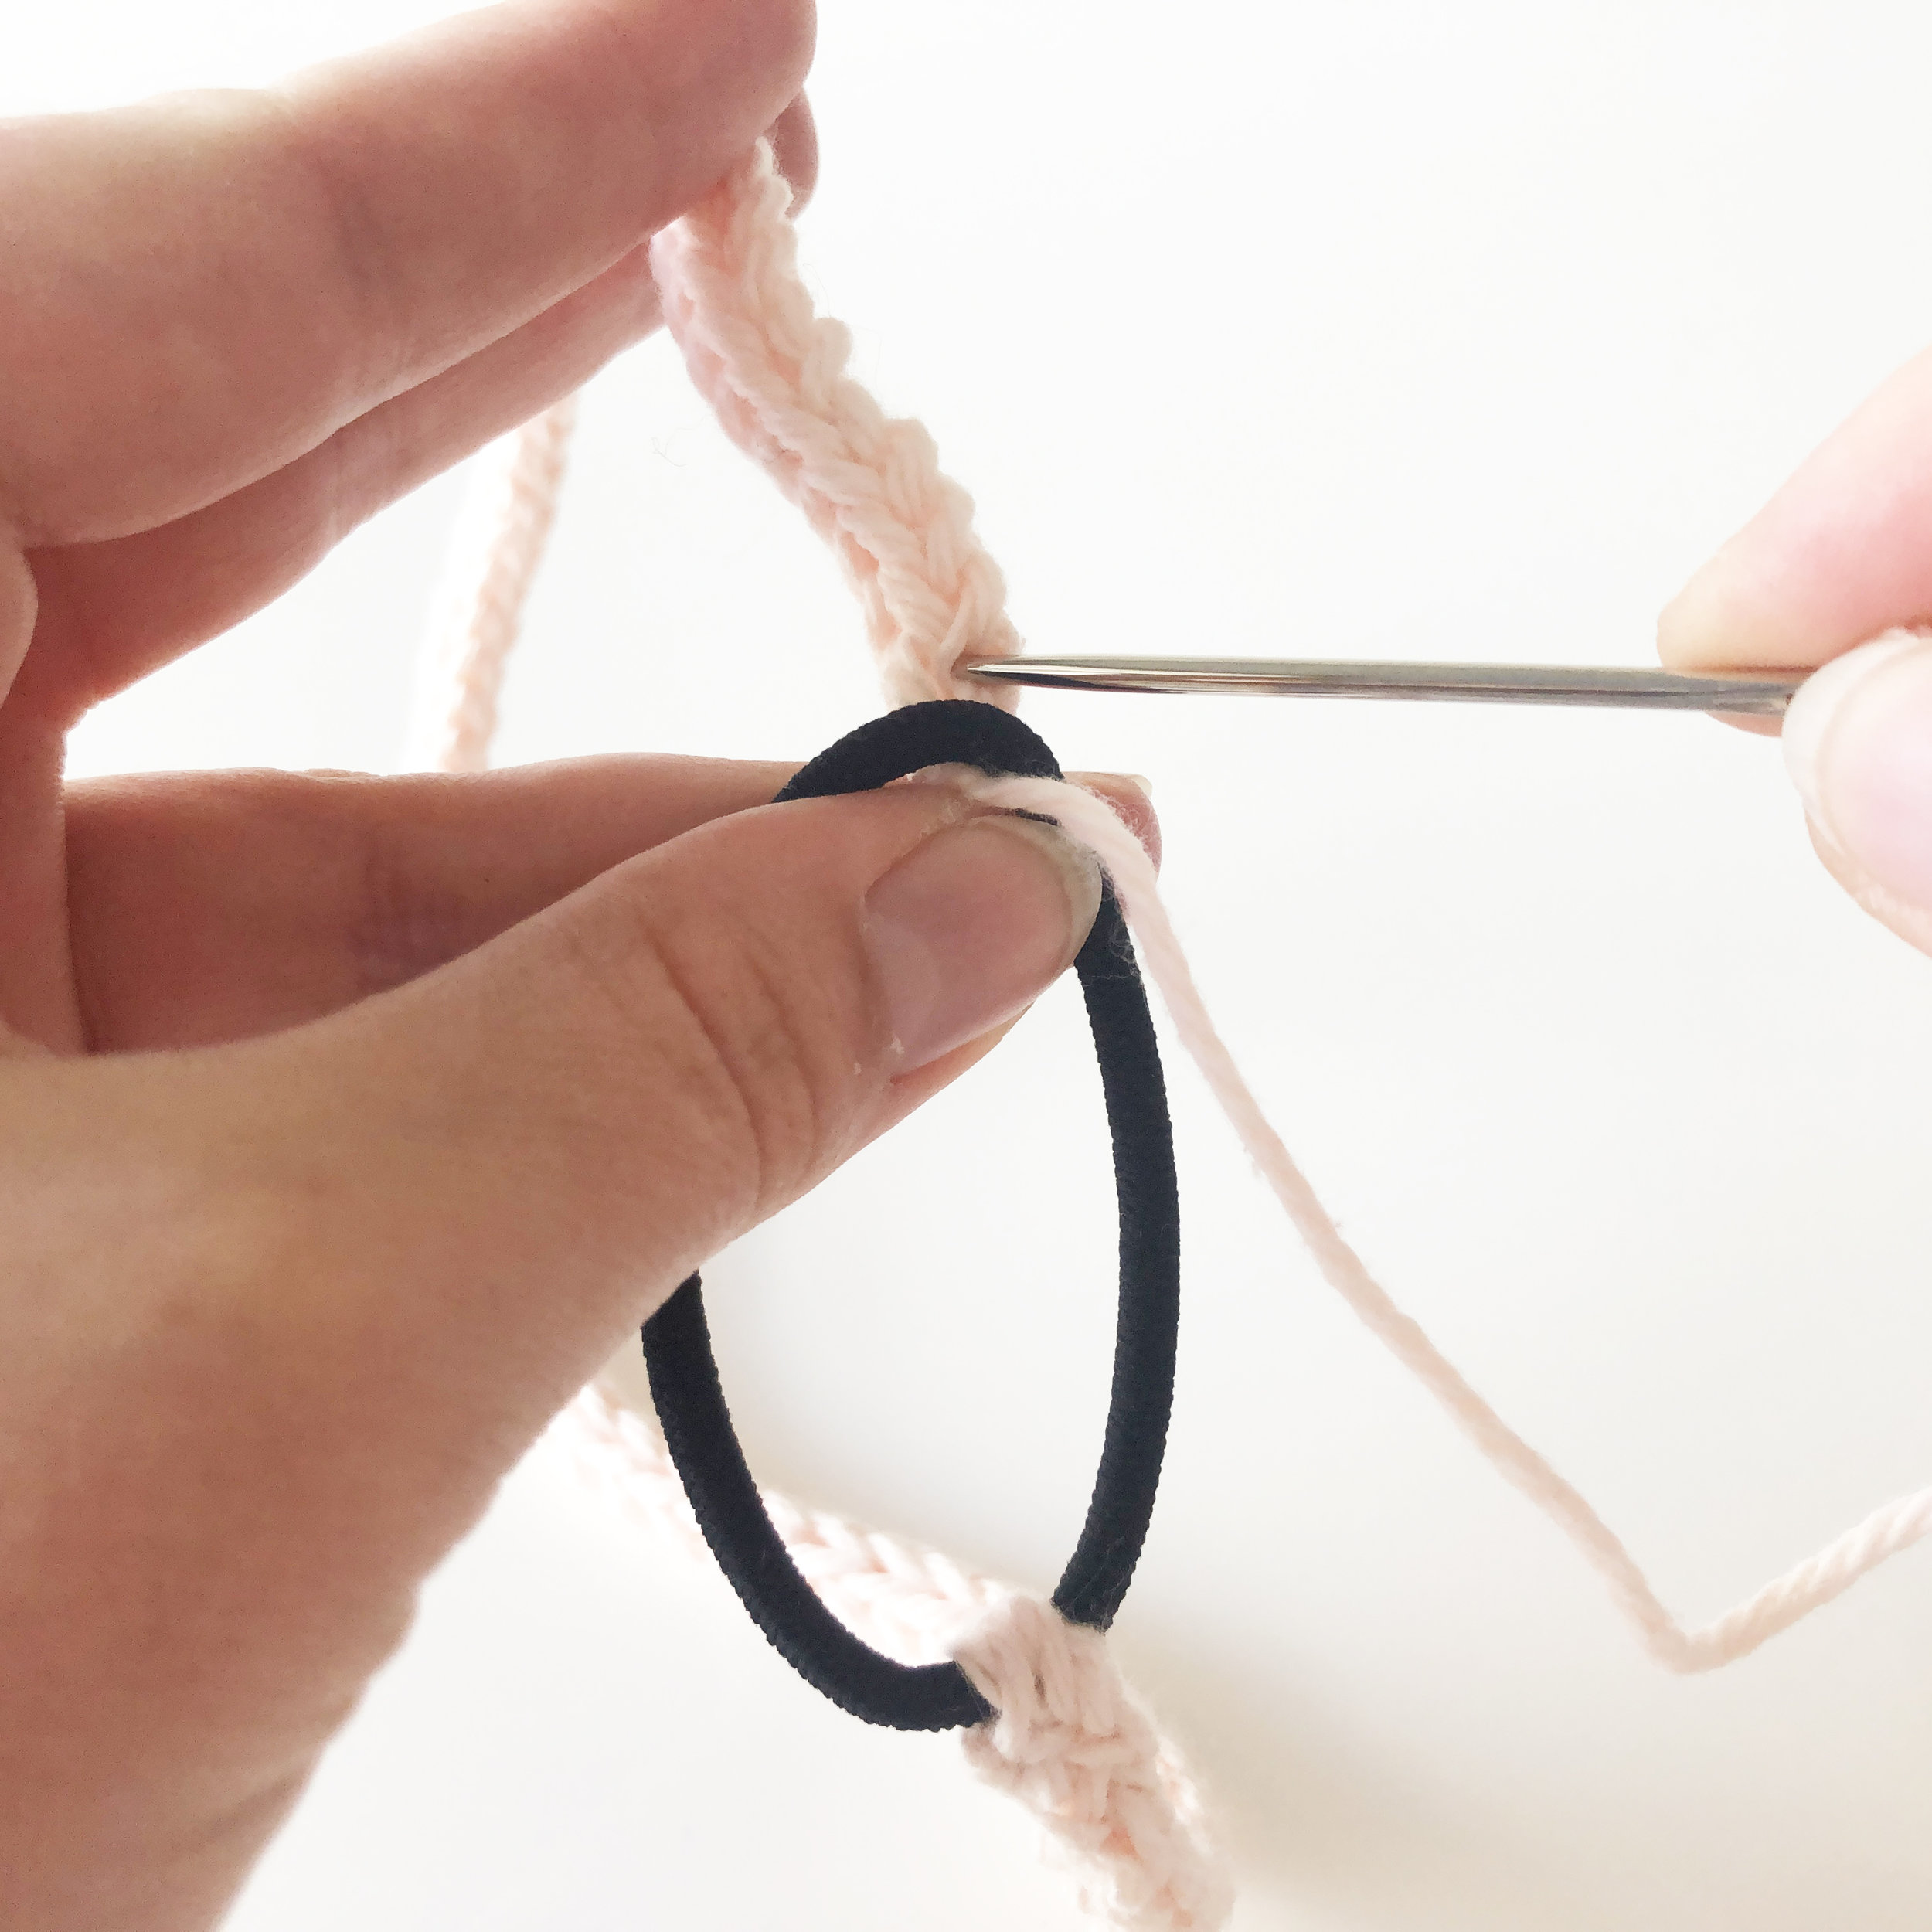
11. repeat directions on the other side!
enjoy your new headband!
if you have pattern questions or need support, please email me at elisemade@gmail.com.
please share your projects on instagram using #icordworkoutheadband and by tagging me @elisemade!

Introducing Farraige: A Cozy Cabled Hat Pattern

my latest pattern design is this cozy hat full of texture and cables inspired by traditional aran fisherman sweaters that i have named ‘farraige!’
starting with simple 1x1 ribbing that is folded over into a warm double-brim, the pattern transitions into a series of orderly cables and seed stitch texture. farraige is a great pattern for cable beginners looking to expand their skills, and a soothing and meditative knit for experienced makers.

pattern details
Yarn:
1 skein category 4/worsted weight yarn
Recommended: Lion Brand Wool Ease
Needles:
Size US 6 (4mm) circular or double-pointed needles
Tools:
Cable needle or extra DPN for cable rows
Tapestry needle for finishing
Gauge:
22 stitches in 1x1 ribbing over 24 rows = 4x4”
Finished Dimensions:
With brim folded up, hat measures 8 x 9.5”
Key:
K - Knit
P - Purl
C6F - Slip 3 stitches onto cable needle and hold in front of work. Knit next 3 stitches from the left needle, then knit the 3 stitches on the cable needle
C2F - Slip 1 stitch onto cable needle and hold in front of work. Knit next stitch from the left needle, then knit the stitch on the cable needle
C2B - Slip 1 stitch onto cable needle and hold in back of work. Knit next stitch from the left needle, then knit the stitch on the cable needle
P2T - Purl two stitches together to decrease
K2T - Knit two stitches together to decrease
CDD - Central double decrease


there are both written and charted instructions as part of the farraige pattern pdf, and it also includes a step-by-step tutorial on how to perform the simple and clever central double decrease.
the pattern for farraige will be available on ravelry, etsy, and elisemade.com this coming friday, april 26th!

Topography Hat Pattern Collection - the Pylon Cable-Ribbed Beanie

i am excited to share with you The fourth and final design in my Topography hat pattern collection, the Pylon hat!
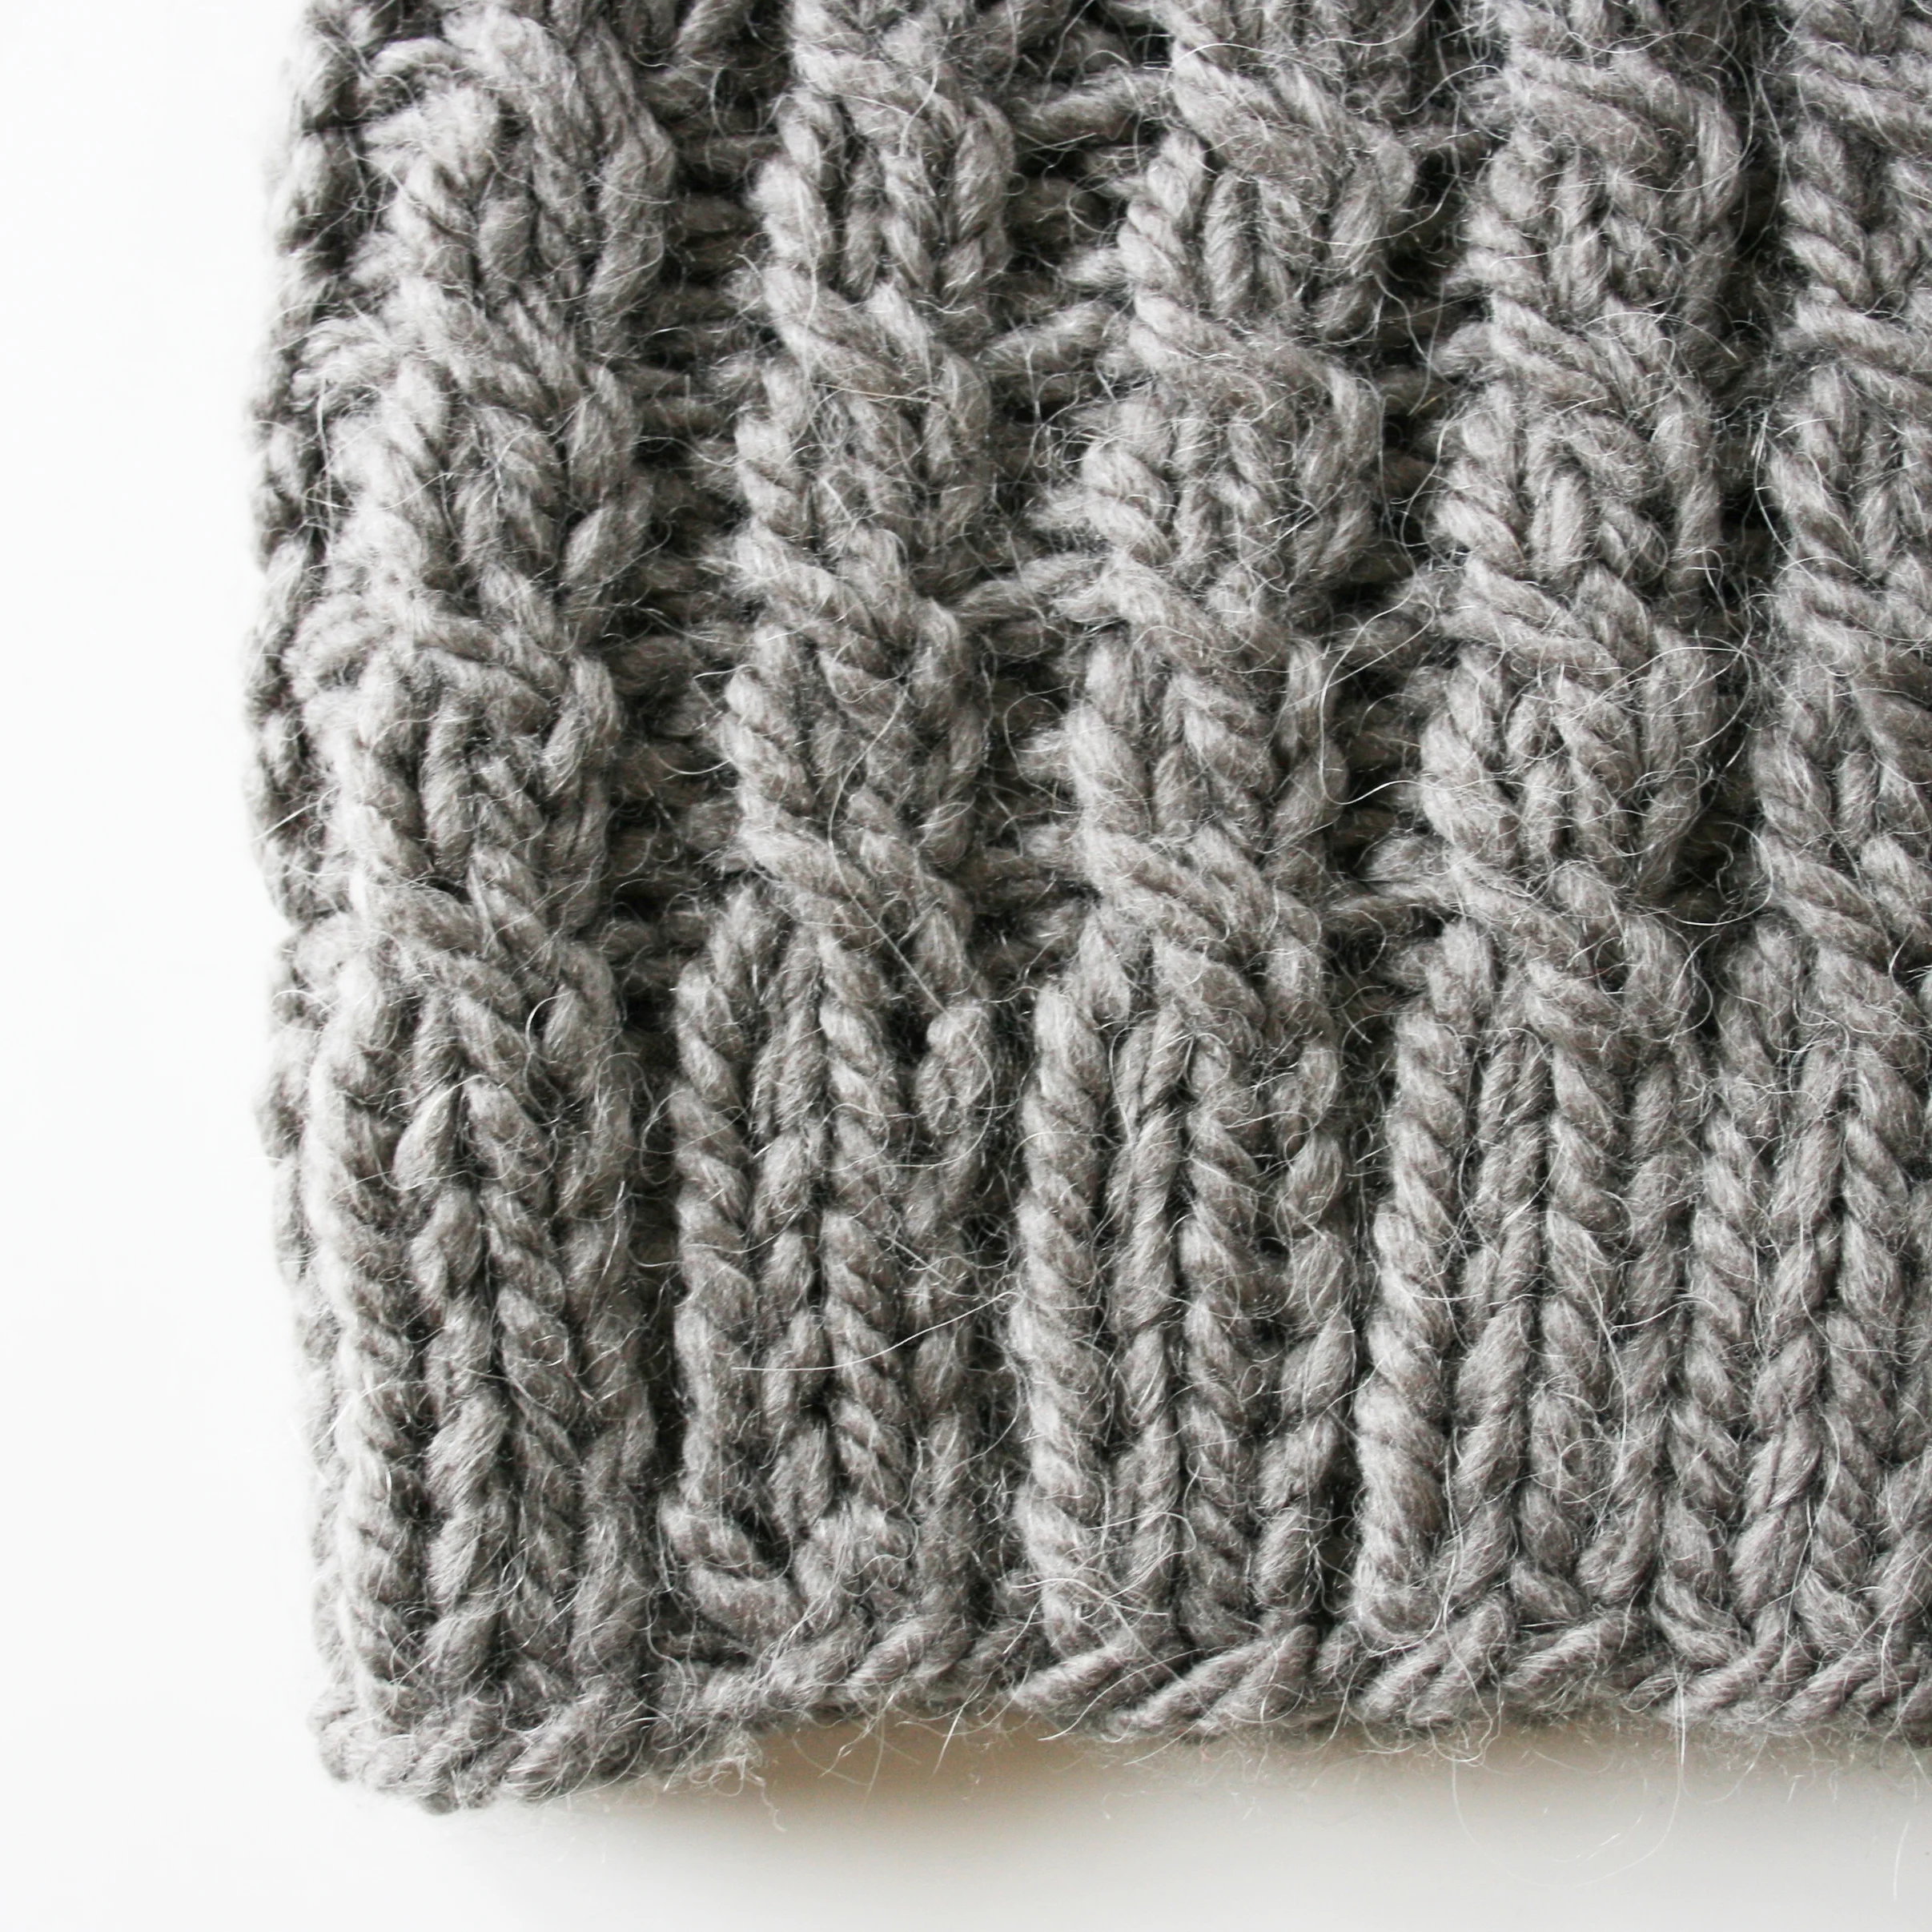
Beginning with an off-beat ribbing pattern that is then worked into thin cables up through the crown, Pylon is is a modern oversized take on a classic ribbed hat design. And since it calls for a category 6/super bulky weight yarn Pylon knits up quickly, satisfying that “instant gratification” itch that i know i feel on the regular.
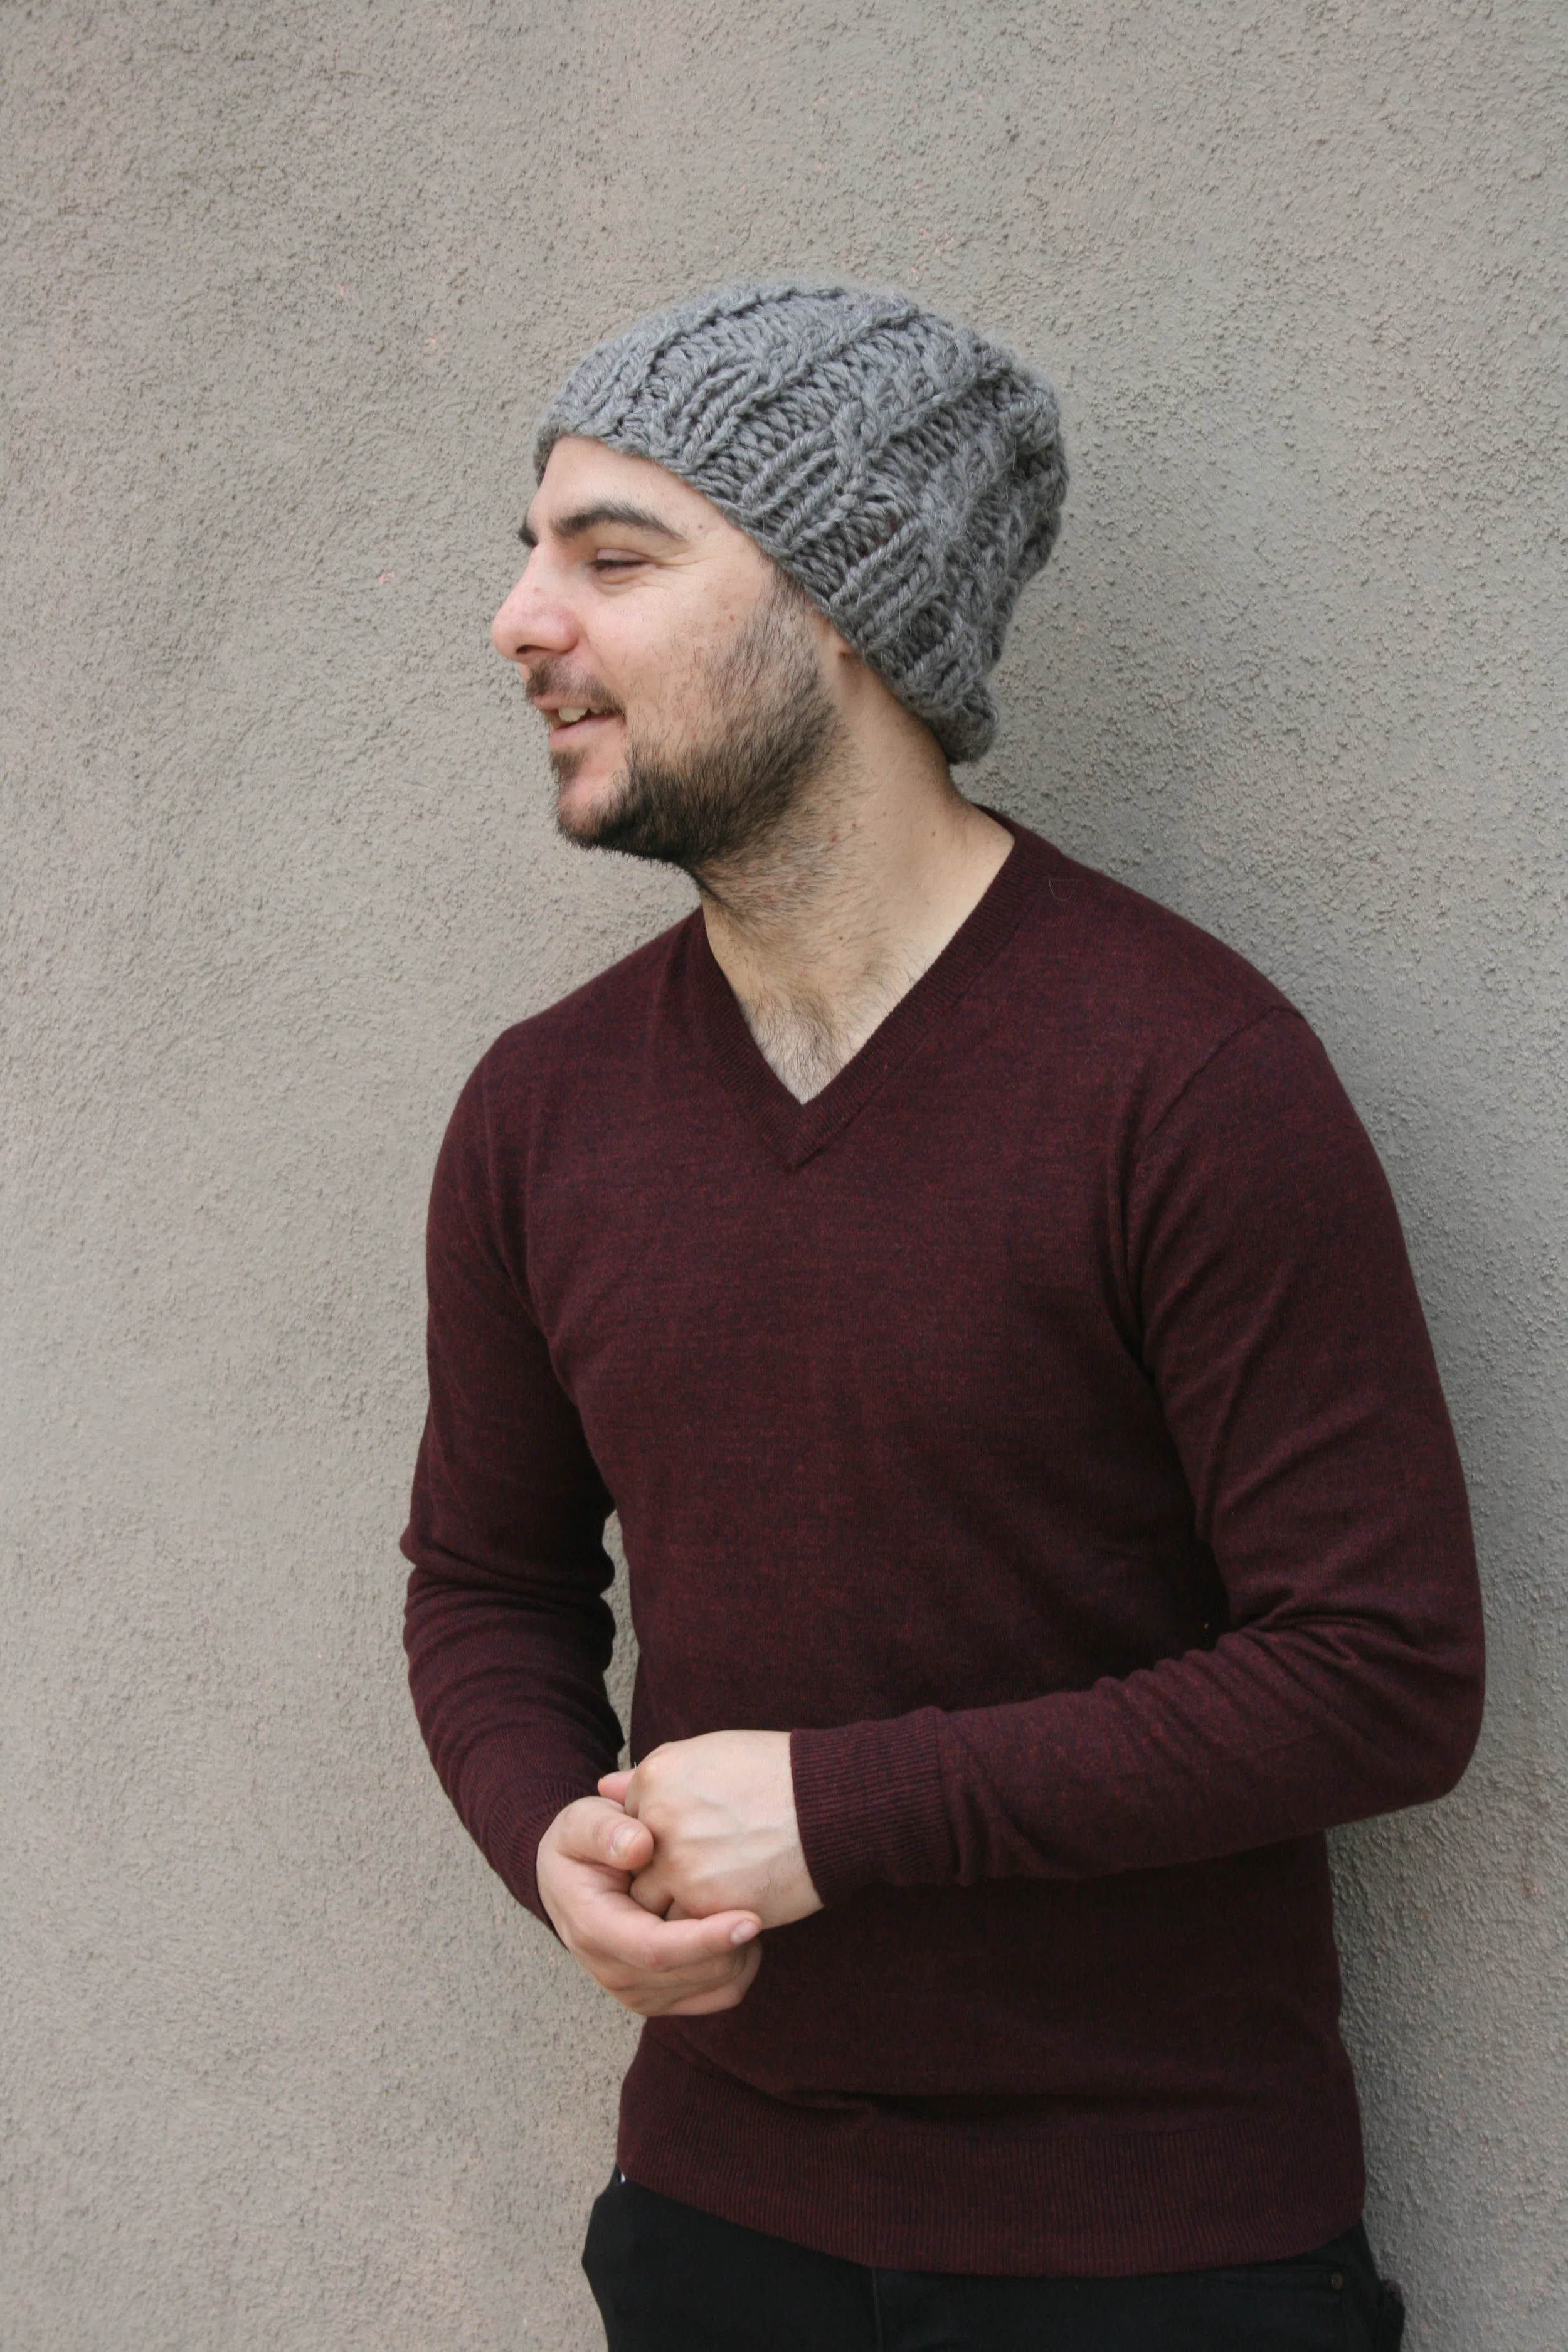

not to mention, pylon is an attractive unisex knit with just the right amount of slouch. the easy but interesting and repetitive cable design makes for a meditative knit that is fun for beginning or seasoned knitters.

pattern notes
Yarn
1 skein category 6 super bulky yarn
recommended: Loops & Threads Lush Alpaca in Gray
Needles
Size US 13 (9mm) circular or double-pointed needles
Tools
Tapestry needle for finishing
Gauge
10 stitches over 10 rows in stockinette measures 4.5 x 5”
Finished Dimensions
Completed hat measures approximately 9” W x 10” H
special skills
Knit and purl stitch, following written or charted cable instructions, simple k2T decreases